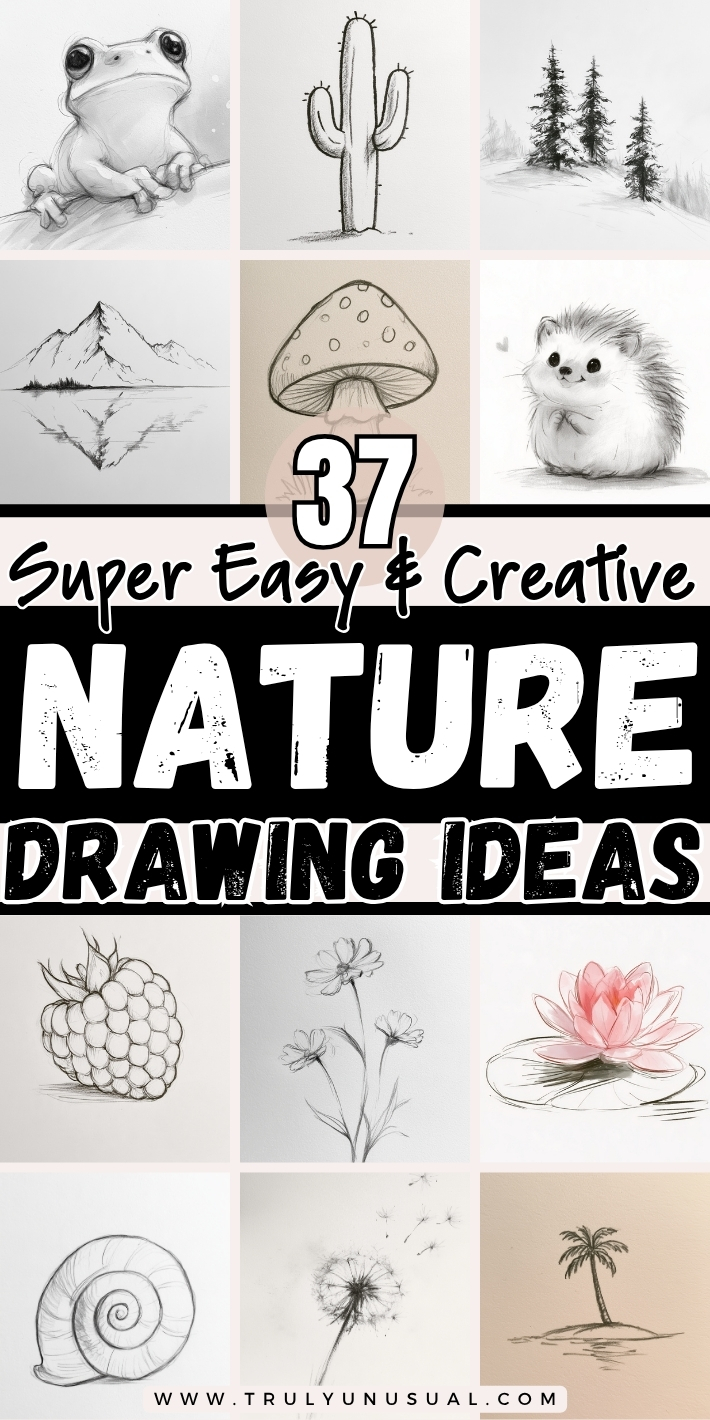
Some of my favorite things to draw from the natural world are the little things I might walk right past, like a fern frond, a pine cone, or a snail on a rock. This collection of easy nature drawing ideas starts with subjects like those and includes bigger scenes inspired by the great outdoors, from misty forest paths and mountain lakes to tropical islands and vibrant coral reefs.
There’s something here for different skill levels. If you’re just getting started, pick one or two natural elements to draw, like a leaf or a shell. If you want to stretch your artistic skills, try a scene where you can play with shadows, reflections, or the intricate details on a pine cone. And if you’re wondering whether you have the right tools, a pencil, an eraser, and a scrap of paper are enough to get going.
Fern Frond
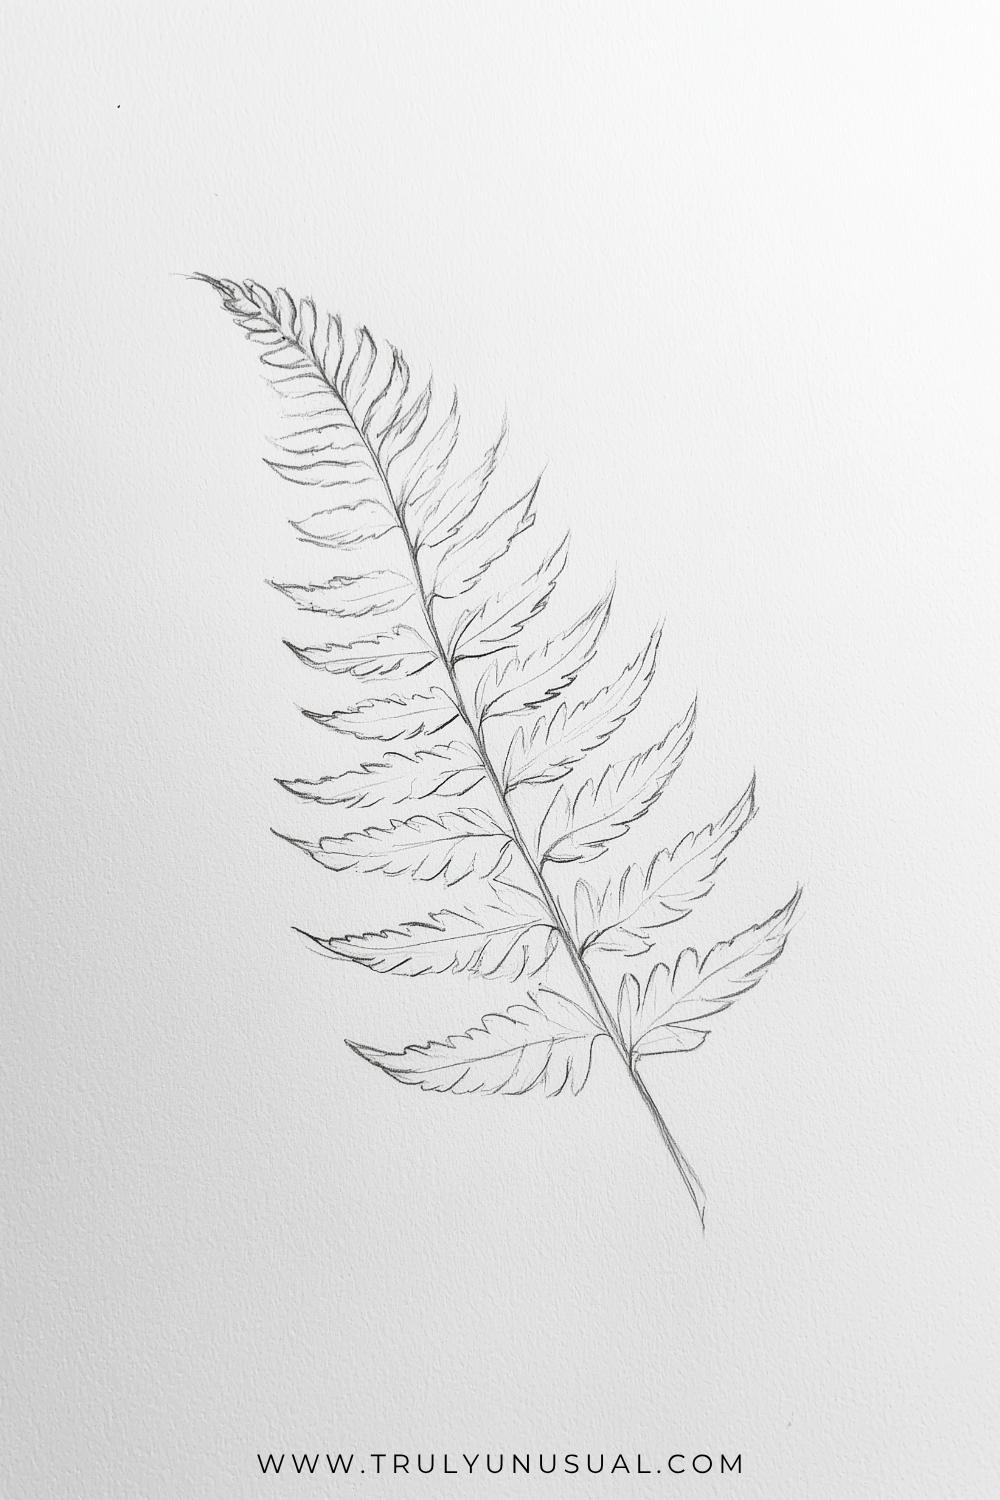
This fern starts with a long stem that leans gently to one side. Mark where the leaflets will go before drawing their outlines. Make the ones near the bottom longer, then gradually shorten them as you move up.
Try drawing one leaflet as a narrow, pointed shape before adding little notches along its edge. A few uneven edges and lightly drawn veins will make the frond feel more like something you found on a walk.
Forest Path
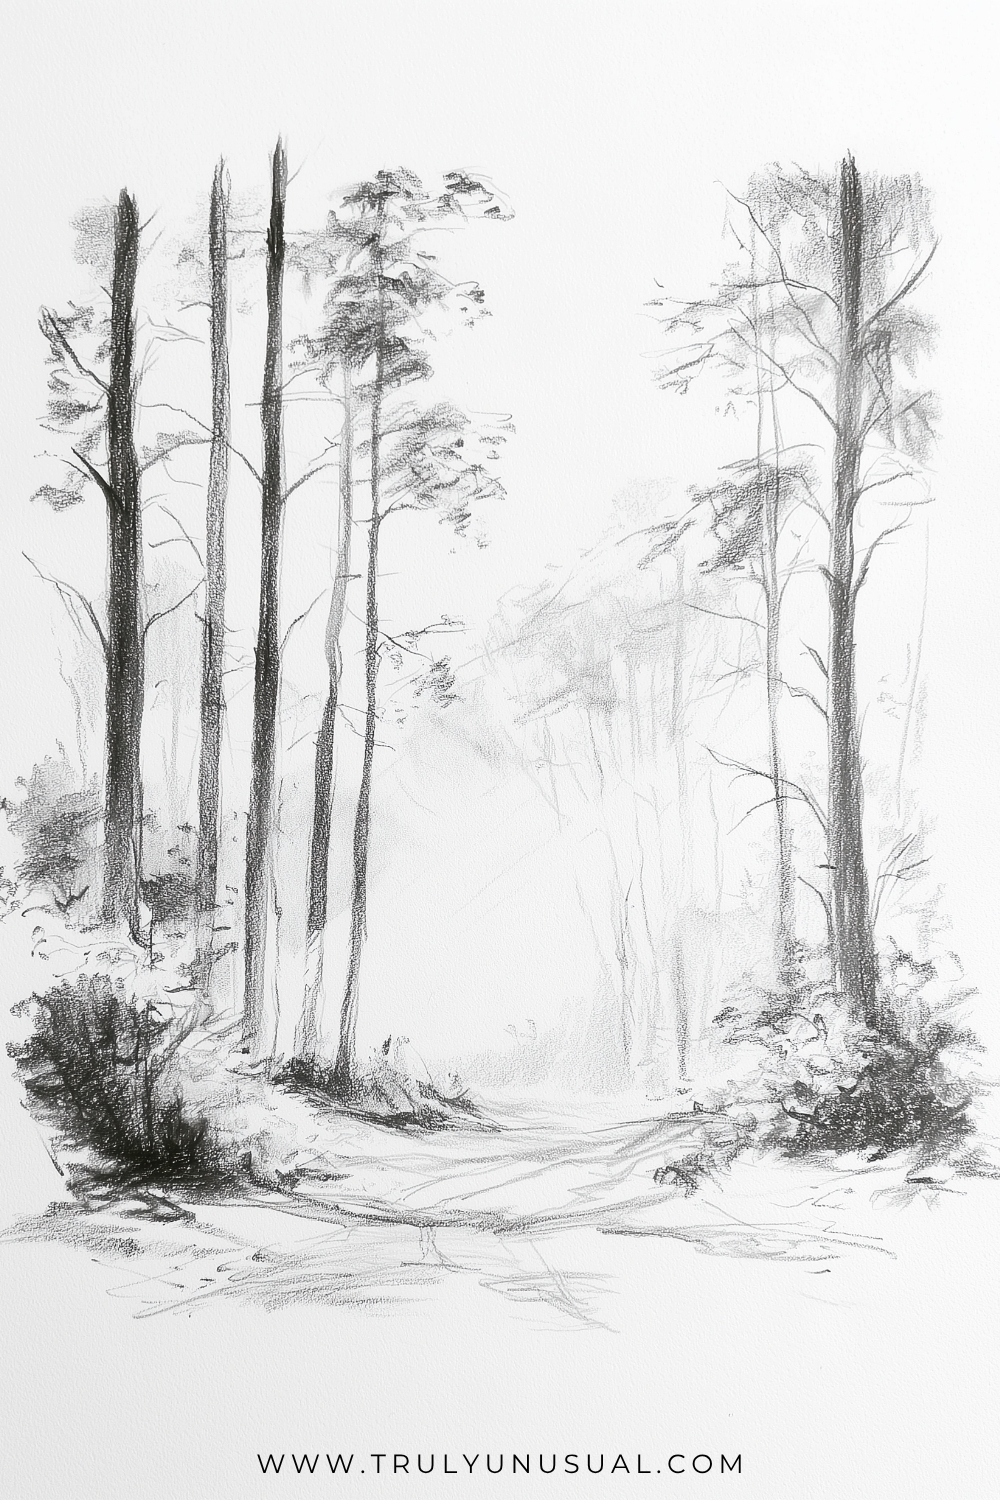
The trees on either side of this path are dark, but the ones in the distance almost disappear. That change in pencil pressure gives the forest its depth. Draw the path wide at the bottom of the page and let it narrow into the pale opening between the trees.
Place a few dark trunks close to the edges first. Fill in the distant trees with faint strokes and let some of their branches fade into the paper. Rough patches of shading along the path are enough to suggest undergrowth.
Beach Sunset In A Circle
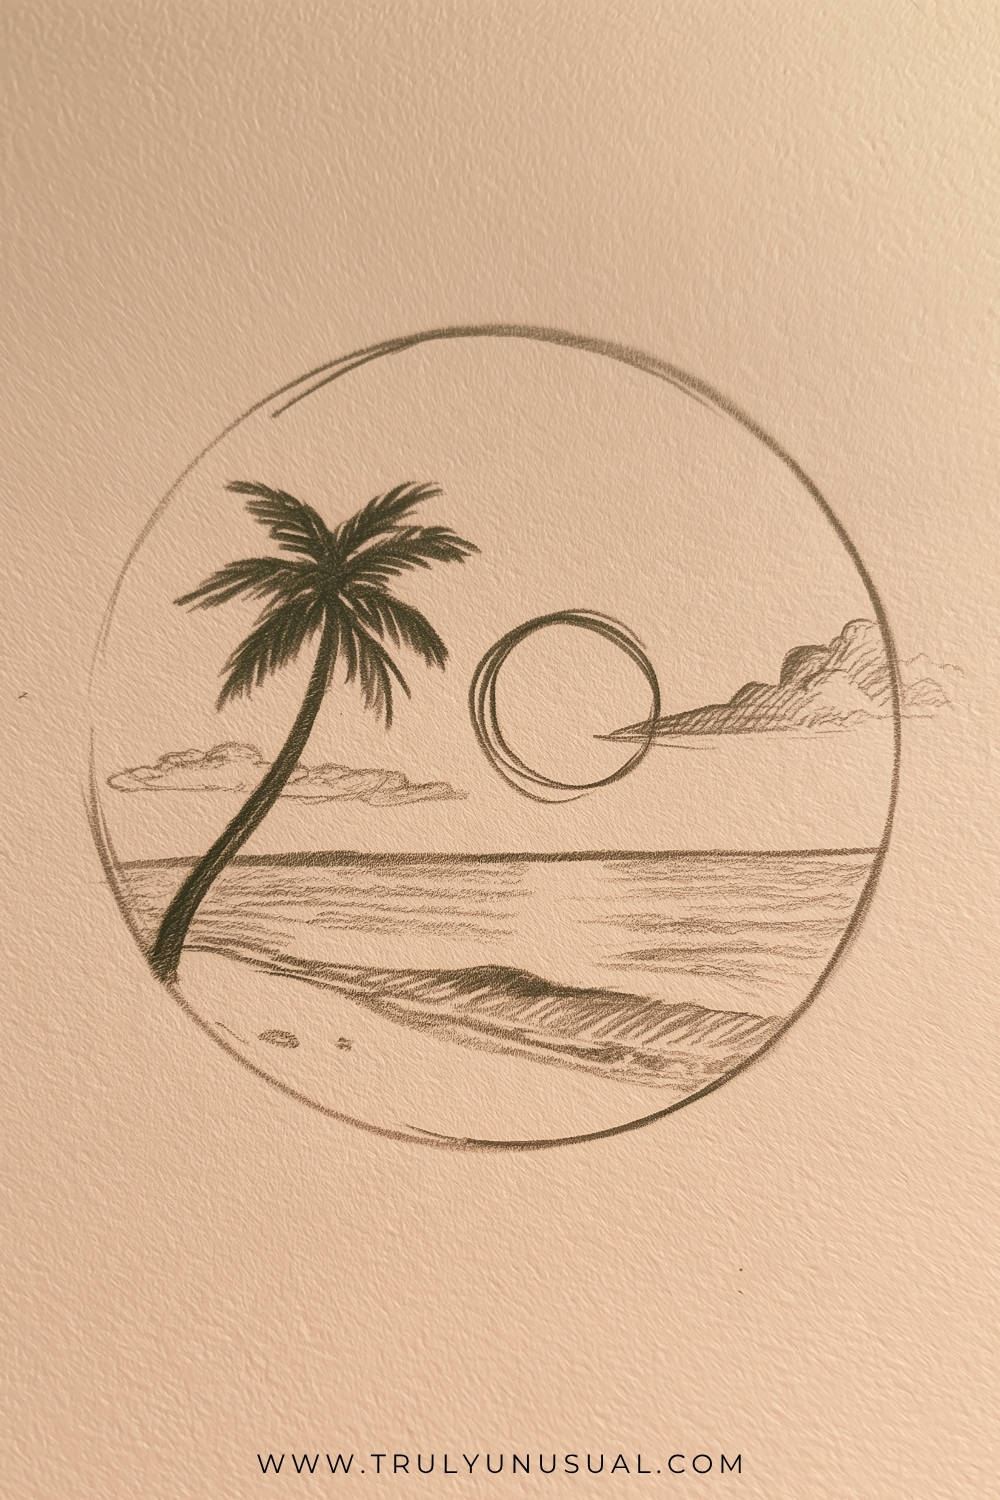
This beach sketch is an example of miniature circle scenery. It’s a complete, tiny world framed neatly inside a hand-drawn circle. If a full-page landscape feels intimidating, start with a circle and draw a straight horizon across it. Place a round sun above the horizon and a curving shoreline below, with a leaning palm tree on the left to draw the eye.
Keep the palm trunk narrow at the top and sketch the fronds as long arcs before adding shorter strokes underneath. A few horizontal pencil marks suggest ripples, while slanted shading gives the little wave a darker face. Leave a pale gap in the water beneath the sun to suggest its reflection.
Spotted Mushroom
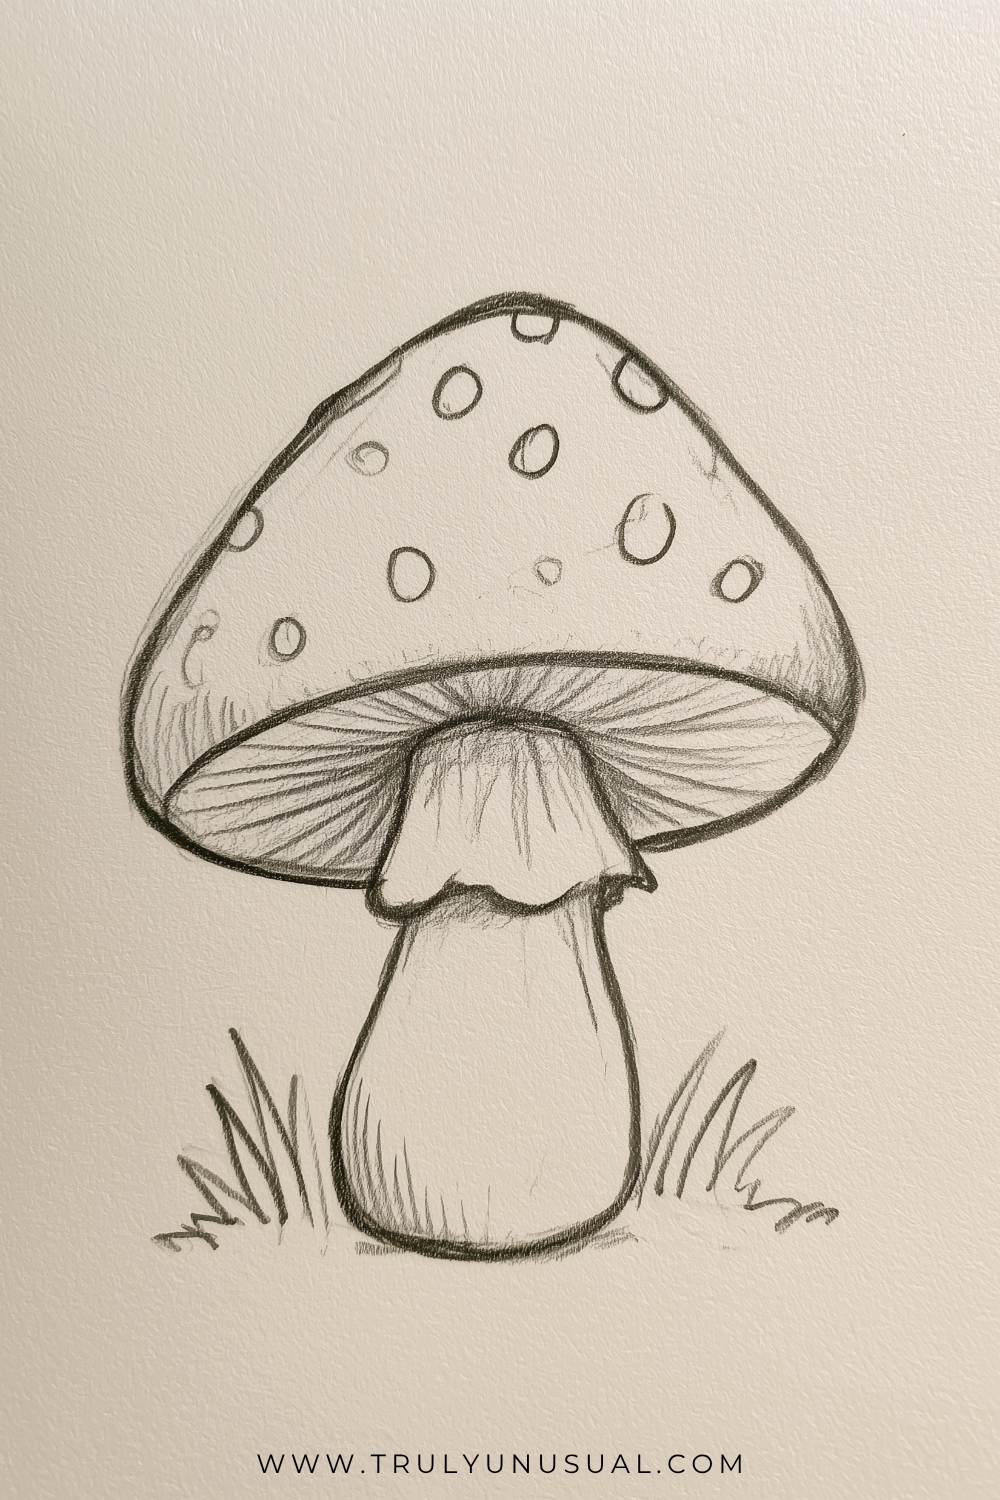
A wide cap and a sturdy stem make this spotted mushroom recognizable before you add any shading. Give the cap a curved underside so there is room to show the gills. The wavy collar around the top of the stem can look like a tiny skirt.
Fan the gill lines out from the stem toward the rim. Scatter spots of different sizes across the cap and let a few run off the edge. Tuck a little grass around the base to show where the mushroom is growing.
Daisy With One Leaf
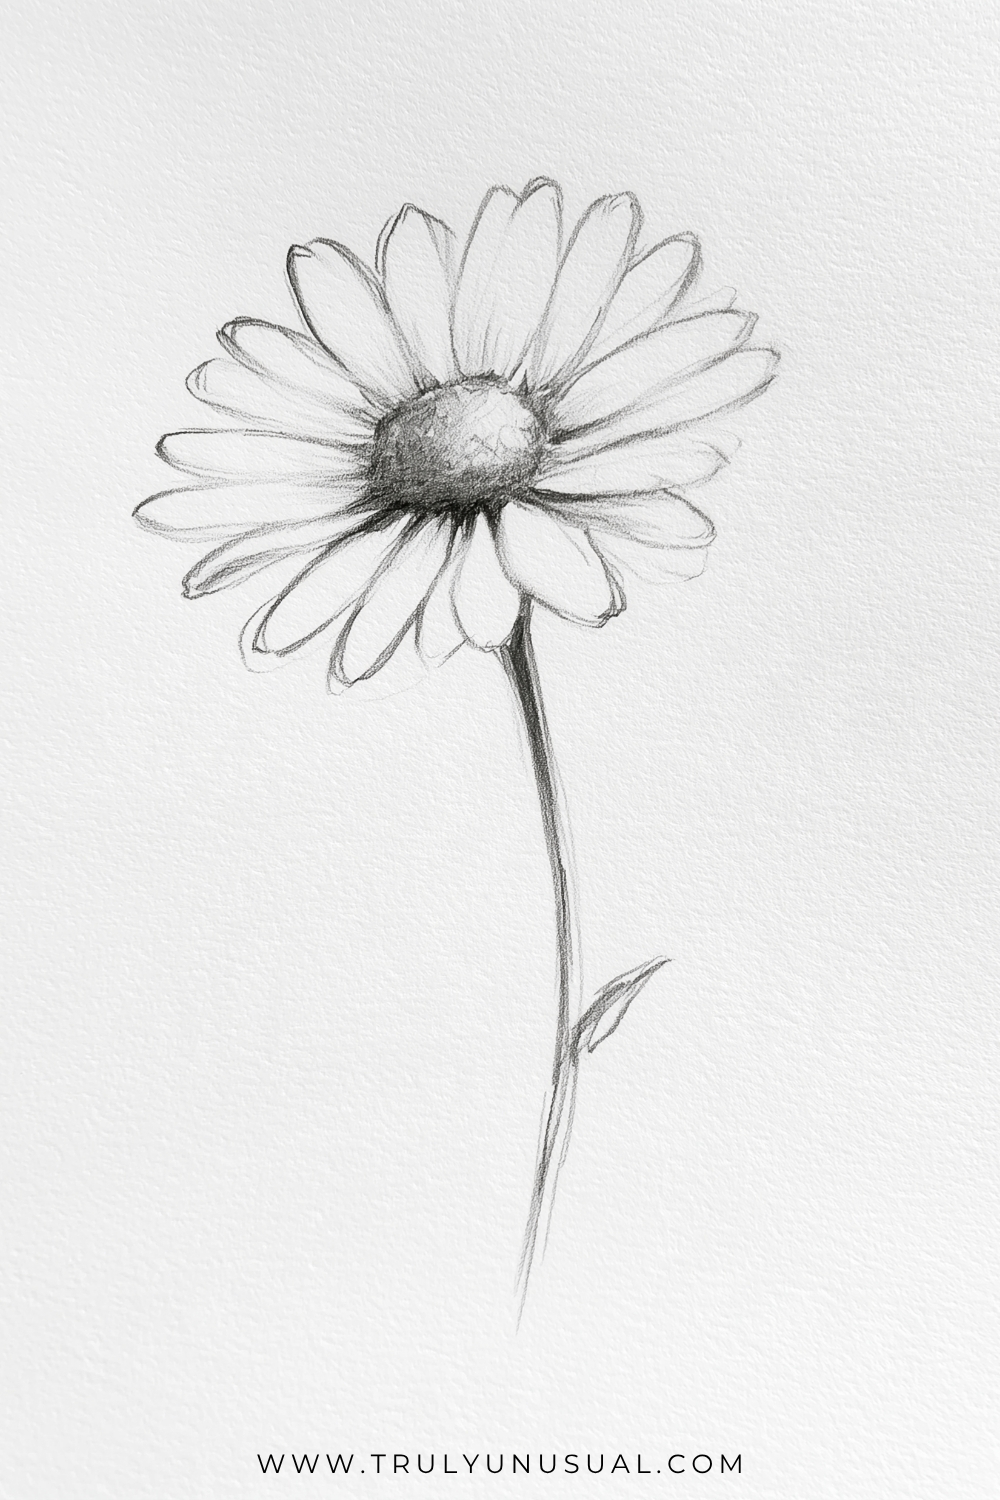
Look at how the petals change length around this daisy. The shorter ones along the bottom help the flower look slightly tilted. Sketch an oval for the center, then space out the petals and let a few overlap.
Shade the lower edge of the center and keep most of the petals light. A slender stem and a single leaf are all this little flower needs.
Dandelion With Floating Seeds
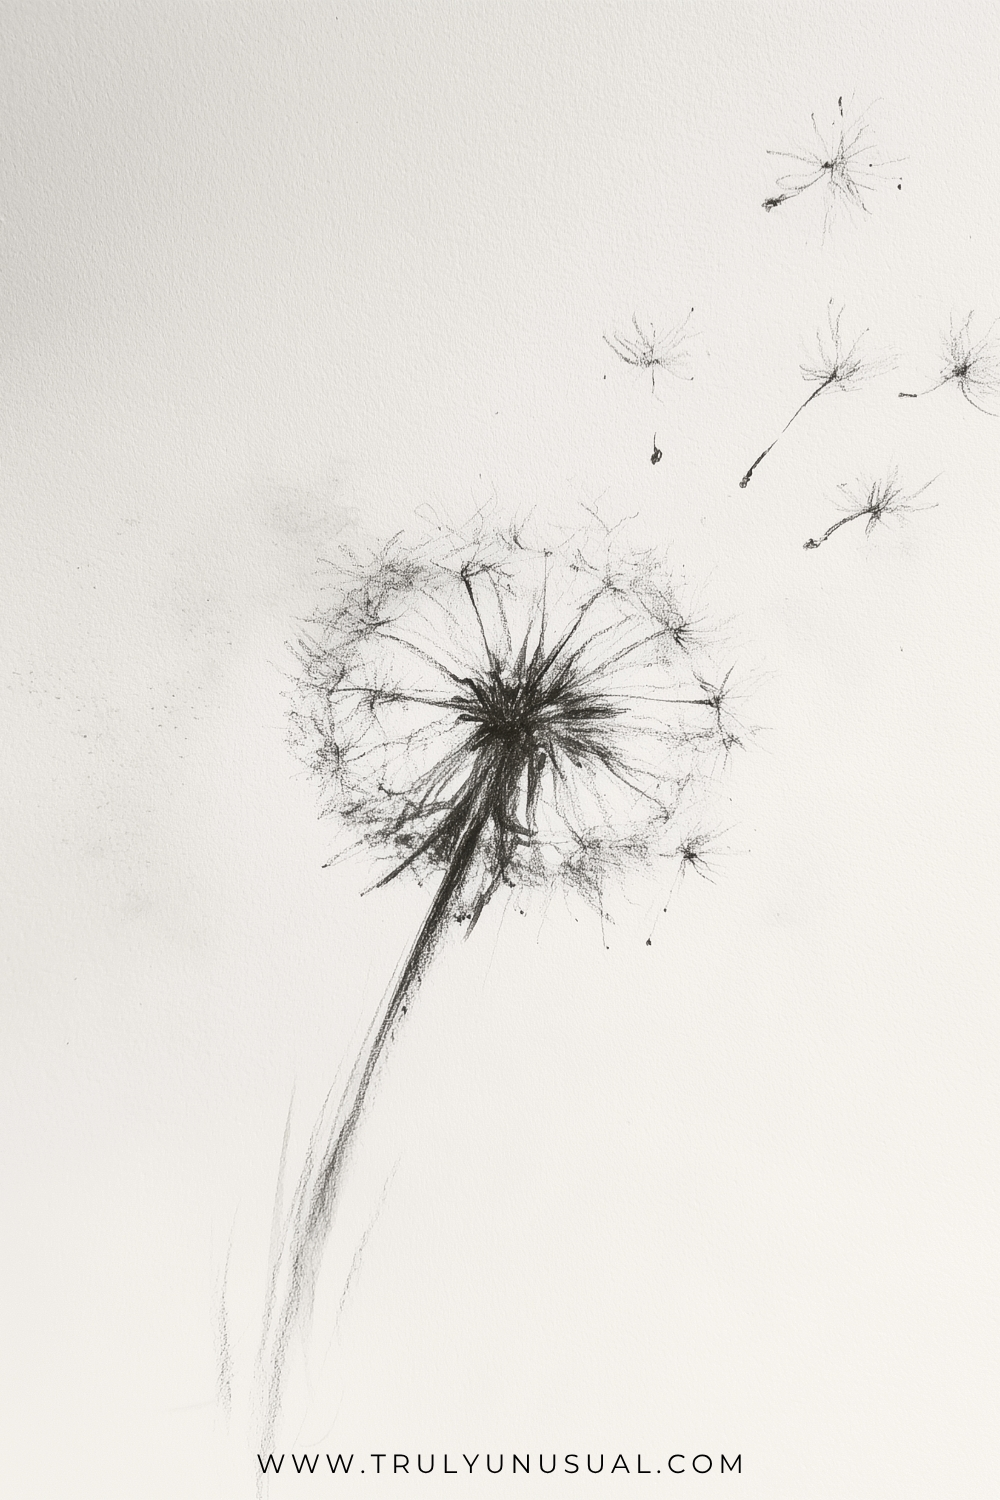
Leave plenty of white space above and to the right of the dandelion so the seeds have somewhere to go. Draw a curved stem with a small dark center at the top. From that center, send out thin lines like the spokes of a wheel.
Add feathery little strokes to the end of each spoke and leave a gap on the side where the seeds are drifting away. For the loose seeds, use the same tuft shape with a tiny dark mark at the other end. Changing their angles makes them look as though they are tumbling in the breeze.
Sunflower With A Bee
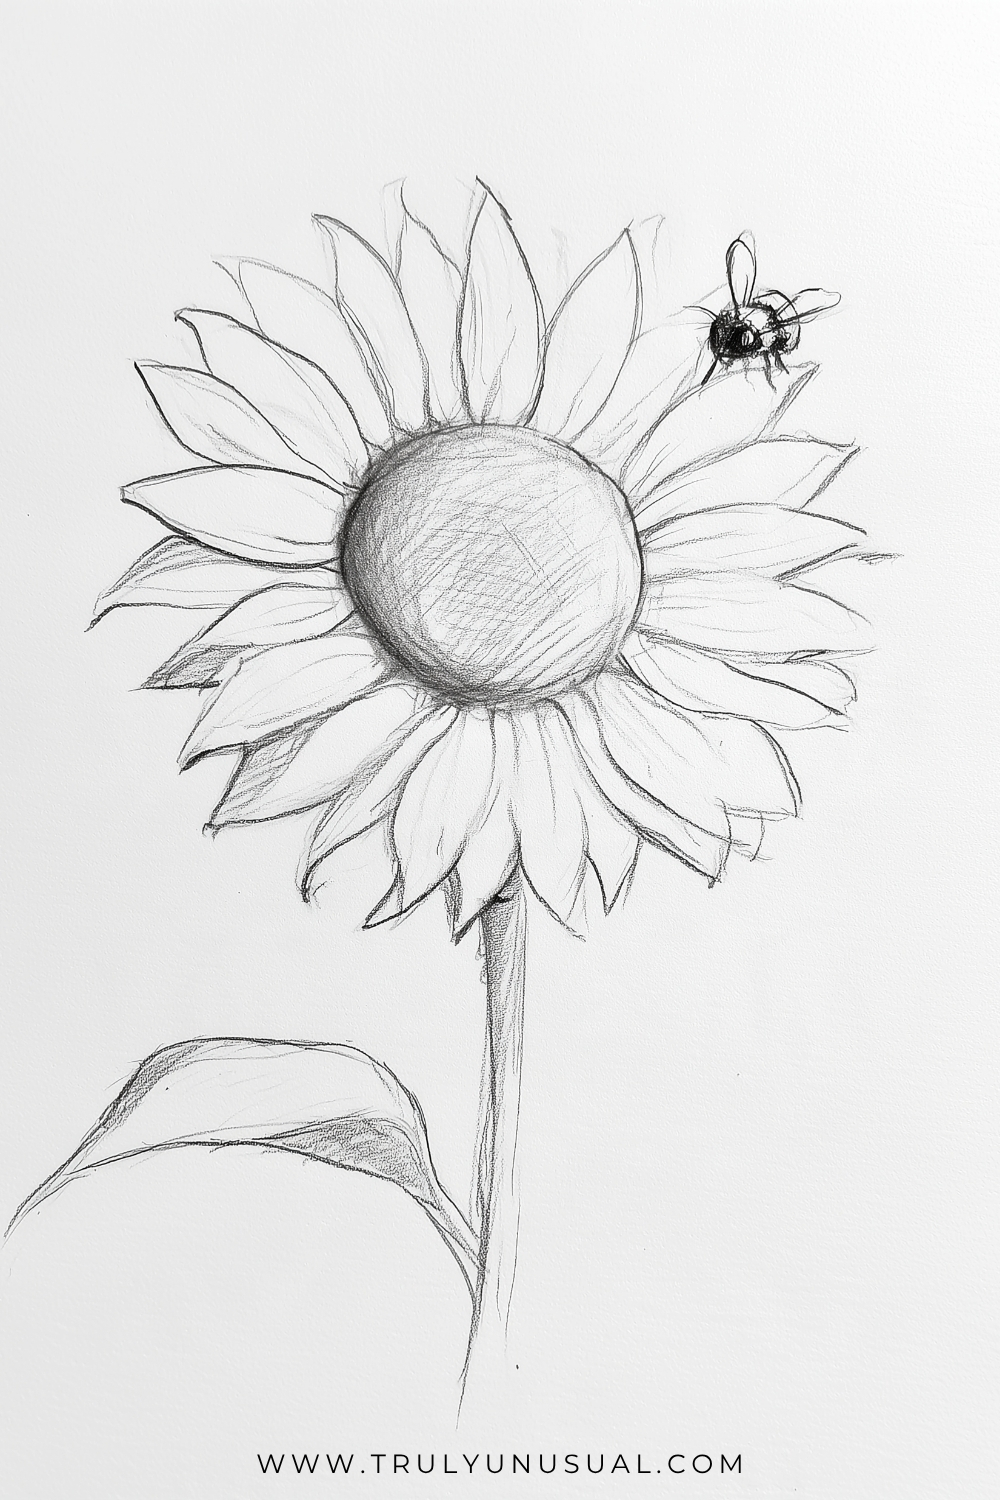
The tiny bee makes this sunflower feel like part of a garden. Give the flower a generous round center and ring it with pointed petals of slightly different lengths. Add a few partial petals in the gaps to suggest a second layer.
For the bee, a small dark body and light looped wings are enough at this scale. Shade the center of the sunflower more heavily on one side to make it look rounded. Finish with a broad leaf that bends away from the stem.
Pink Water Lily
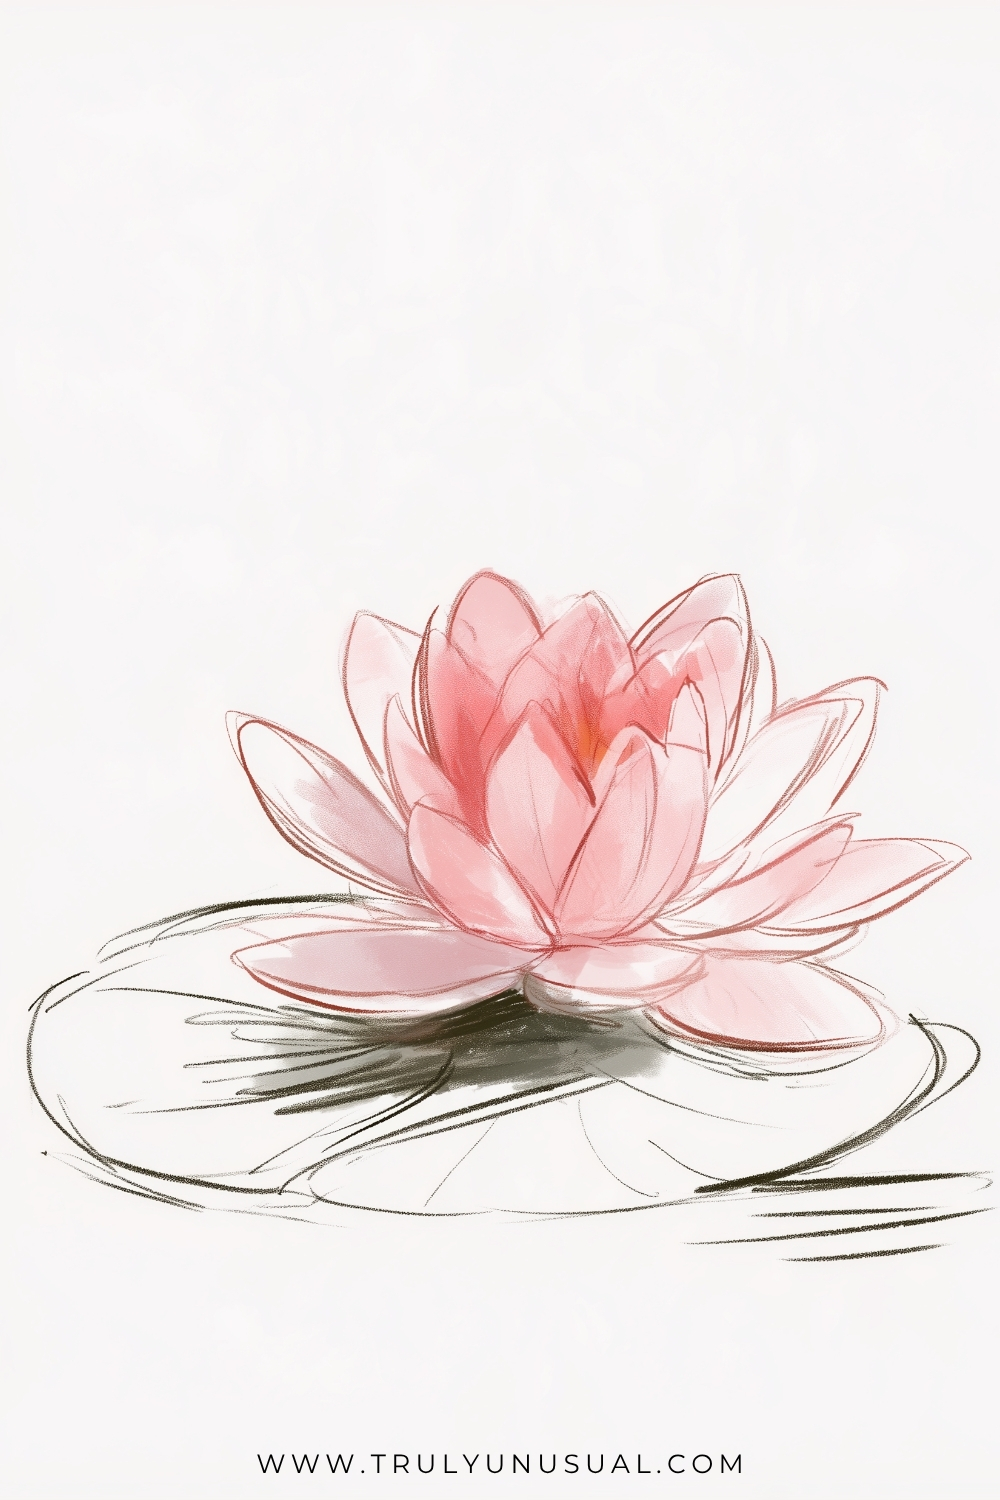
The outer petals on this water lily lie almost flat, while the petals in the middle stand up like a cup. Draw a few upright petals first and tuck the rest behind them. Keep the outer ones wider and lower to show how the flower opens.
A flat oval with a notch makes a good starting shape for the lily pad. Put the strongest pink near the bases of the petals and leave a little white along their edges. A few ripples beside the pad are enough to place the flower on water.
Pine Cone On A Twig
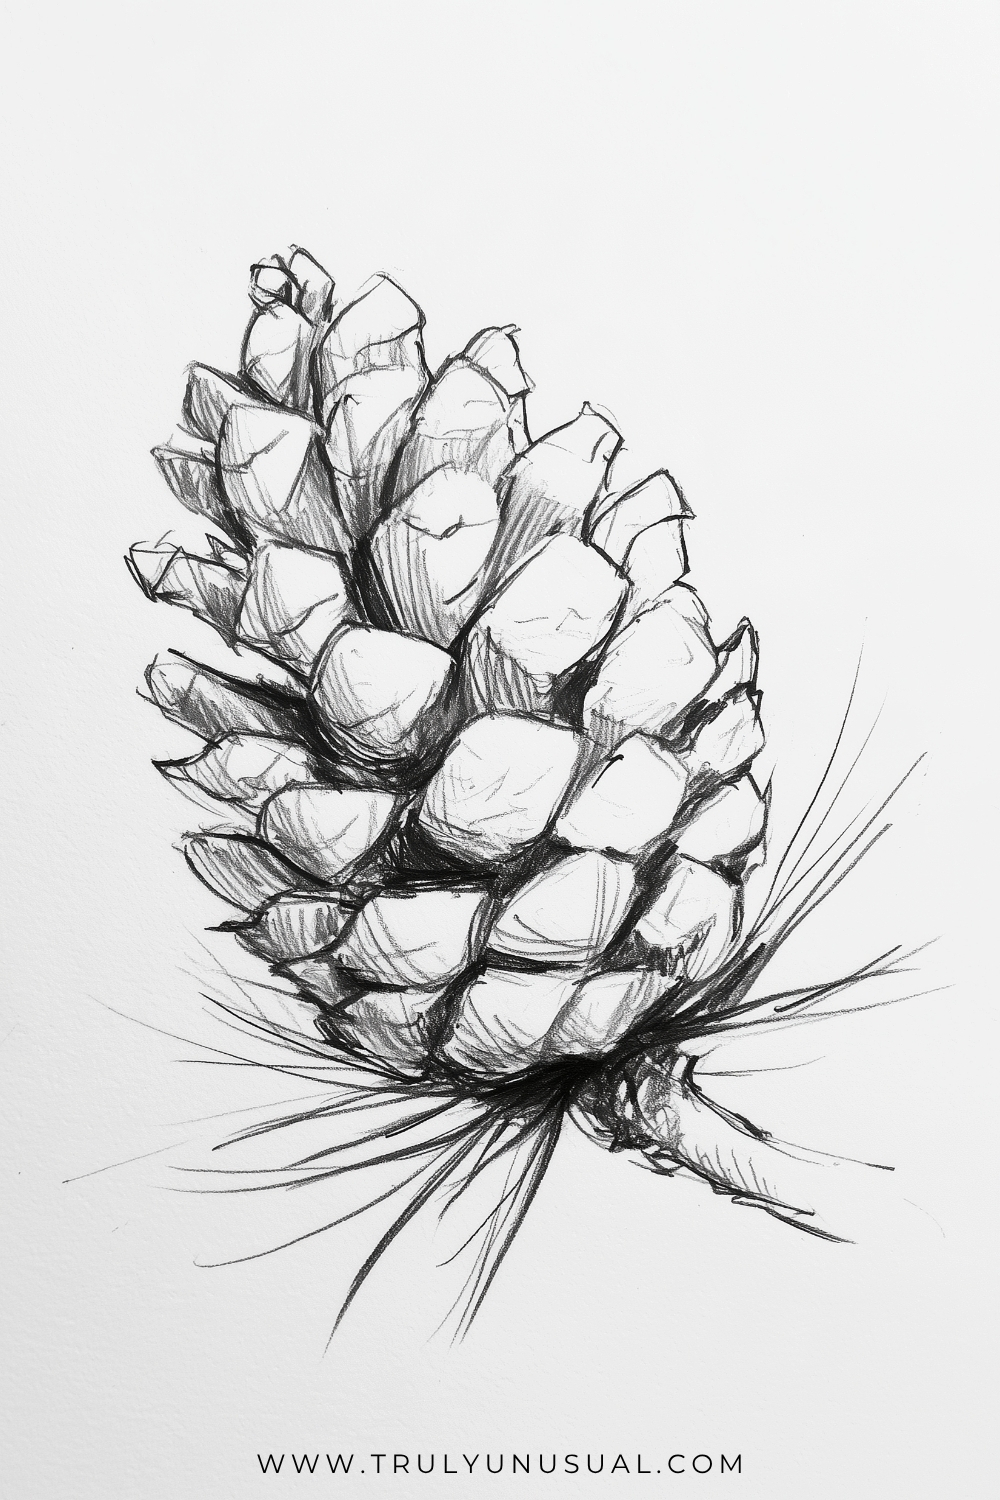
A pine cone looks complicated until you notice that the same scale shape repeats. Sketch the cone as a slightly tilted egg, then arrange the scales in staggered rows. Make the scales near the top smaller than the ones in the middle.
Keep the flat tips fairly light and put darker pencil marks in the narrow gaps underneath. This is where the layers start to look three-dimensional. A short twig and a few long needles will finish the drawing without crowding the cone.
Two Spotted Mushrooms With A Leaf
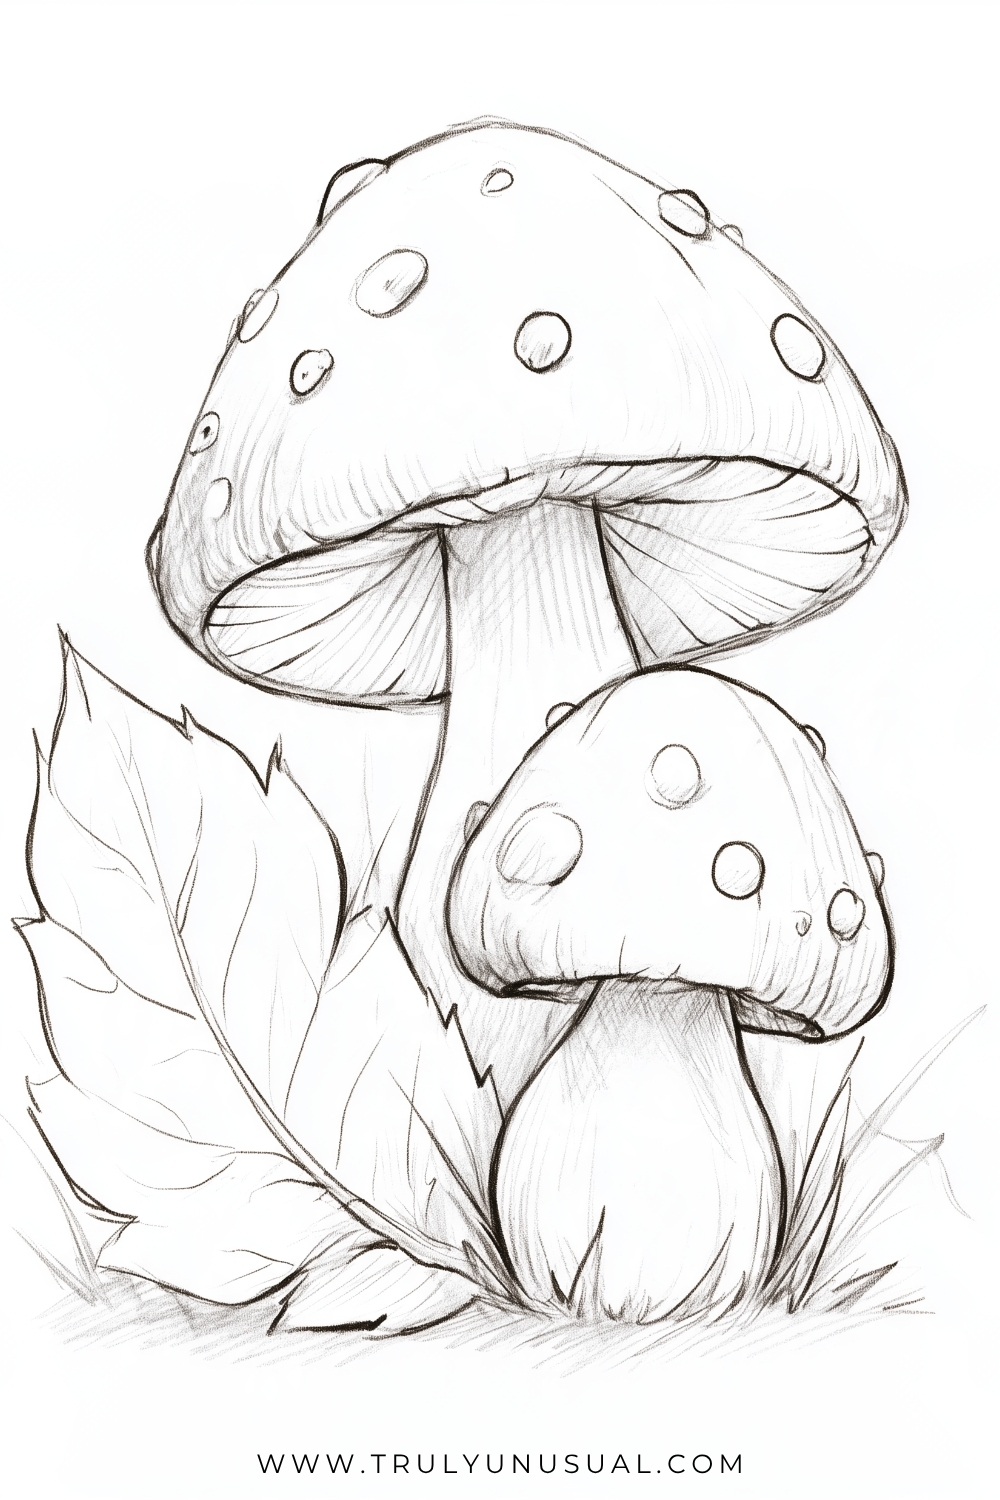
The smaller mushroom sits in front of the tall one, hiding part of its stem. Draw the little mushroom first so you know where the lines of the taller one need to stop. A gently curved line beneath the larger cap shows where the gills begin.
Set a large pointed leaf beside the pair and angle it away from the stems. Keep the leaf veins lighter than the outer edge, and add just a little grass where the three shapes meet.
Snail On A Rock
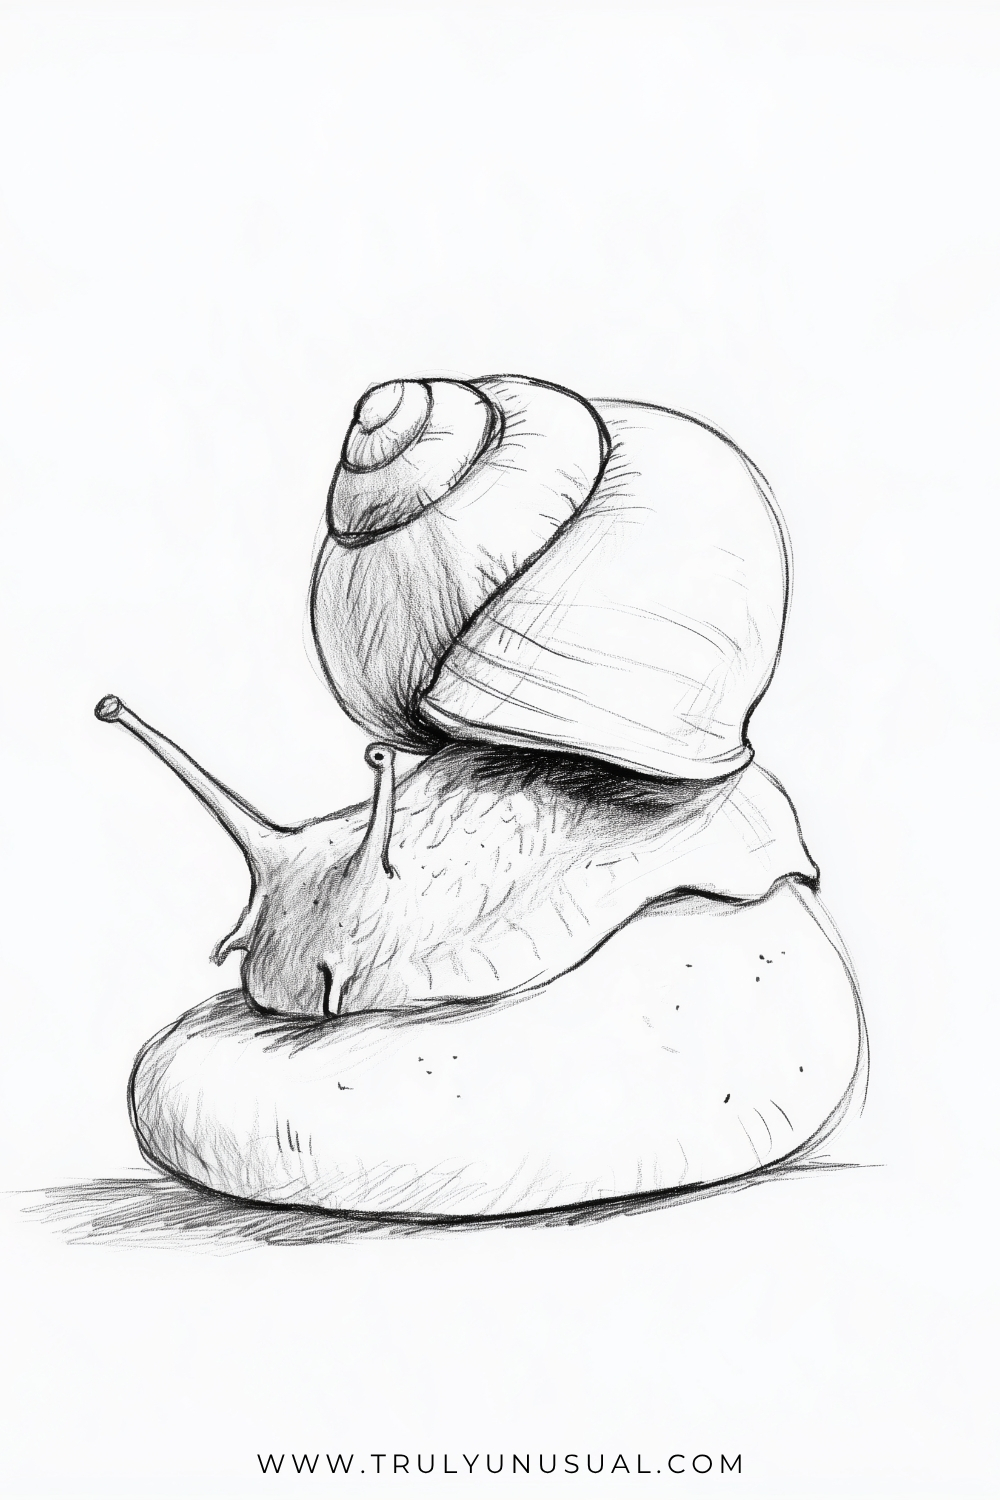
The shell is the tallest part of this little snail, and the body drapes over a smooth rock. Draw the rock as a low, lopsided oval. Above it, sketch the shell as a much rounder shape and curve the spiral toward its upper left.
Give the snail two narrow eye stalks with dots at the tips. Follow the curve of the rock when you draw the snail’s underside so it looks like it is resting on the surface. A dark shadow beneath the shell helps separate it from the softer body.
Mushrooms On A Fallen Log
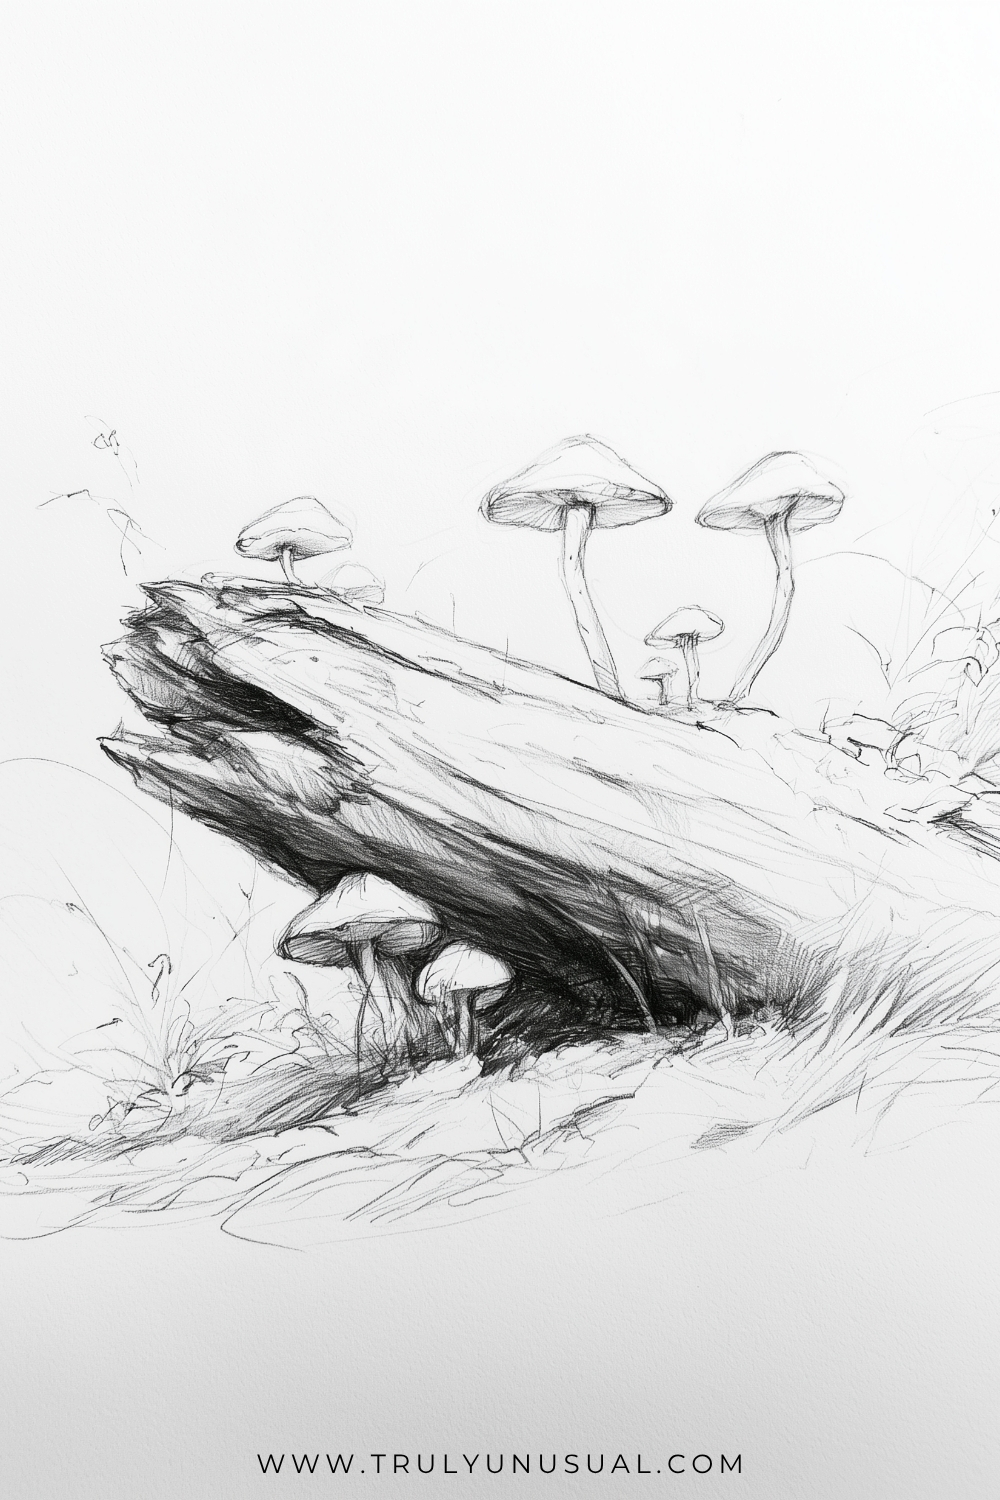
Here the log is just as interesting as the mushrooms. Angle it across the page and break up the wider end with a few jagged shapes. Run the bark lines along the length of the wood so it looks like one solid piece.
Place a couple of tall mushrooms along the top and squeeze smaller ones into the shadow below. Their stems can bend a little instead of standing straight. Use your darkest shading under the log, where the light would have trouble reaching.
Shooting Star
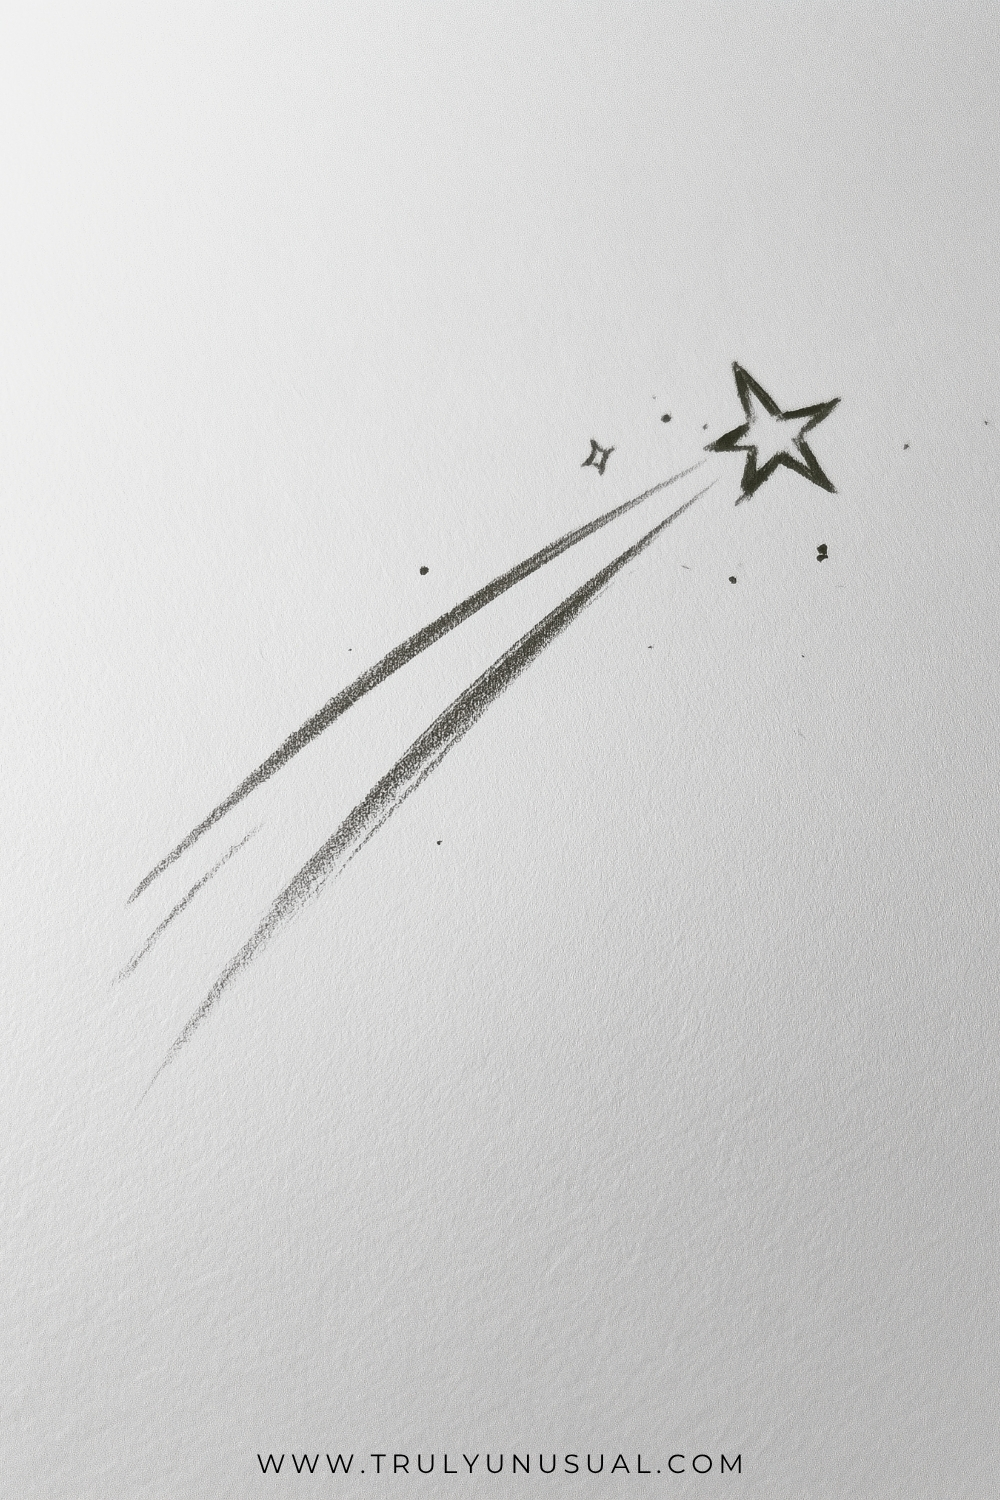
Draw a five-pointed star near the upper corner and leave most of the page open for its trail. Two long pencil strokes sweeping in from the lower left make the star look like it is moving. Lift the pencil as each stroke reaches its far end so the trail fades.
Add a tiny sparkle and a few scattered dots close to the star. Keep the center of the big star blank so its dark outline stands out.
Crescent Moon Behind A Cloud
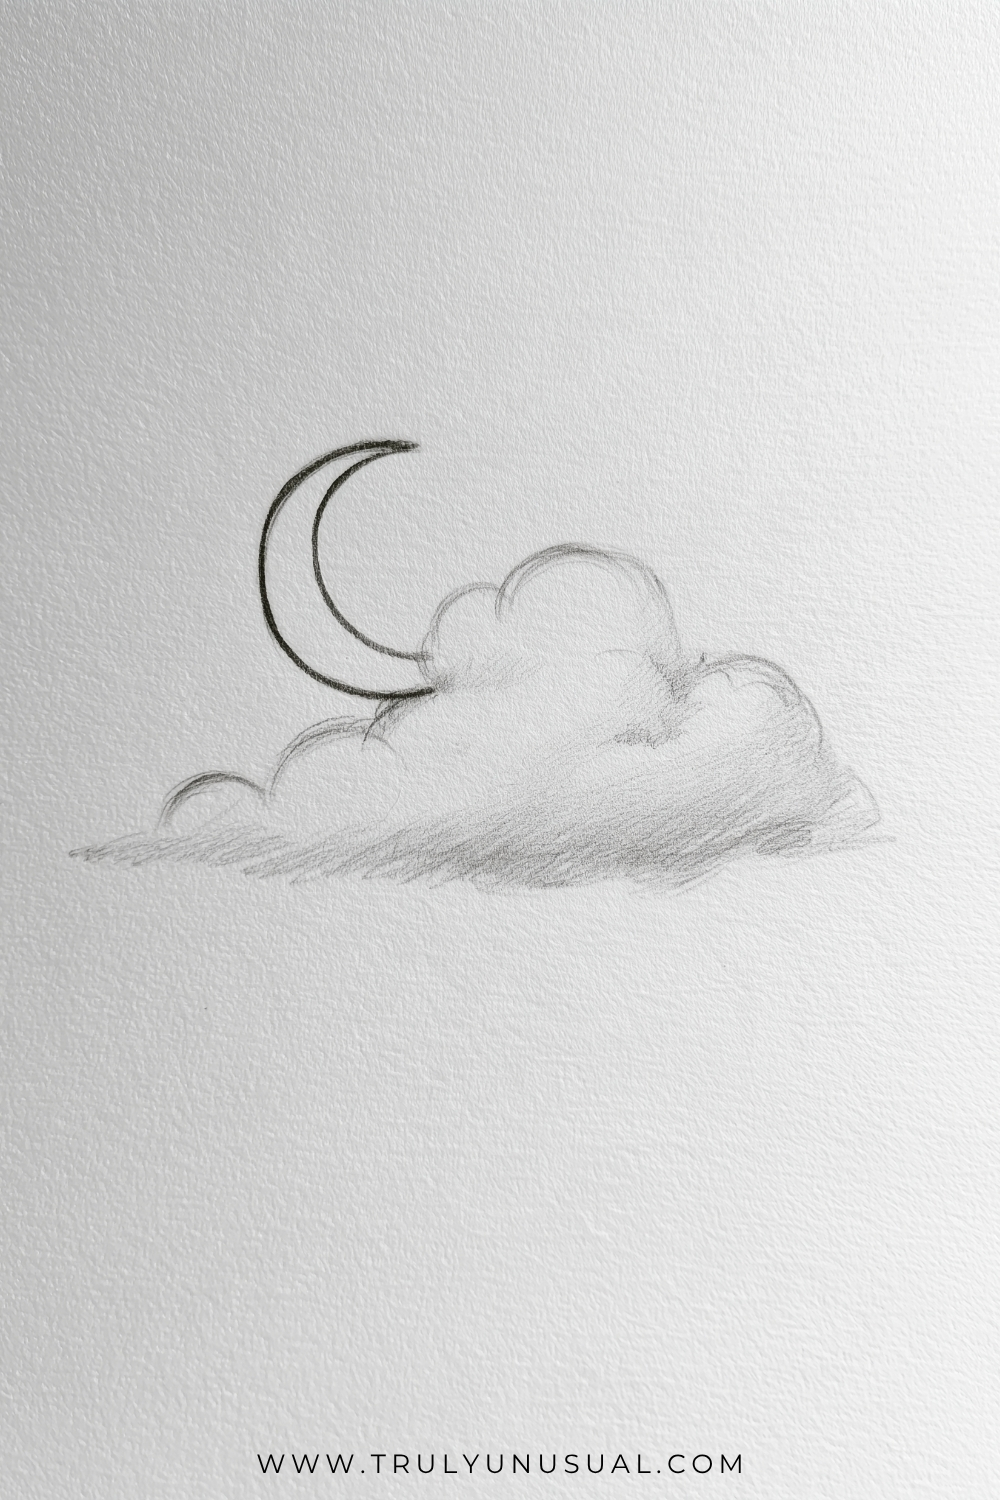
This little night-sky sketch is mostly curves. Start with a low cloud made of rounded bumps, with the tallest bump slightly off center. Draw a large C shape behind it, then add a smaller curve inside to form the crescent.
Stop the moon’s lower lines where they meet the cloud so it looks partly hidden. A little soft shading beneath the cloud will give it volume while keeping the top light.
Snowflake
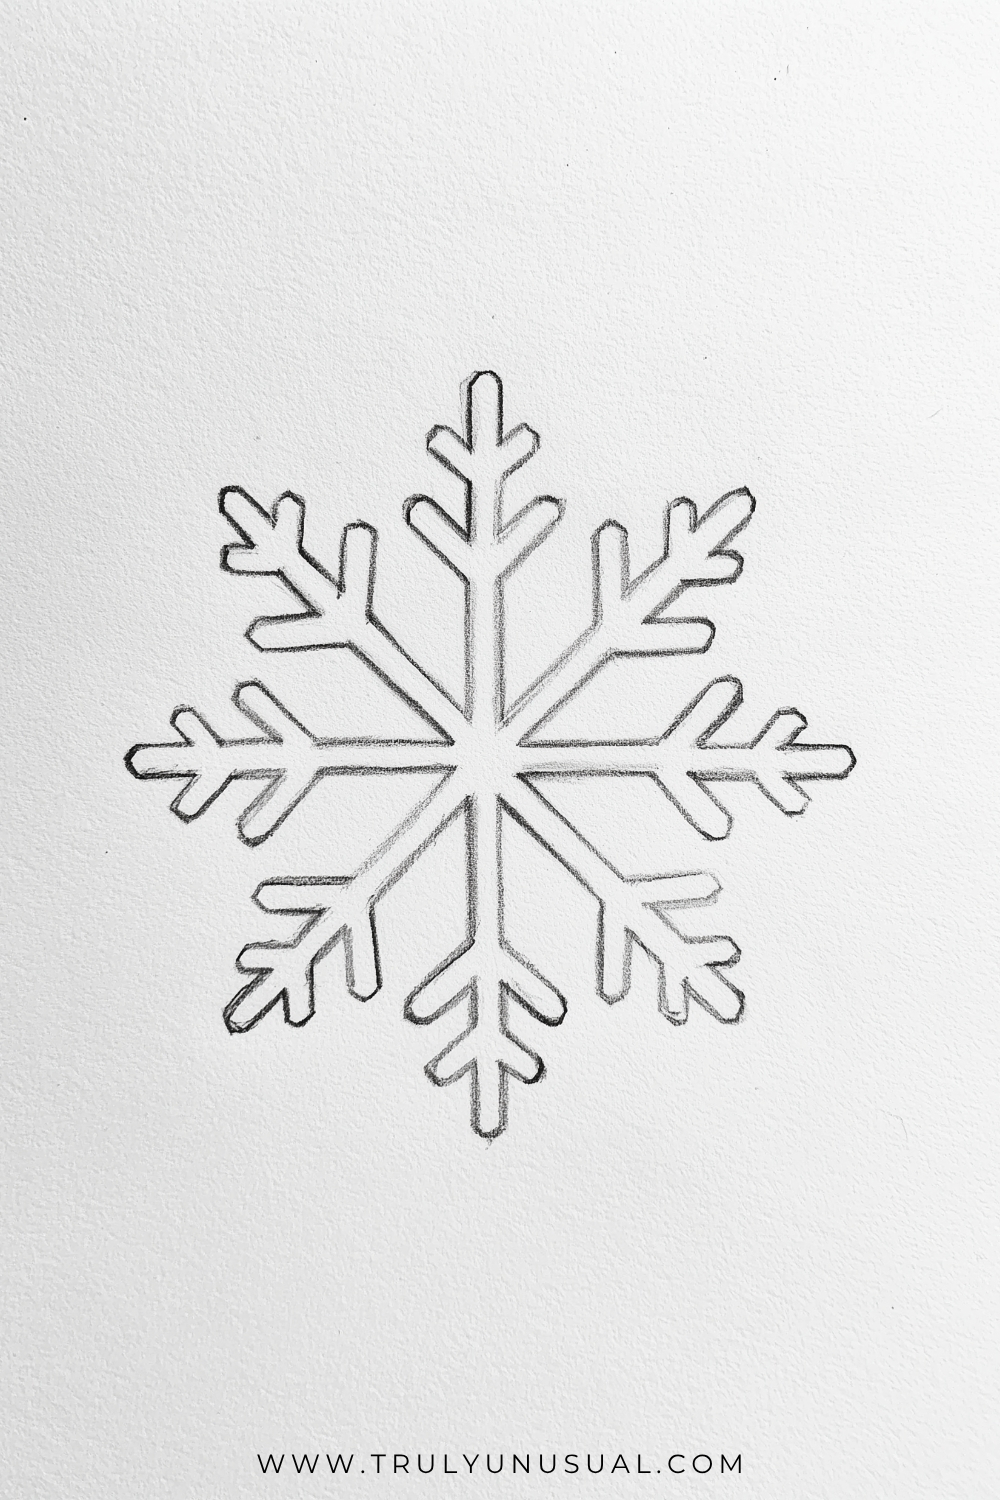
This stylized snowflake has eight arms, so you can plan it with a plus sign and an X. Keep the guide lines light and have all of them cross at the same point. Add two small sets of branches to each arm, starting with the larger pair closer to the center.
If you want the outlined look shown here, draw around your guide lines and round off the tips. Erase the guides once the outline is complete. You can also keep the snowflake as a thin-line doodle for a smaller sketchbook page.
Storm Cloud With Lightning
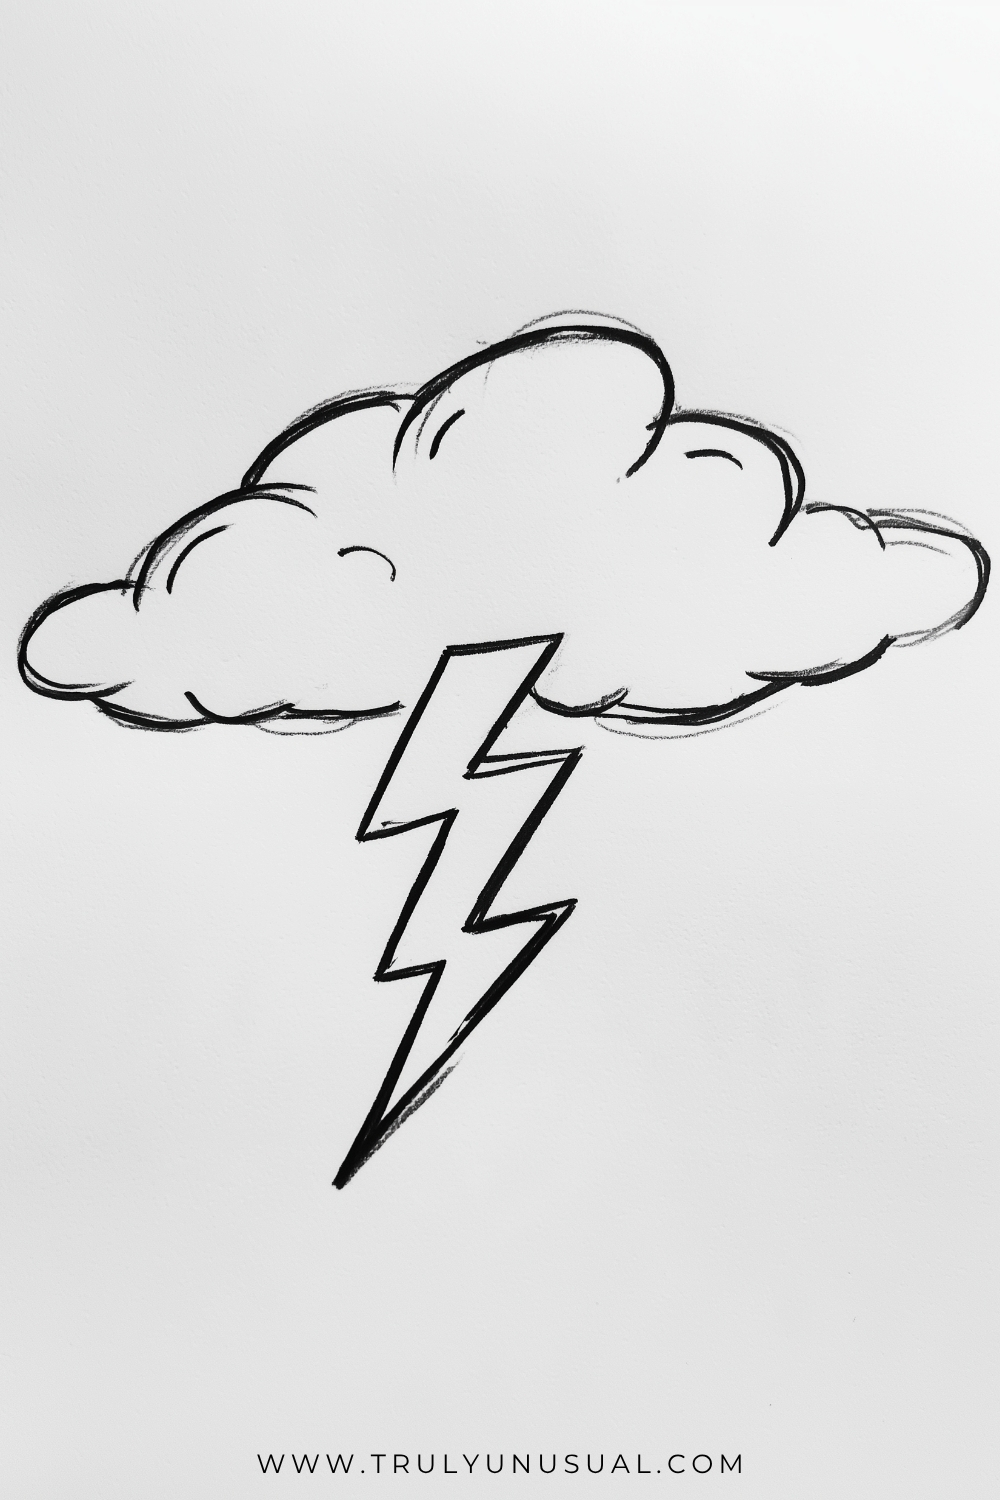
The puffy cloud and the sharp lightning bolt make a fun pair because their lines are so different. Draw one large bump for the top of the cloud and tuck smaller bumps around it. Leave a gap along the bottom where the bolt will begin.
Make the bolt with two zigzag edges that come together at a sharp point. Once you like the shape, darken the outline and add a few short curves inside the cloud. Those little curves are enough to suggest layers without shading the whole thing.
Dragonfly Above Tall Grass
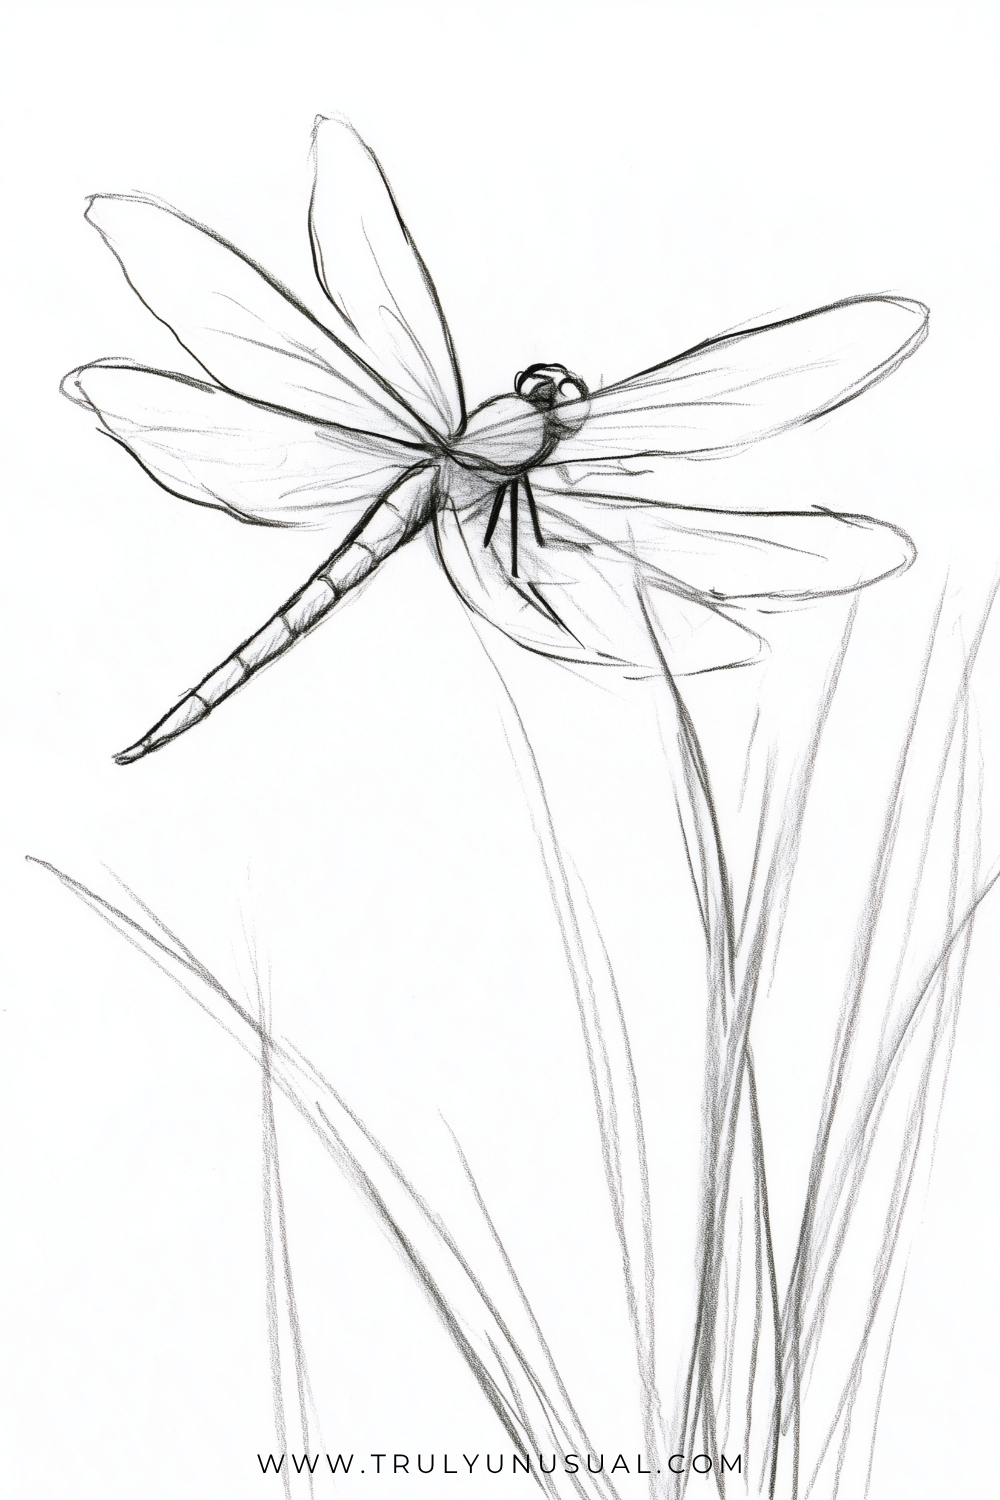
The long body of this dragonfly points down and left while its wings open across the page. Sketch the body as a narrow taper with a small rounded head. Add two long wings on each side, using loose curves that begin near the same spot.
A few short cross-lines can show the segments along the abdomen. Keep the wing veins pale so the wings still look delicate. Add tall blades of grass below, leaving a little room between the grass and the insect’s body.
Starfish
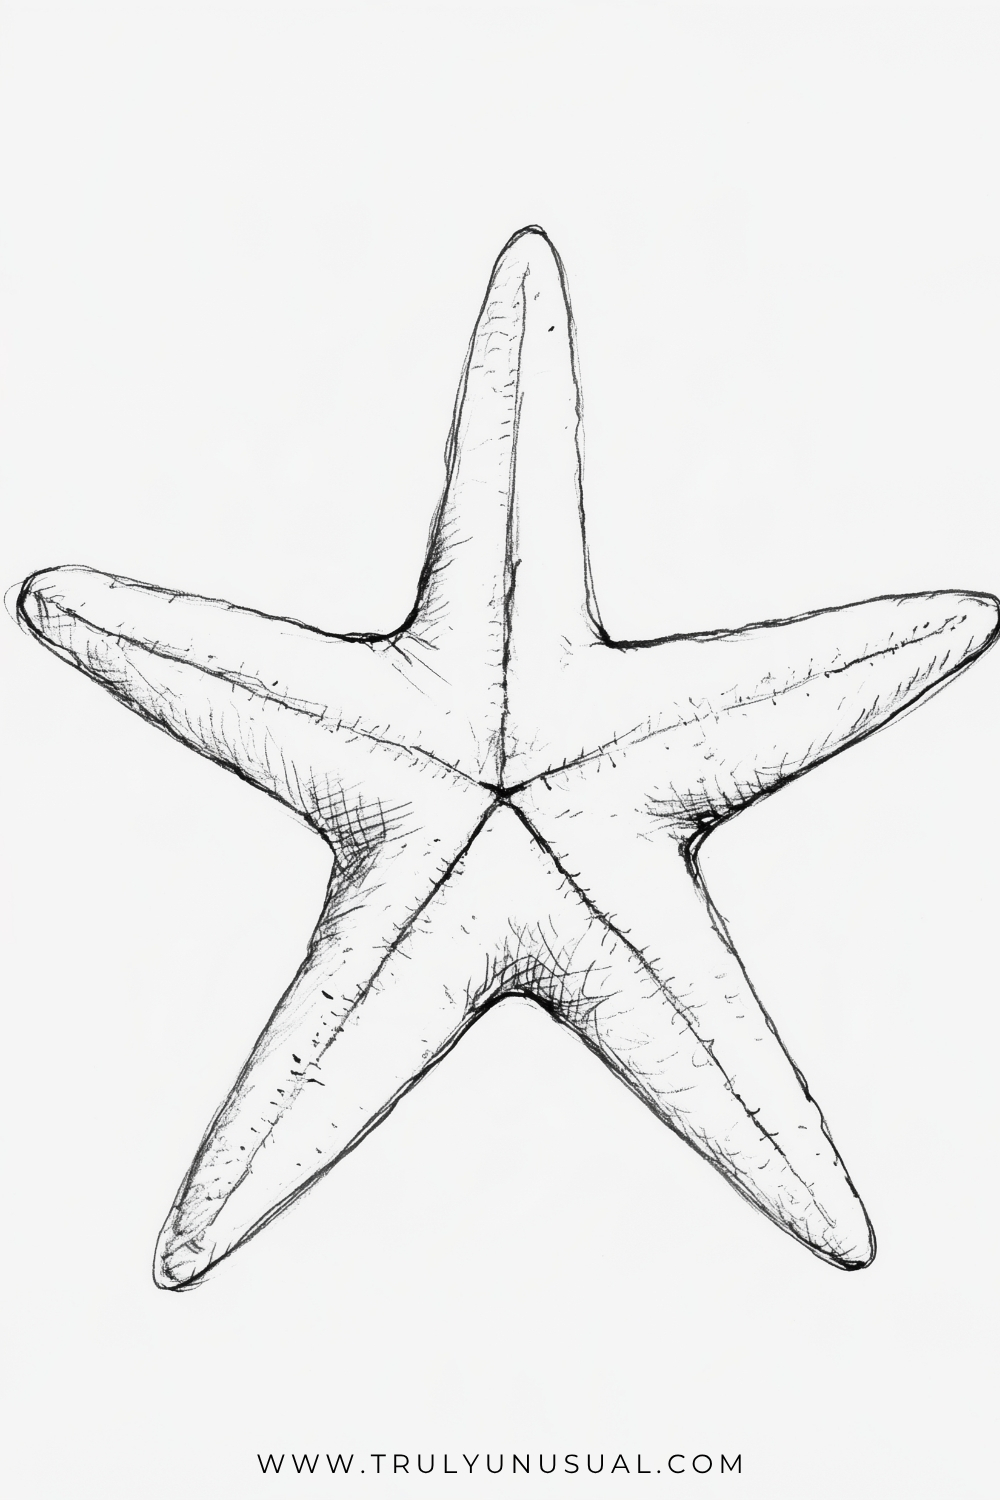
Mark a center point and draw five light lines out from it to plan the starfish’s arms. Give each arm a wide base and a narrower, softly rounded tip. Let the outline dip into a curve between one arm and the next.
Draw a faint ridge down each arm and scatter tiny dashes or dots around it. Shade the dips between the arms more heavily so the starfish looks as though it has some thickness.
Mountain Reflected In A Lake
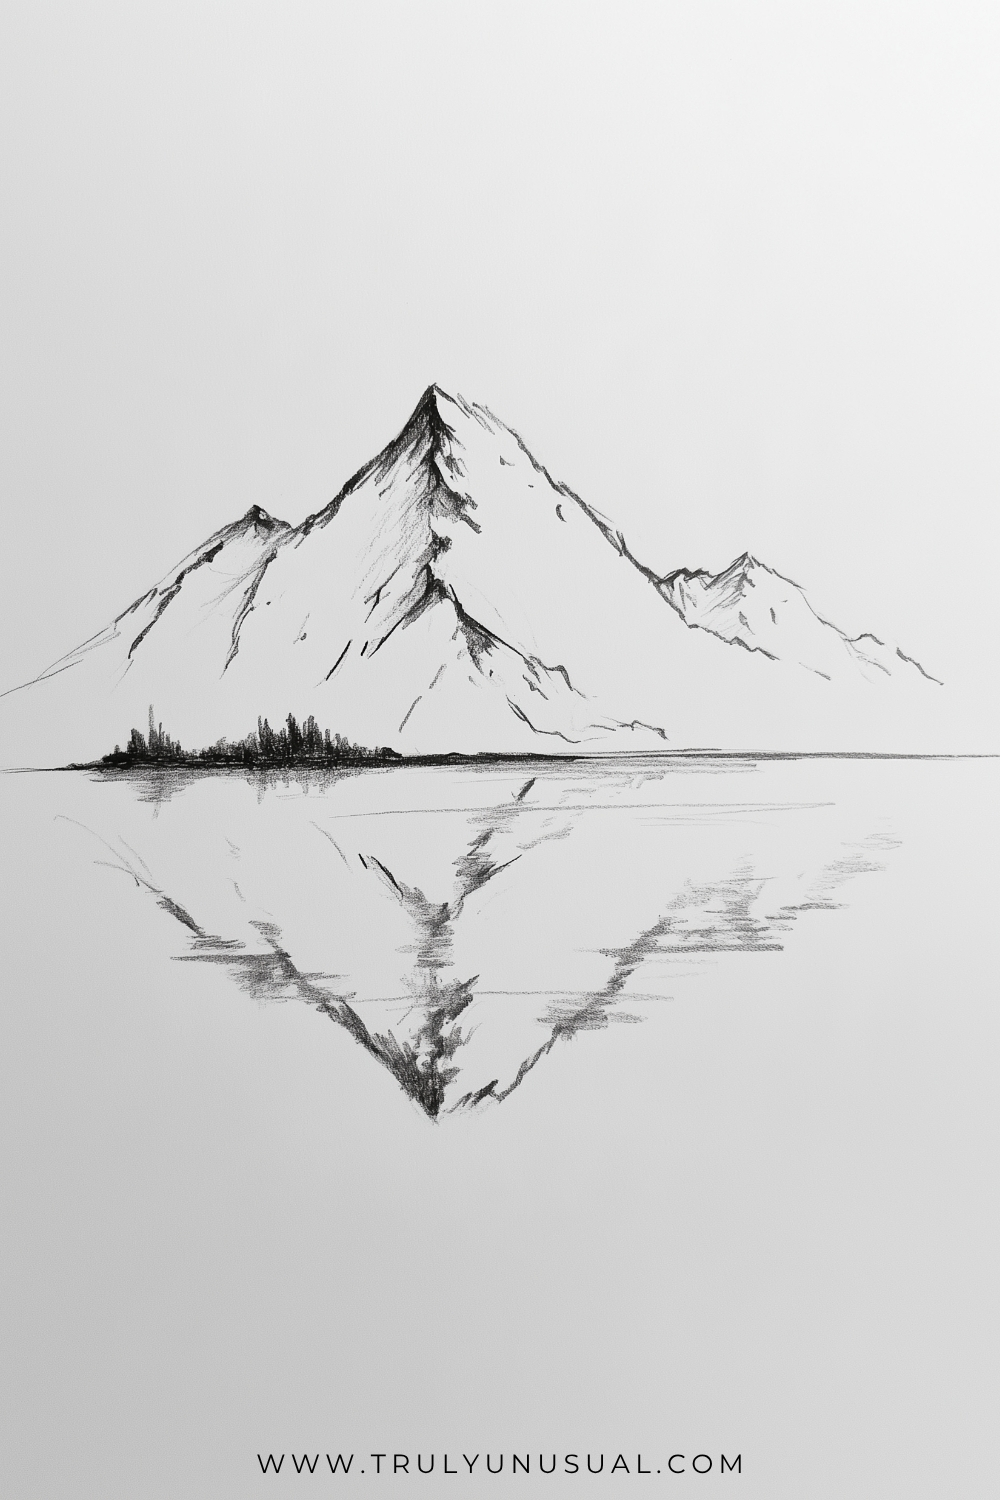
Put a straight shoreline across the page before you draw the main peak. Give the mountain a jagged outline and add a few short ridges leading away from its highest point. A dark strip of tiny trees at the water’s edge makes the mountain look much bigger.
For the reflection, place the tip of the upside-down peak directly beneath the real one. Use softer strokes in the water and break the reflected outline with little horizontal ripples. You only need to repeat the most recognizable parts of the mountain.
Evergreen Trees On A Snowy Hill
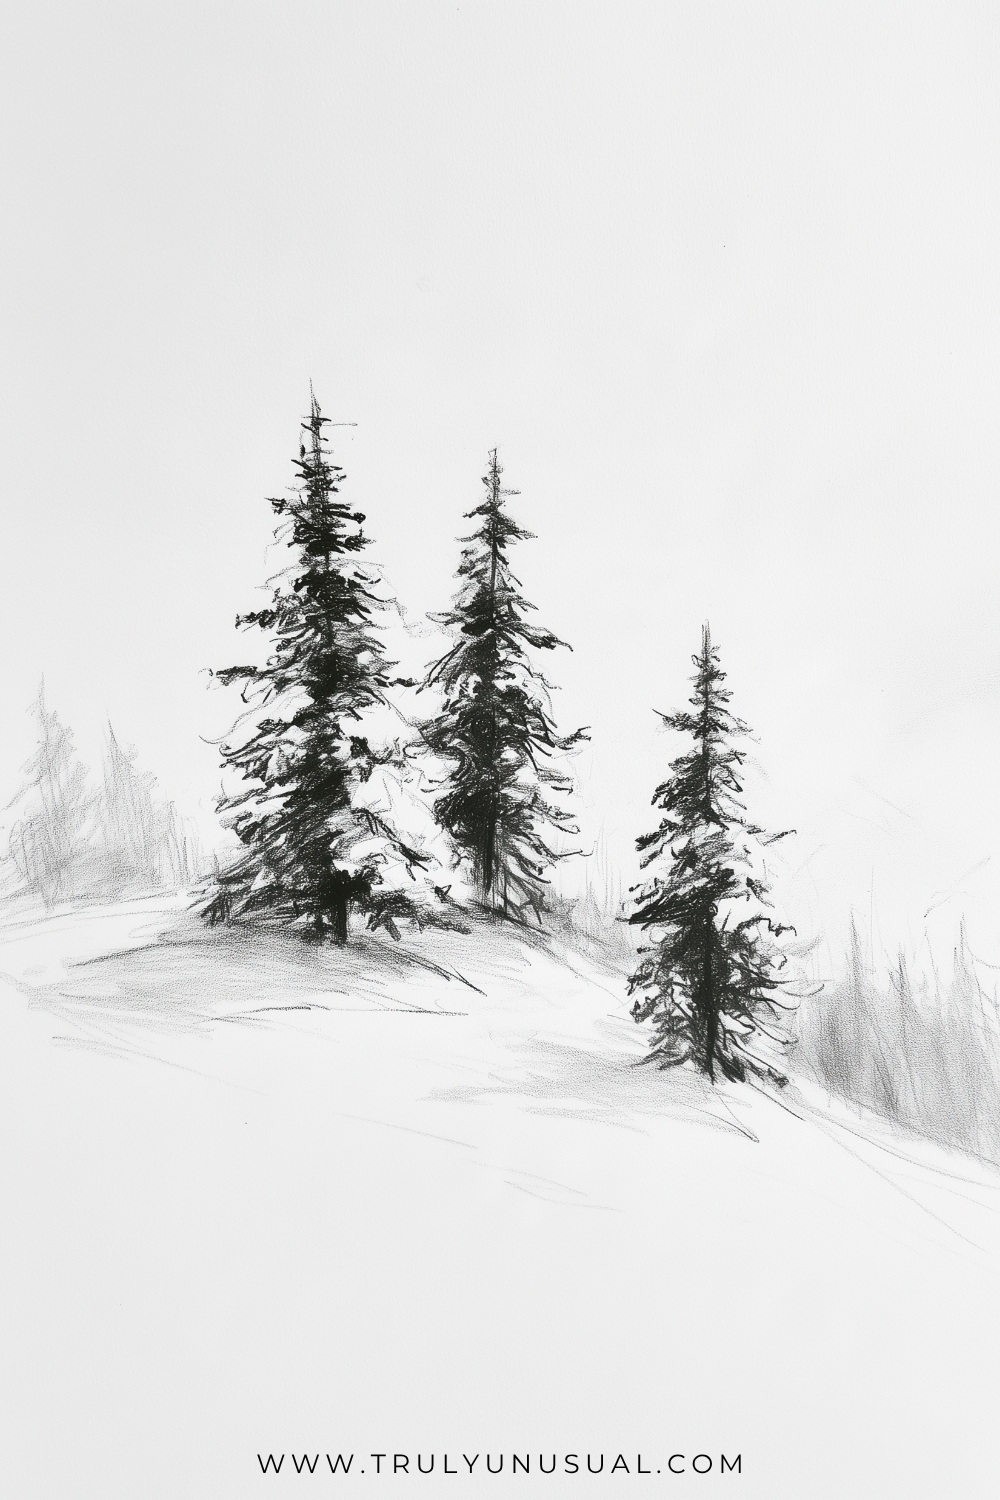
Three dark evergreens stand out on a pale hillside. Place their trunks at different heights along the slope and vary the sizes of the trees. Use a narrow triangle as an invisible guide for each crown, then fill it with quick, uneven branches.
Leave little gaps between the branches so the trees still have some air in them. Soft marks beneath the trunks suggest shadows on the snow. In the distance, barely visible trees can hint at a forest beyond the hill.
Palm Tree On A Small Island
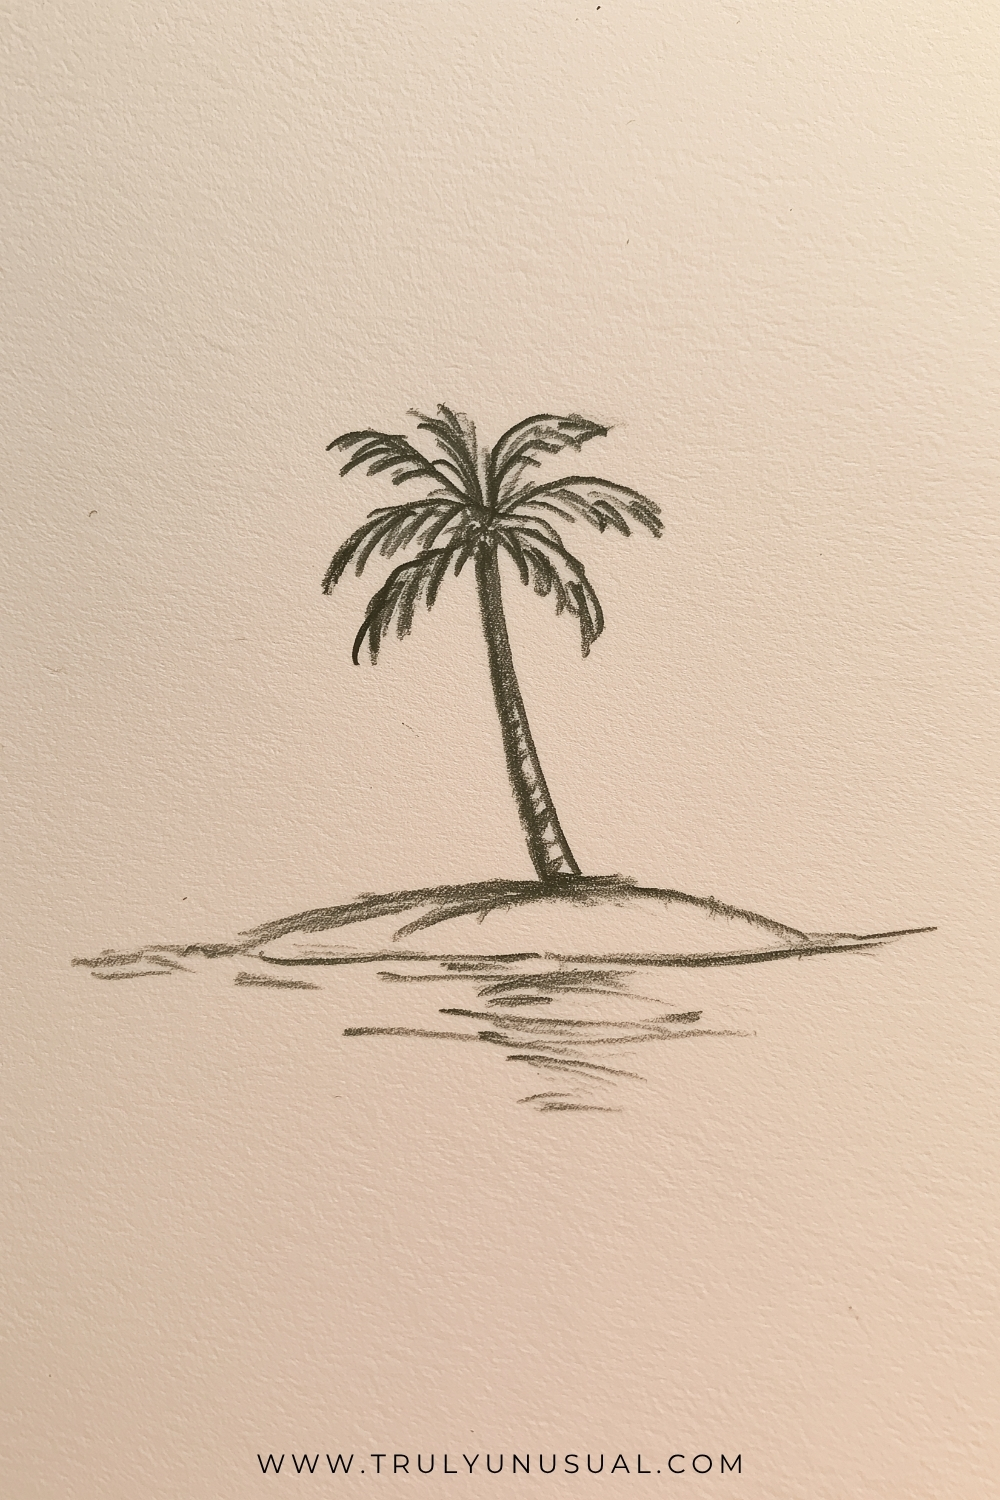
A low mound, a leaning trunk, and a few ripples are all you need for this tiny island. Set the trunk slightly off center and make it wider where it meets the sand. From the top, sweep long curved lines out in several directions.
Add short, downward strokes to the fronds and leave some space between their tips. Below the island, break the reflection into short horizontal marks so the water looks gently rippled.
Tree With Spreading Branches
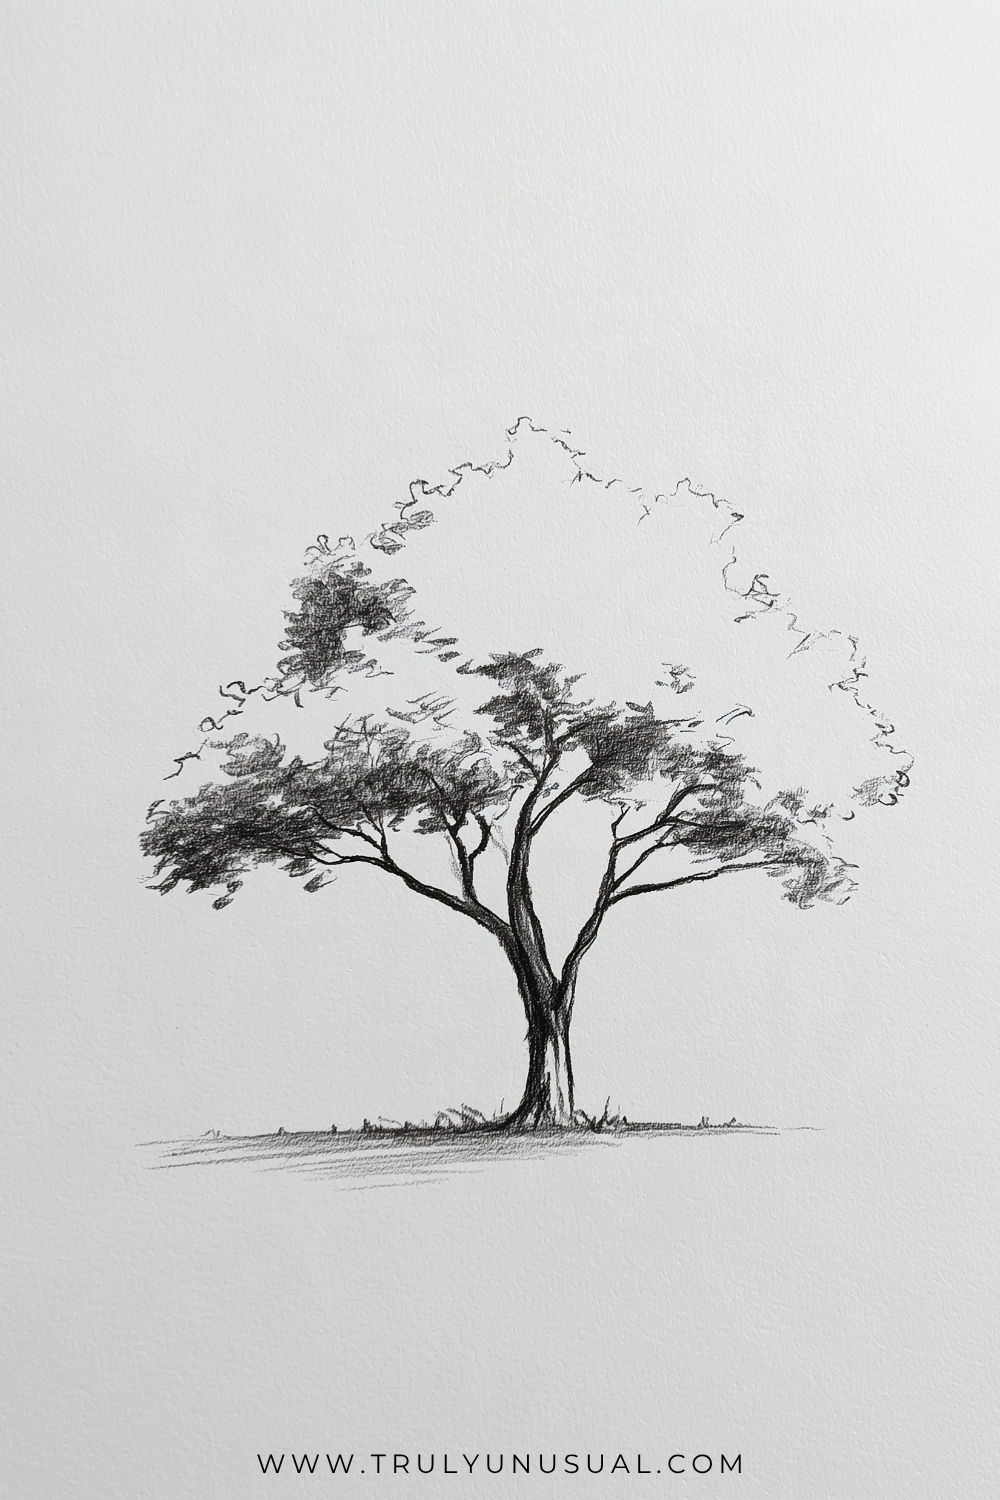
Before drawing the leaves, sketch a trunk that splits into several branches at different heights. Let those branches get thinner as they spread out. Once you can see the shape of the tree, mark the outer edge of the canopy with a loose, uneven line.
Shade small patches of foliage where the branches disappear into the leaves. Leave some open sky between the branches and some pale areas across the crown. A light ground shadow will anchor the trunk without taking attention away from the canopy.
Cute Smiling Hedgehog
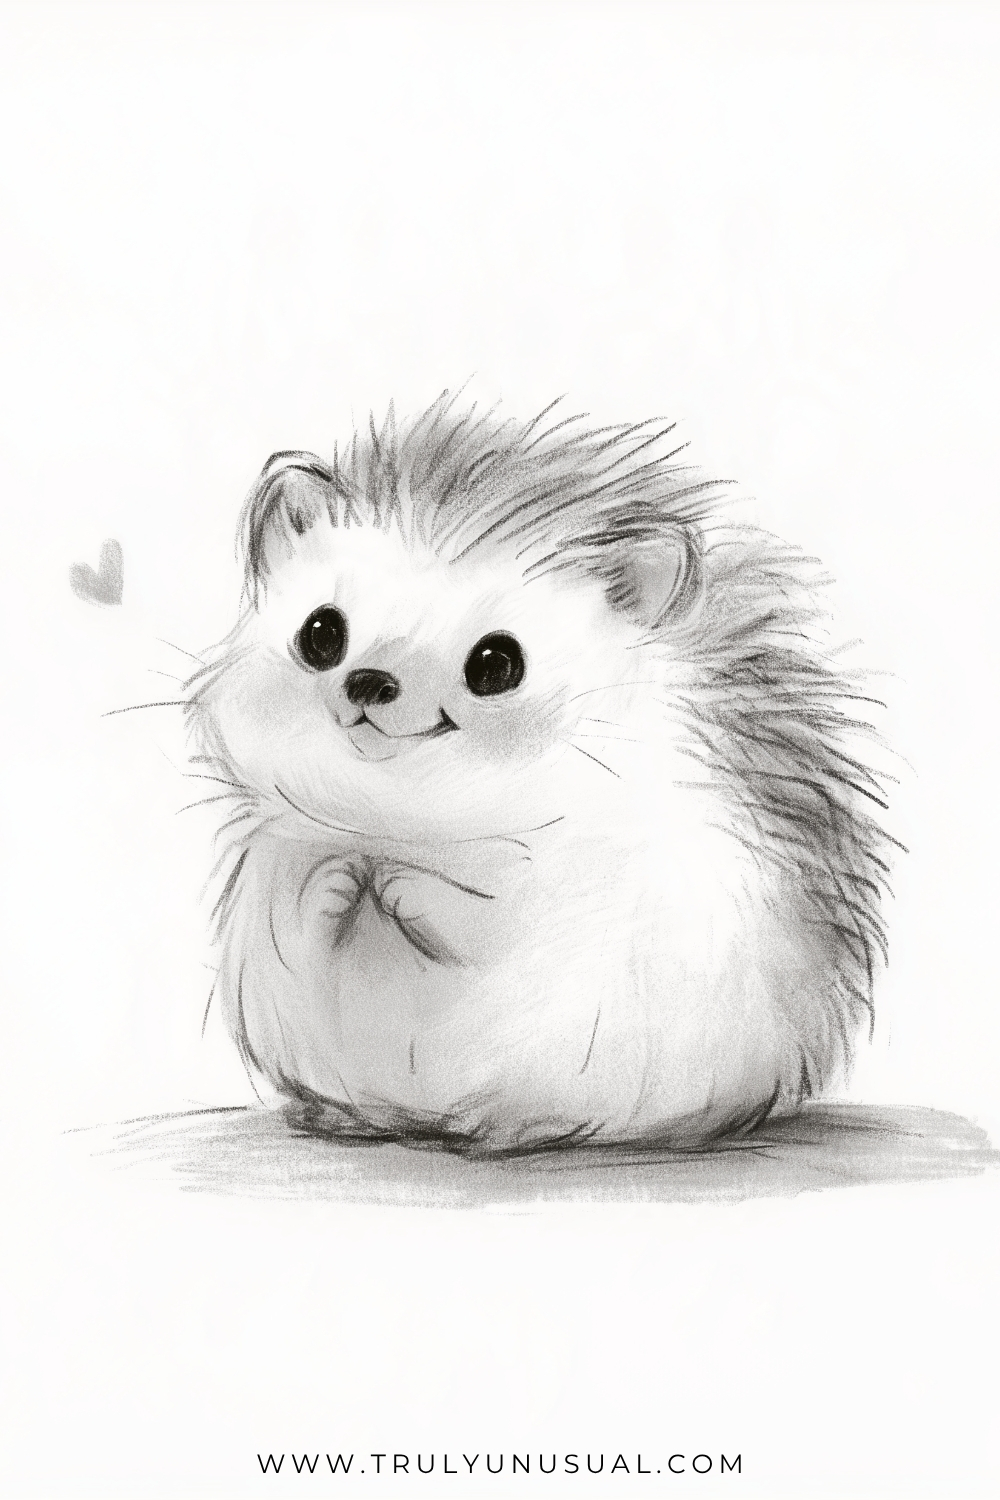
This round little hedgehog is sitting up with its front paws tucked under its chin. Build it from simple shapes, with a squat oval for the body and two small curves for the ears. Place the nose between the eyes and turn the mouth up just slightly.
Try drawing the spines in loose groups that sweep back from the forehead. Leave a tiny white dot in each eye before shading it dark. Soft pencil strokes on the belly will give it a fluffier look than the spiky back.
Raspberry With Leaves
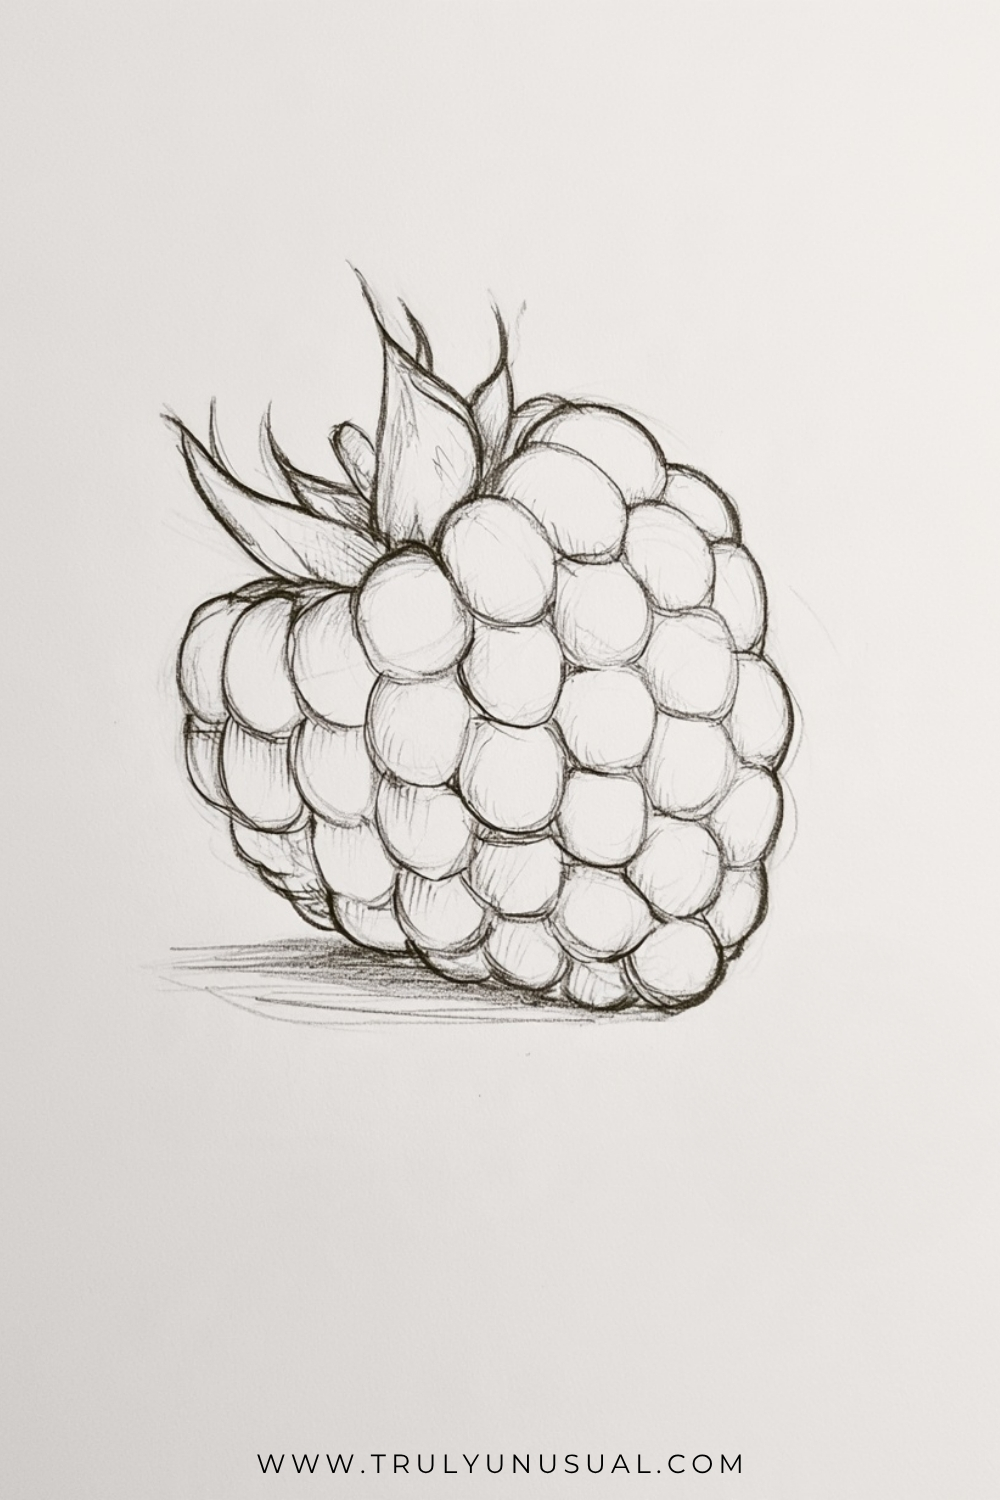
A raspberry is a nice drawing to try when you want to practice repeating a shape without making every mark identical. Lightly sketch the outline of the whole berry. Fit small rounded bumps inside it in staggered rows, with narrower ones along the outer edges.
A few pointed leaves at the top balance all those rounded shapes. Darken the creases where the bumps meet and leave their centers fairly light. A thin shadow underneath makes the berry look like it’s resting on the page.
Three Wildflowers
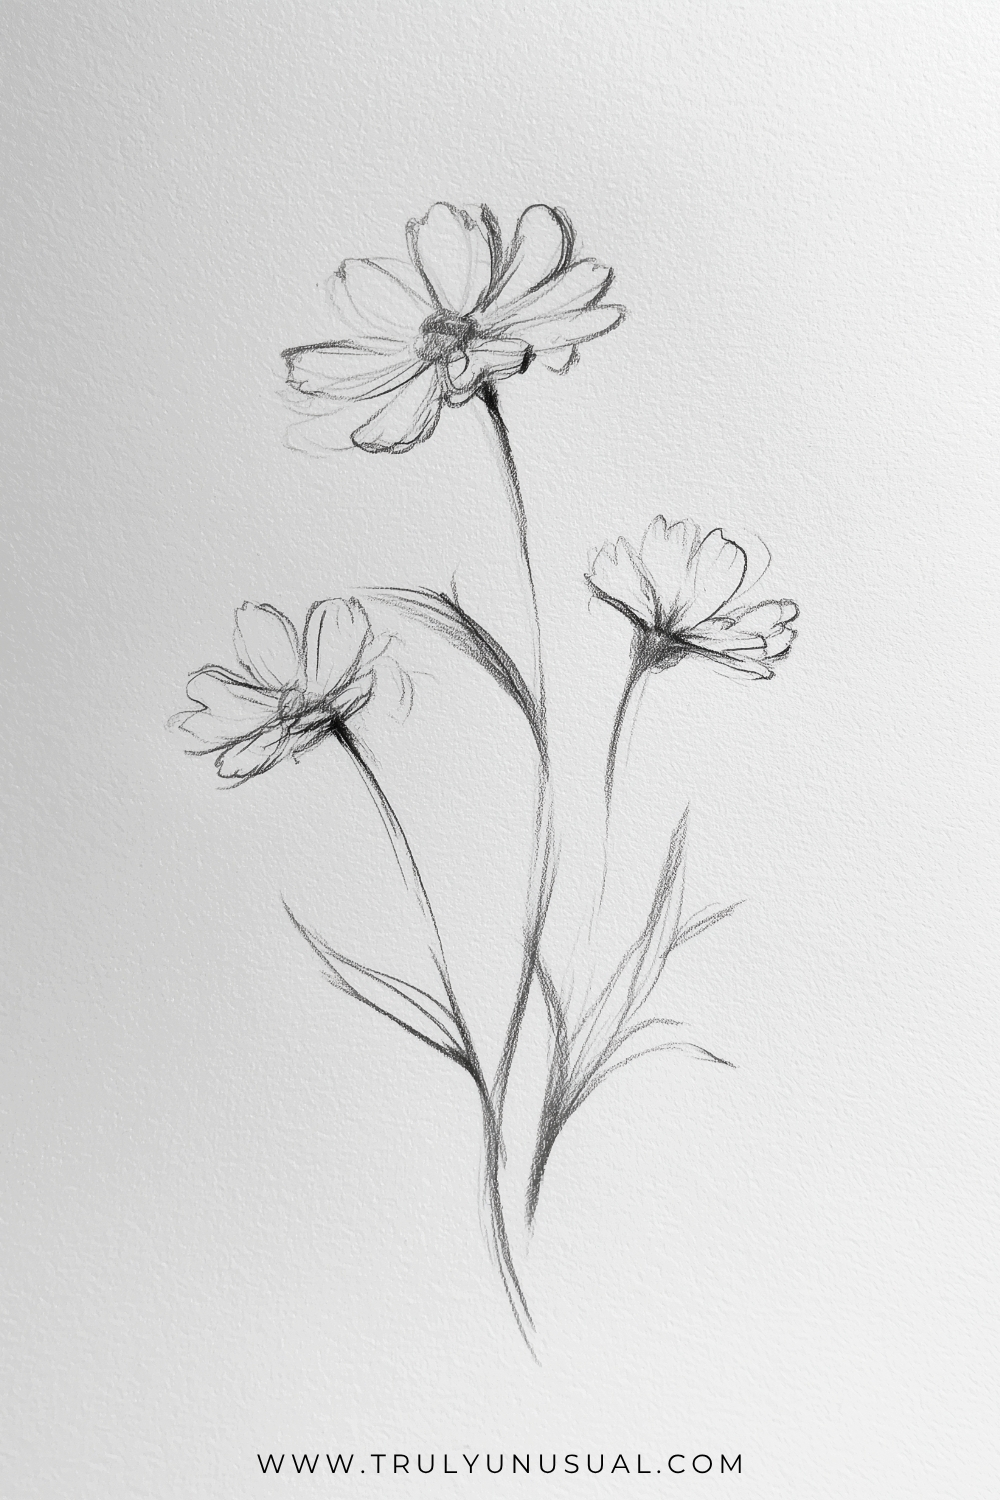
These flowers look different because you’re seeing each one from a slightly different angle. Start by marking where you want the three flower heads, with one noticeably higher than the others. Draw the tall flower with an oval center and spread its petals out where you can see them.
On the side-facing flower, cluster the petals above the dark base so it reads as a profile. Let the stems bend gently toward one another. A few narrow leaves can fill the spaces between them while keeping the arrangement airy.
Three Maple Leaves
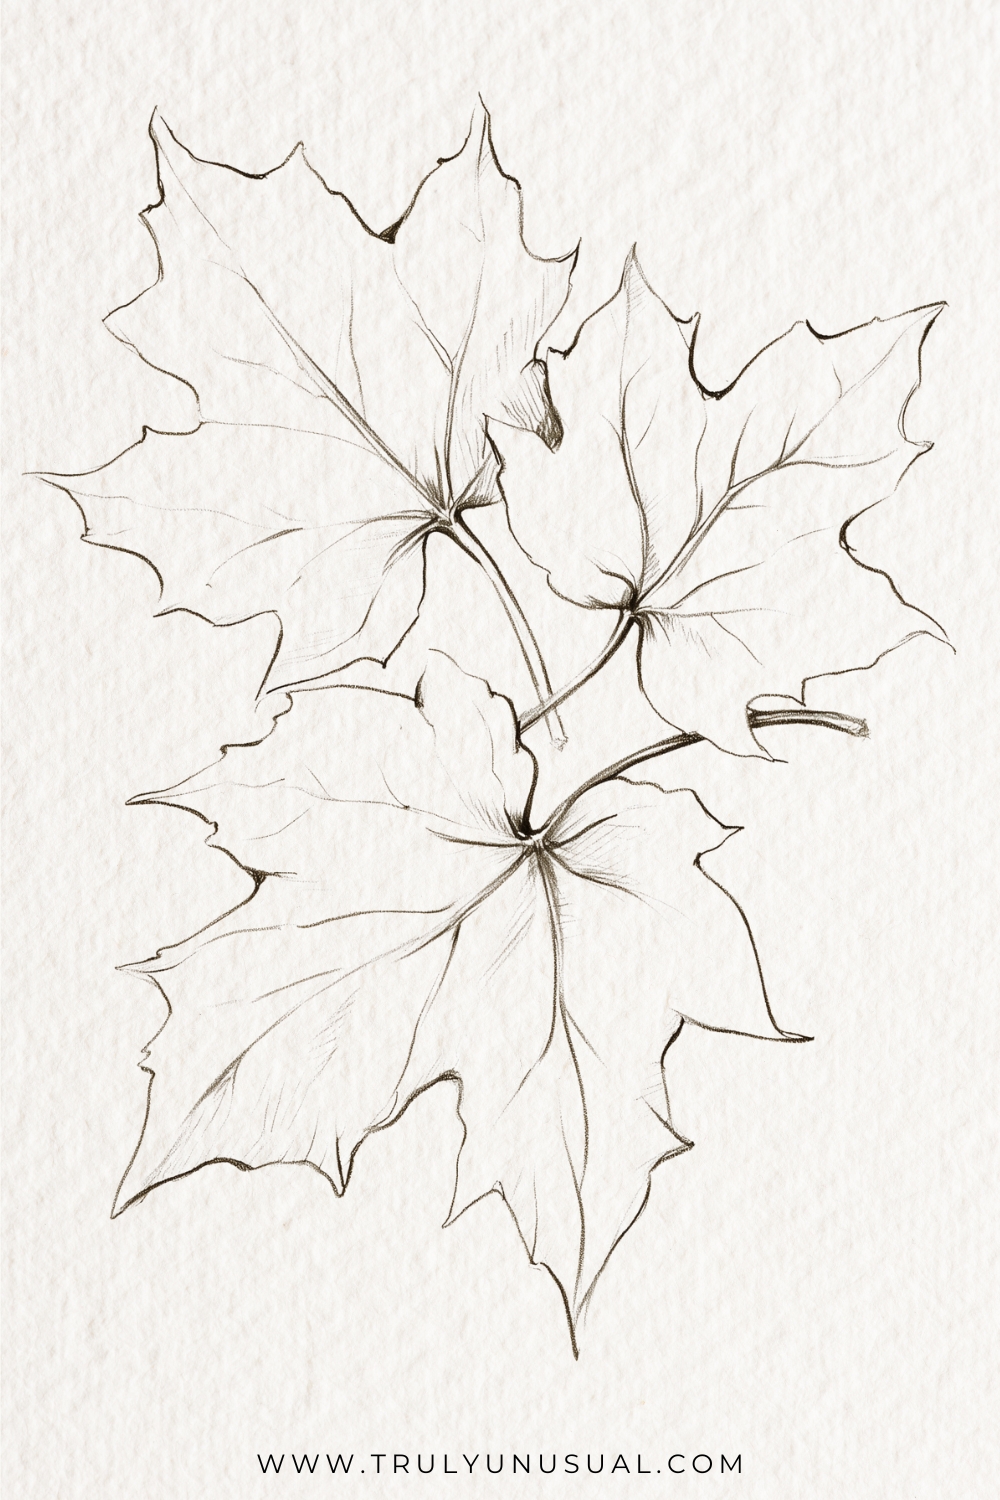
Find the spot where each stem meets the leaf and draw the main veins outward from that point. The veins show you where the biggest points of each maple leaf should go. Join those points with dips and smaller teeth to get the familiar jagged edge.
Turn the leaves in different directions and let one overlap another. If you have a real leaf or a reference photo, look closely at where its veins split. A little shading where the stems meet is enough to show which parts curl away from the light.
Tall Cactus With Two Arms
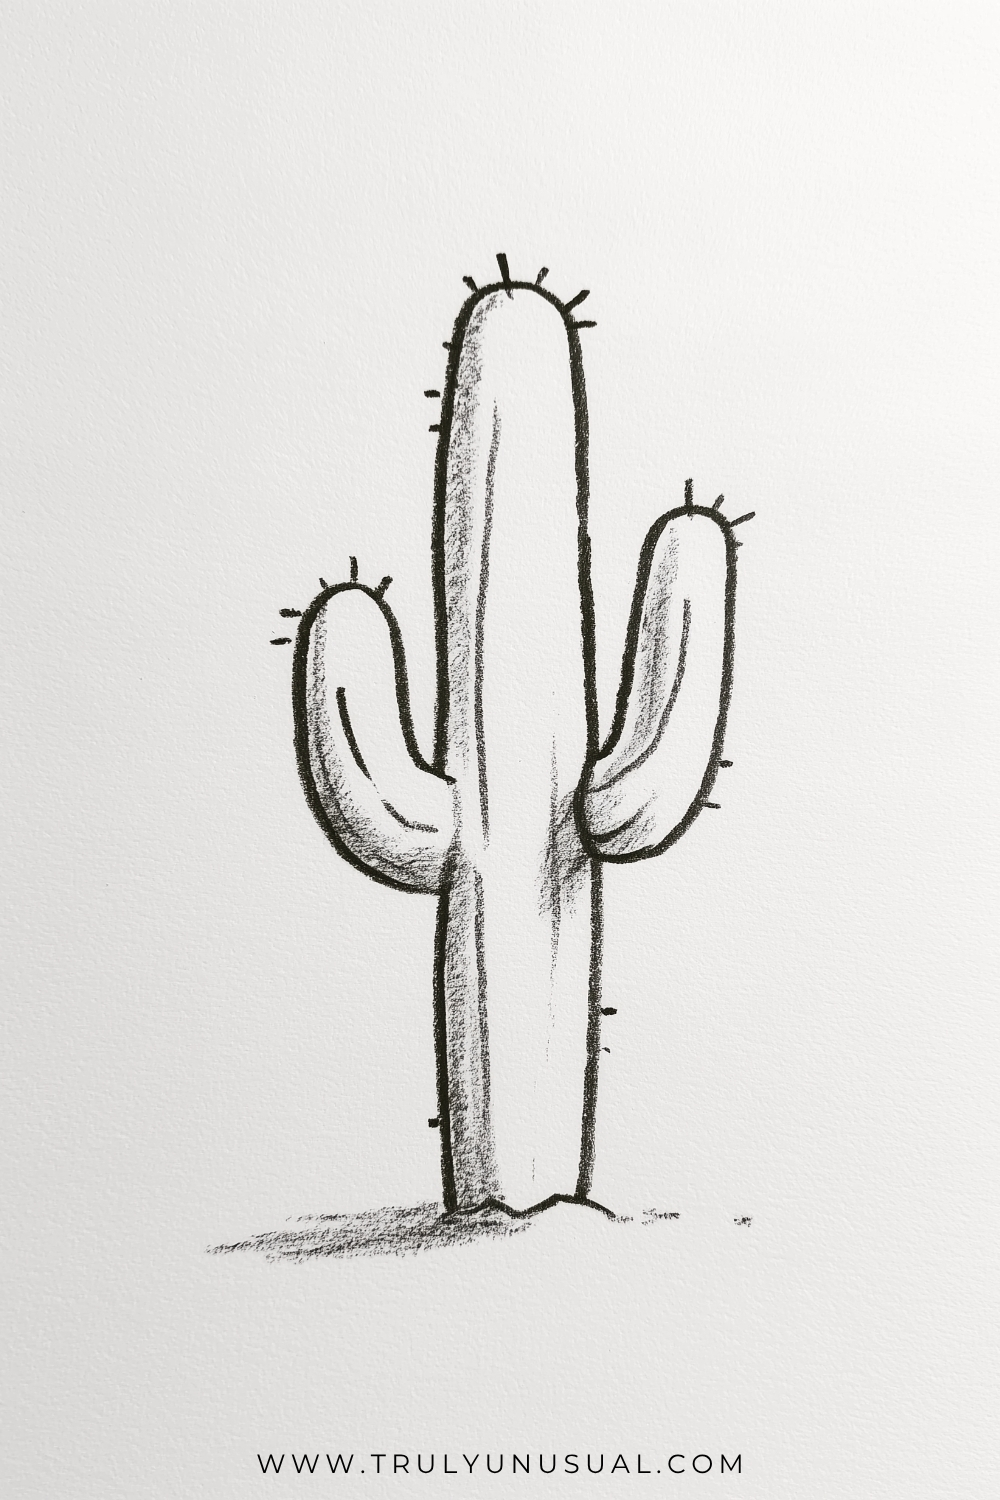
Think of the main cactus stem as a tall arch with nearly straight sides. Draw one arm curving up on either side, with one finishing a little higher than the other. Erase the parts of the stem outline that would cut through the arms.
Follow the curves with a few inner lines to show the ribs. Add short dashes around the outside for spines and a little shadow on one side to round out the stem.
Robin On A Branch
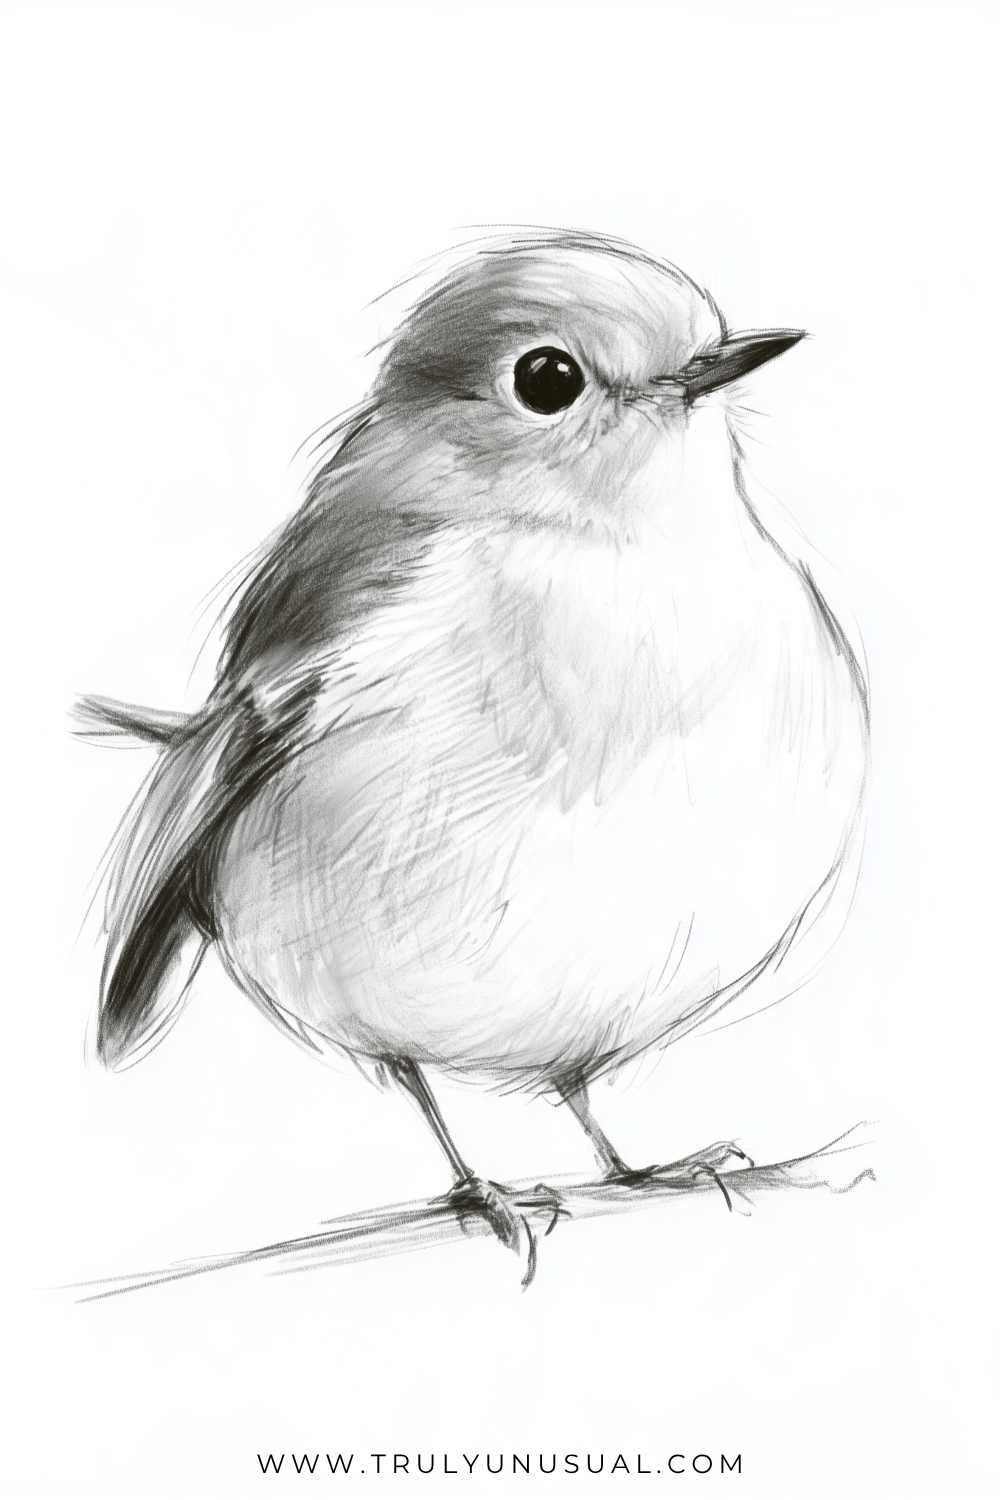
This robin has a round, puffed-up chest and a short beak that points slightly upward. Sketch the body like a tilted egg and add a smaller curve for the head. A long, tapered shape along the back will give you the folded wing.
Draw the branch before you finish the feet so you can curl the toes around it. Shade the wing and back with short strokes, keeping the breast lighter as in the pencil sketch. If you’d like to use color, try a warm orange-red on the face and breast.
Cute Smiling Sea Turtle
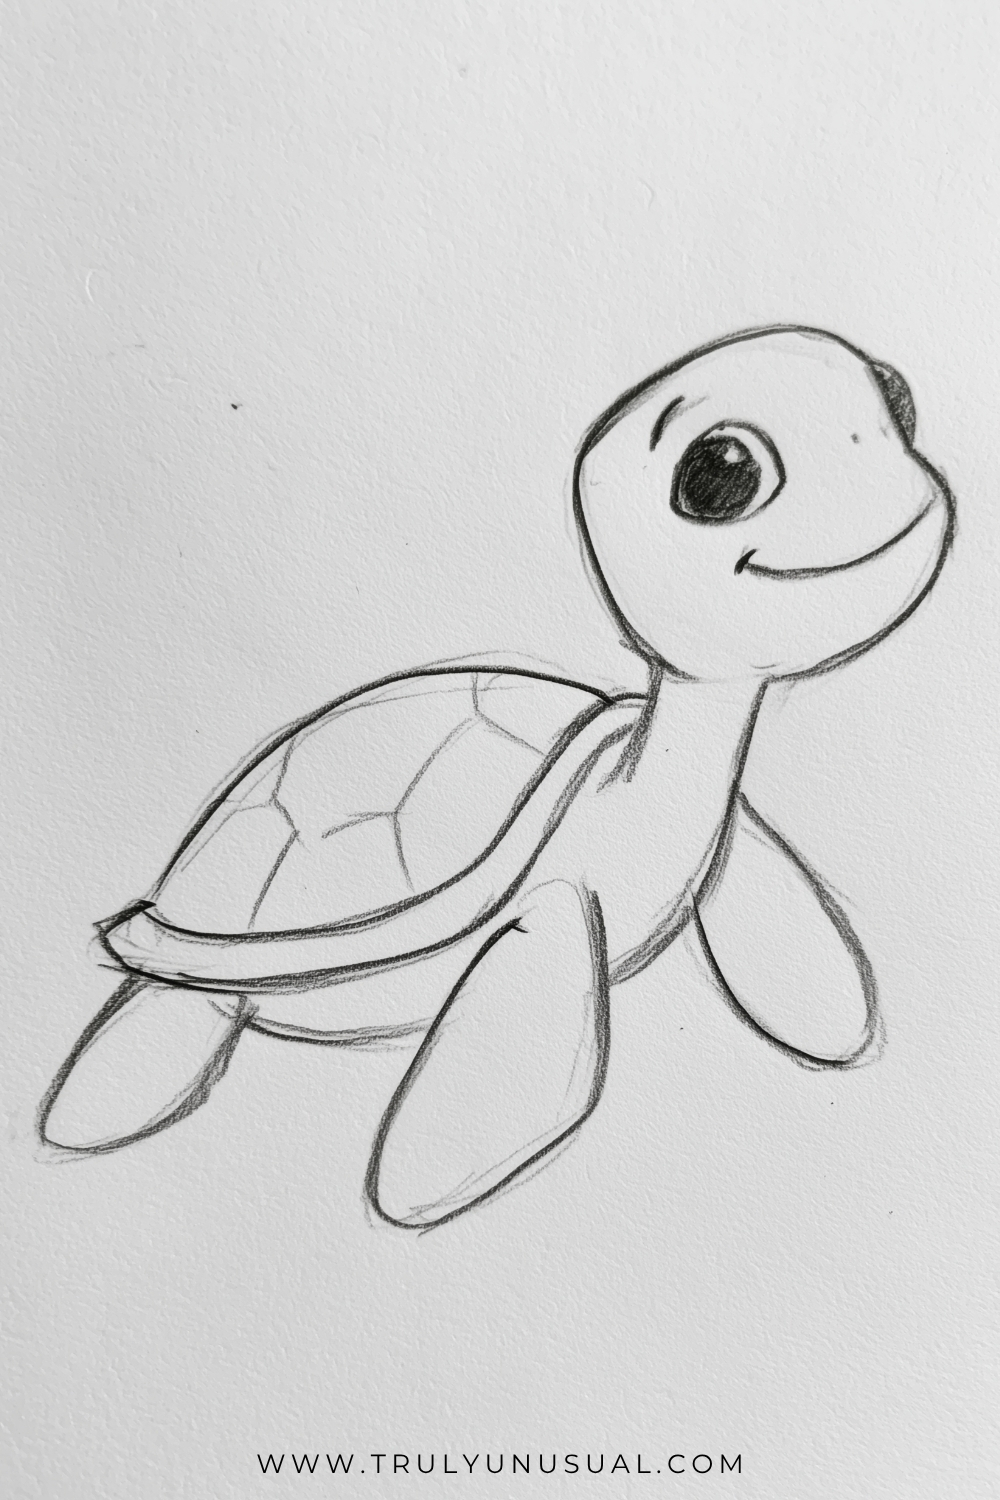
This little sea turtle has a big smile and looks as though it’s swimming toward the top of the page. Sketch the shell as a tilted dome, then add a narrow band around the bottom edge. Give the shell a simple pattern of adjoining shapes.
Draw the nearest flipper a little larger than the one on the far side. For the face, a round eye with a white highlight and one sweeping smile are enough. Leave the background blank or add a few bubbles if you want a bigger underwater scene.
Three Mangoes On A Branch
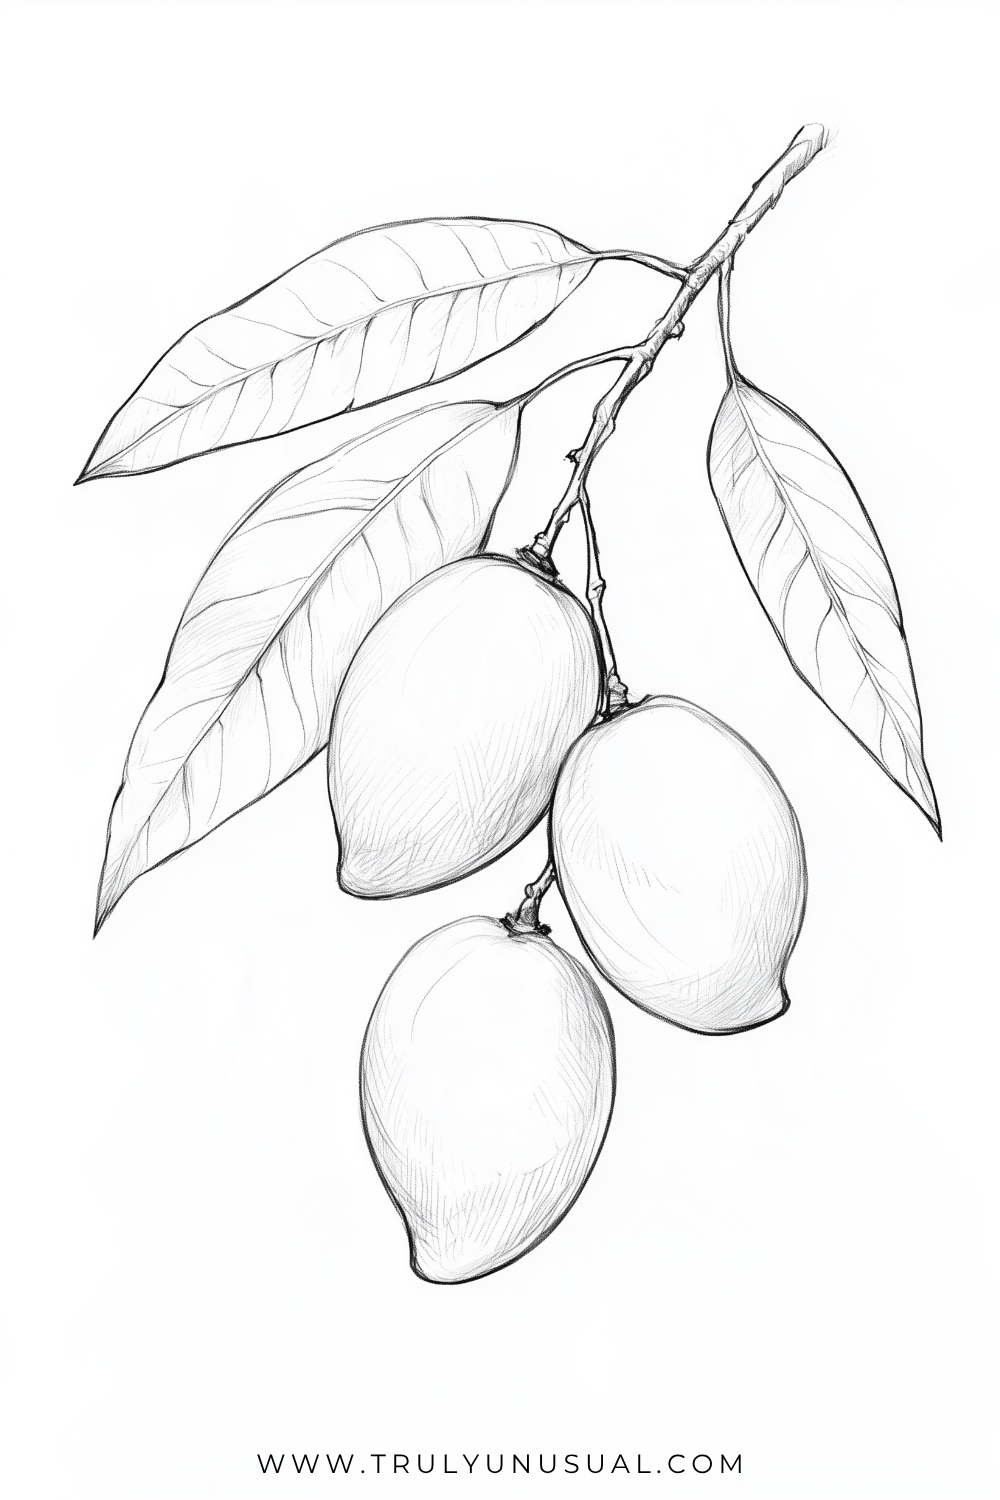
These three mangoes hang at different heights, with long leaves fanning out around them. Start by placing three slightly uneven ovals and tilt each one in a different direction. Keep one side of each mango fuller and give the lower end a gentle taper.
Connect the mangoes to the branch with short stems and let one of the leaves tuck behind the fruit. A light center vein and a few thinner lines will give each leaf some texture. Use curved pencil strokes along one side of each mango and leave a broad, pale area to make the fruit look rounded.
Hummingbird In Flight
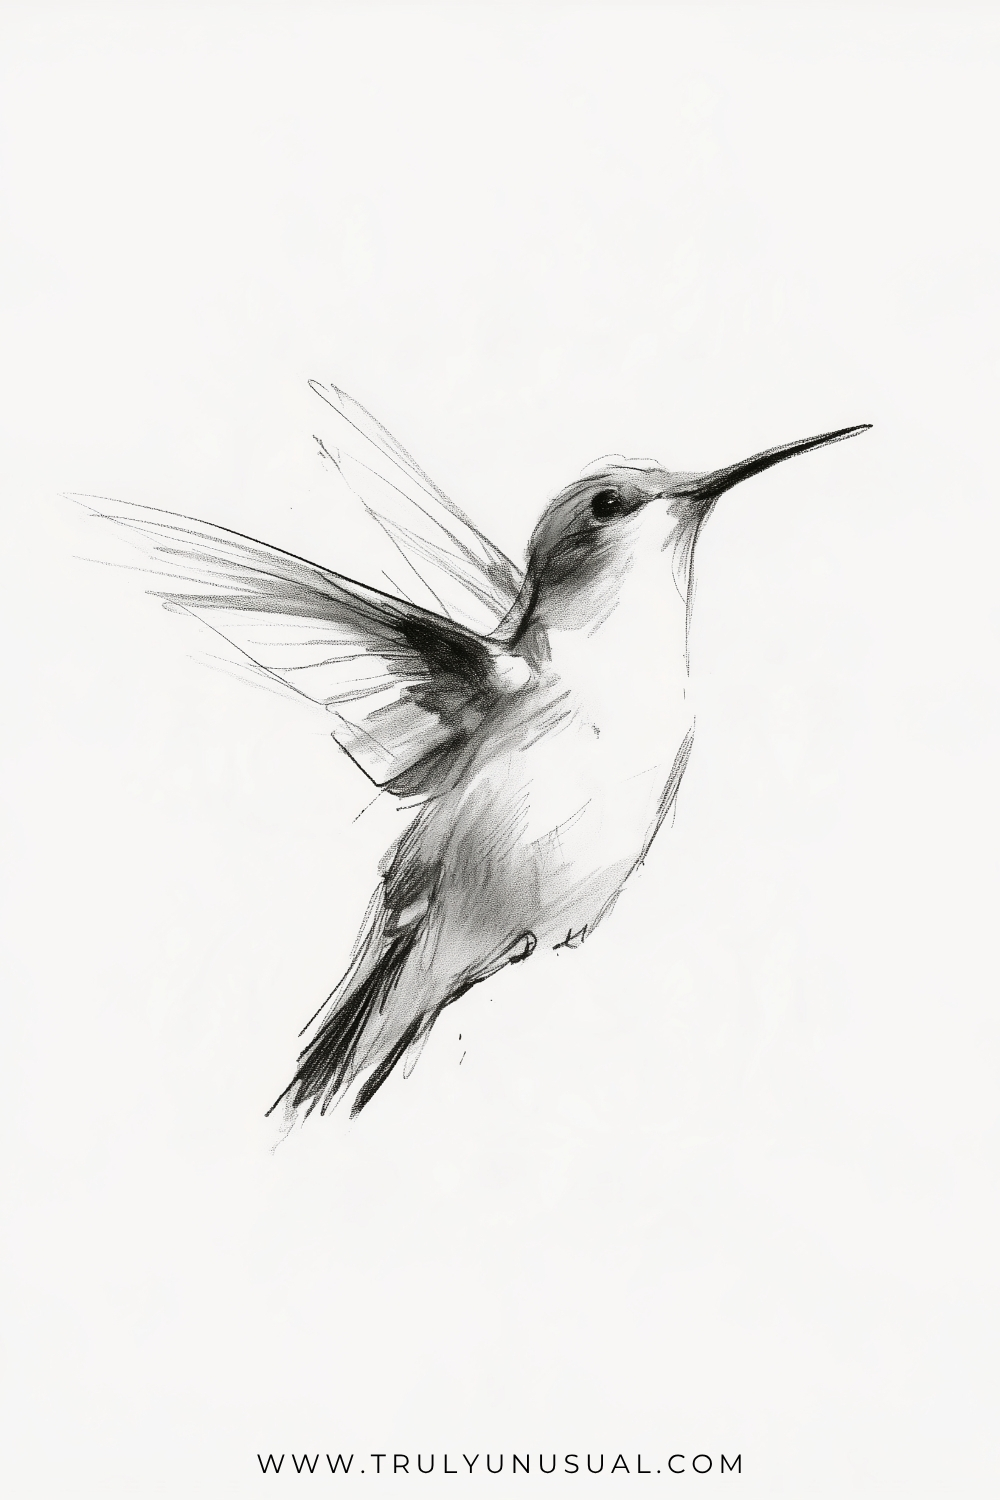
The long beak and the upward tilt of the head are the easiest way to spot what makes this bird different from the one on the branch. Sketch the body at an angle, then add a small rounded head and a straight, fine beak. Keep the tail short and pointed down.
Sweep the wing shapes back from the shoulder and use a few light strokes to suggest movement. Concentrate the darkest marks near the eye, wing base, and tail. Leaving the chest mostly white helps keep the whole sketch light.
Frog On A Branch
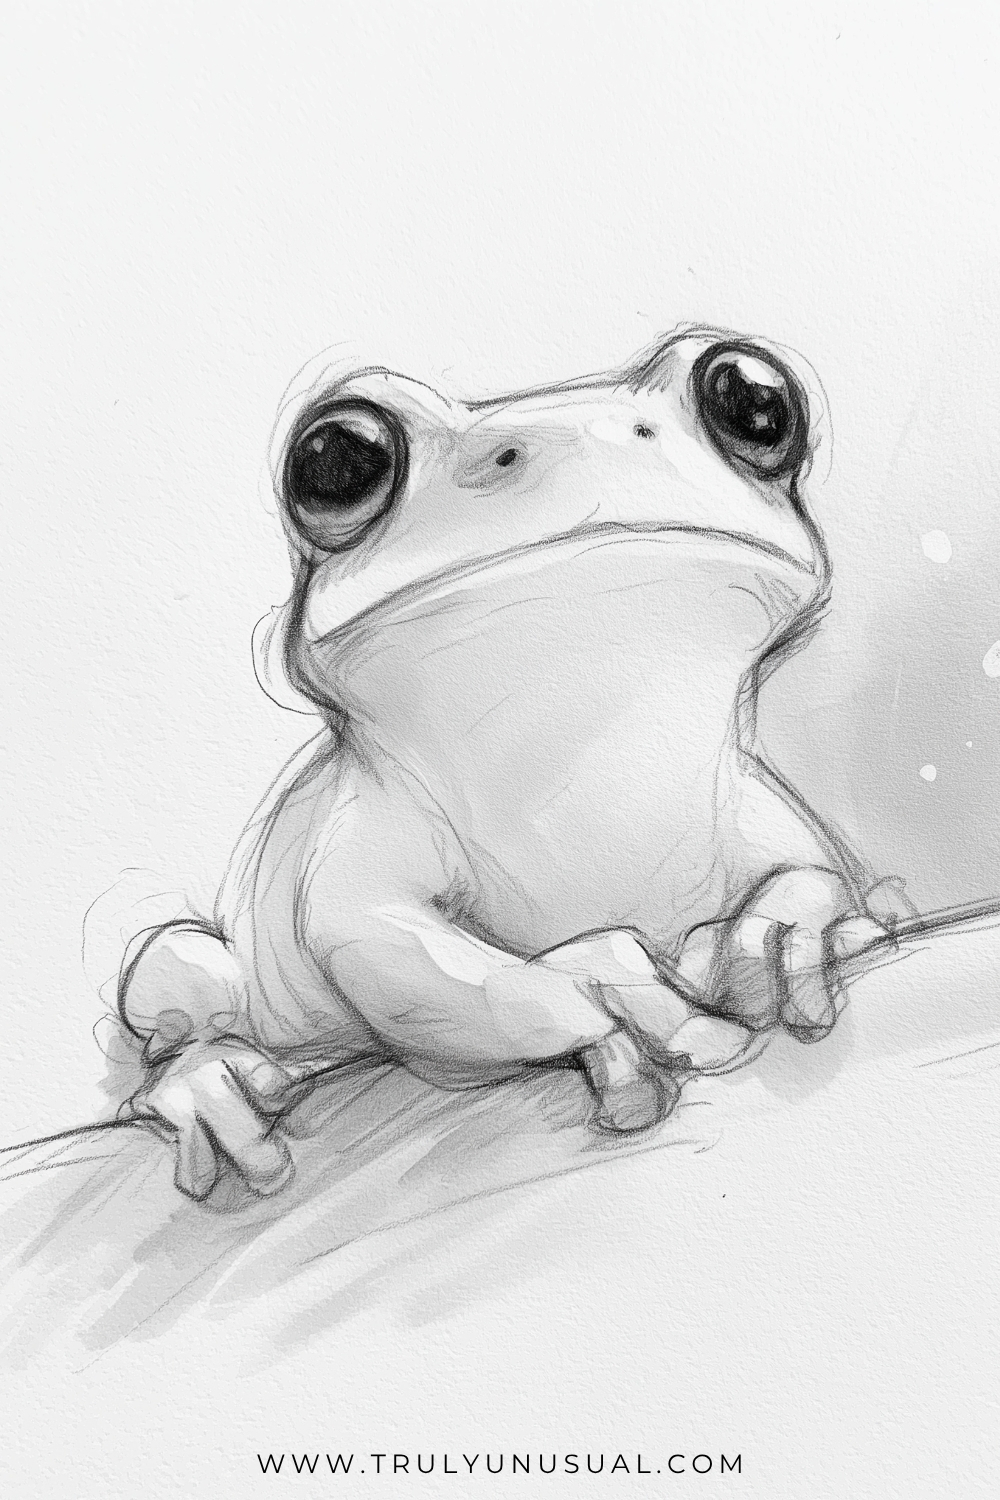
This frog is seen from slightly below, so its big eyes and pale throat take up most of the drawing. Start with two round eyes near the top of a wide head. Connect the eyes with a shallow curve and set the mouth low across the face.
Sketch the branch at a slant, then curl the toes over its upper edge. Leave a white patch in each dark eye for a glossy look. Keep the throat lighter than the sides so it appears to come forward.
Single Feather
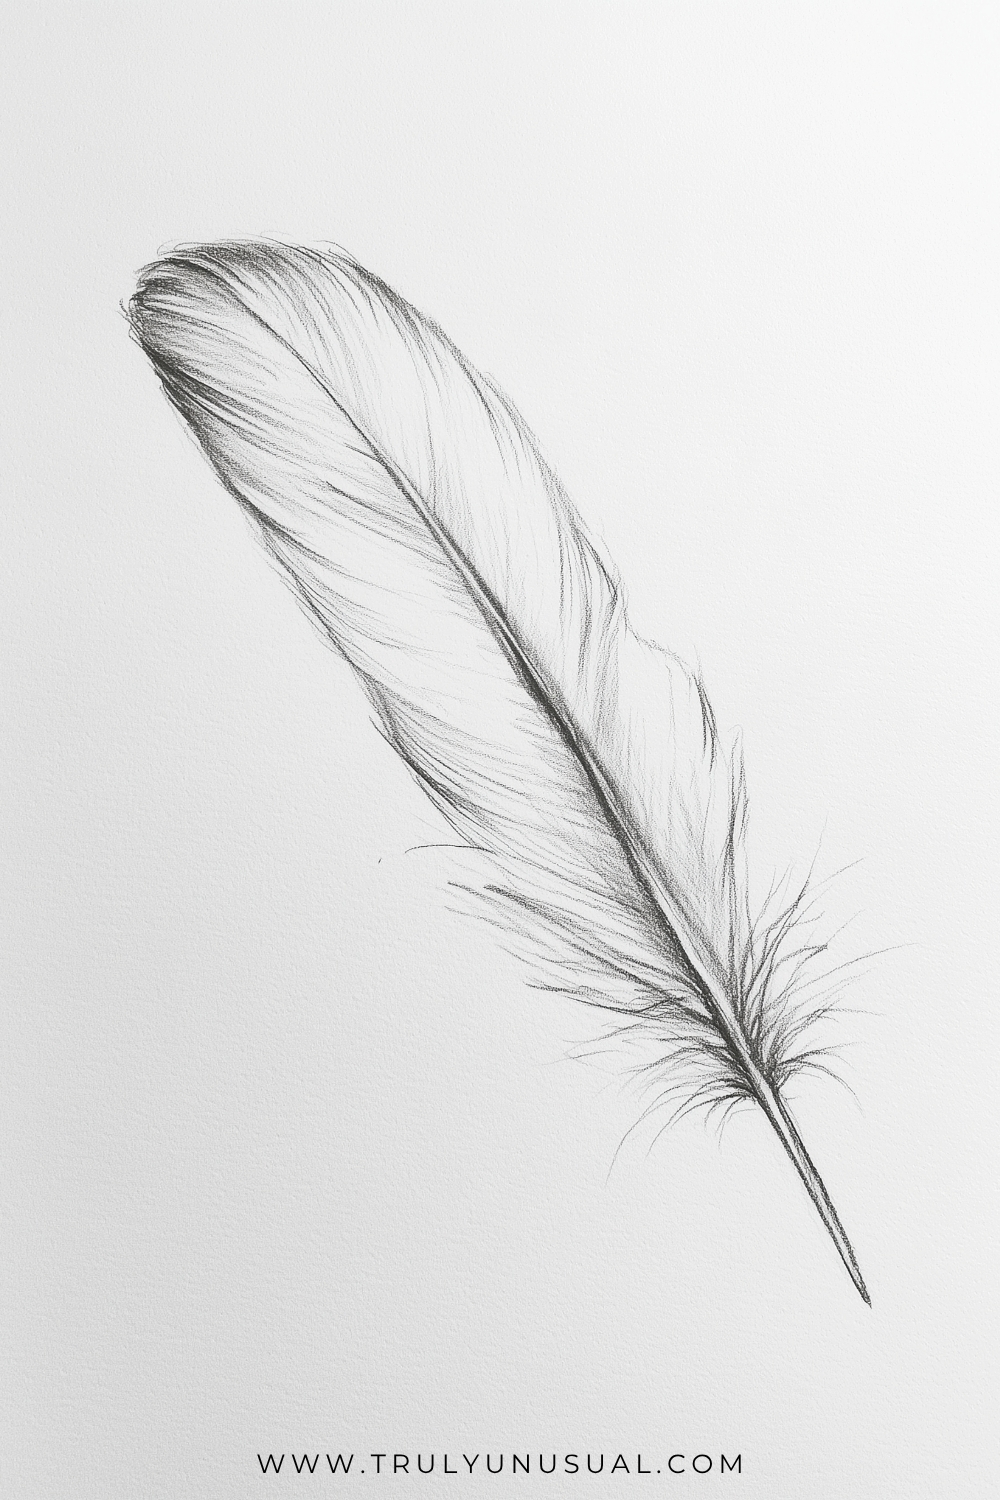
A feather is a good subject when you want to practice light pencil strokes. Draw a slightly curved shaft and leave a bare section at the base for the quill. Add a long outline around the upper part, making one side a bit wider than the other.
Sweep fine lines outward from the shaft toward the edge. Near the base, let a few soft strands curl in different directions to suggest the fluffier part of the feather.
Spiral Shell
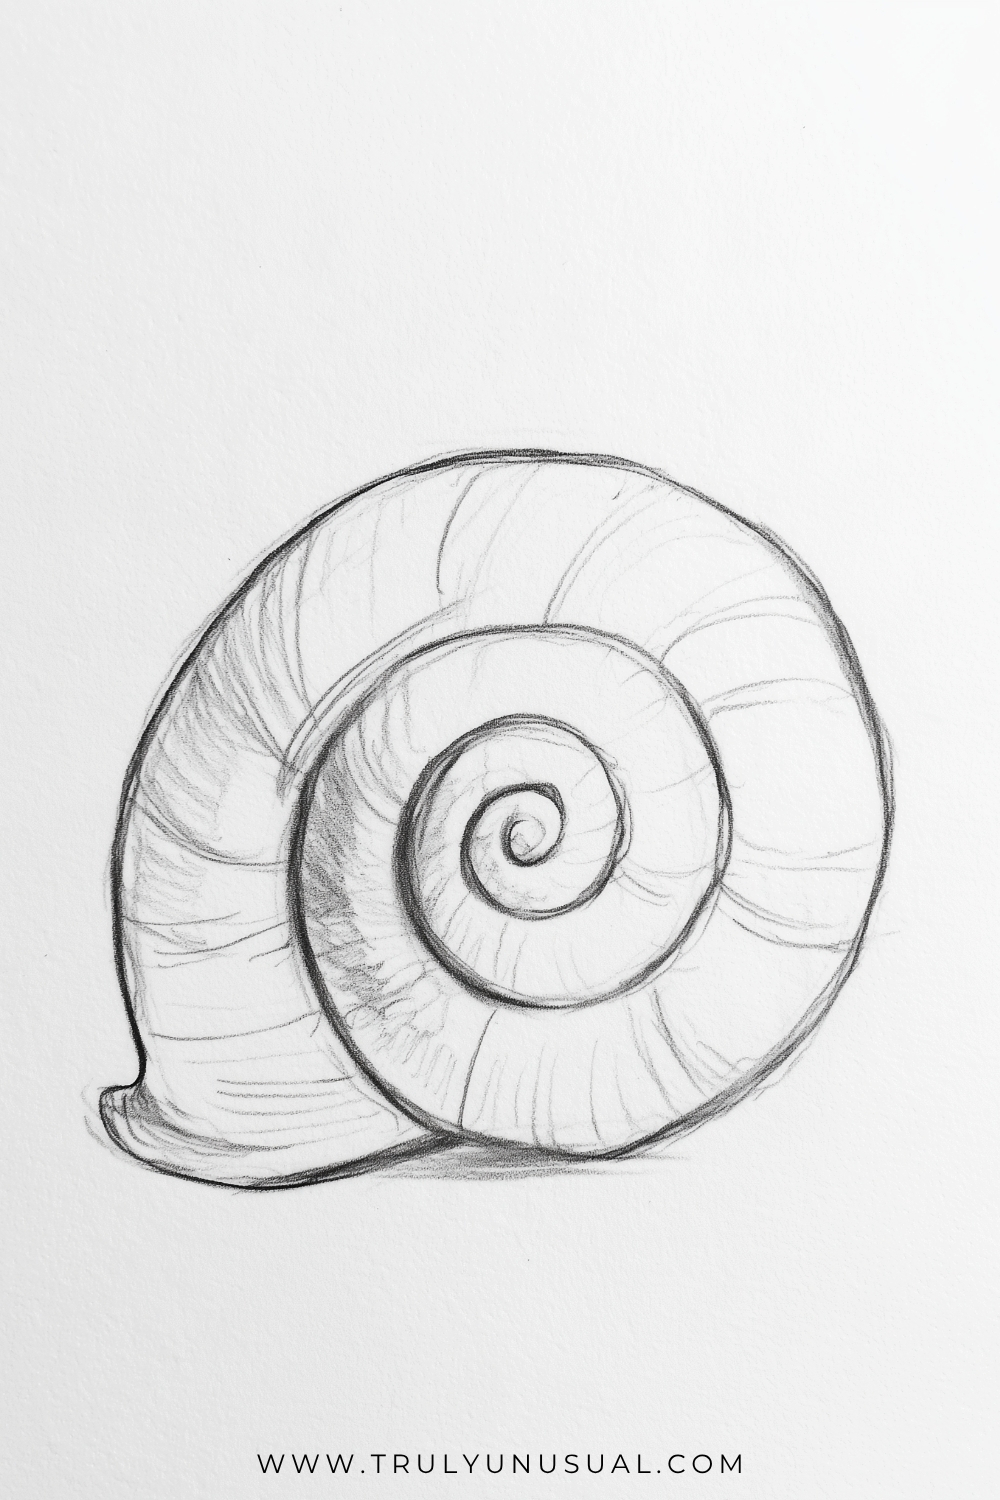
Start with a small curl and gradually widen the spaces between the turns as you move outward. Let the final turn flatten slightly along the bottom where the shell rests. Add a little lip at one end so the outline feels more like a shell.
Draw a few faint ribs across the spiral, following the curve of the surface. Darkening one side of the inner turns gives them depth, and a soft shadow beneath the shell helps it sit on the page.
Winding River Between Mountains
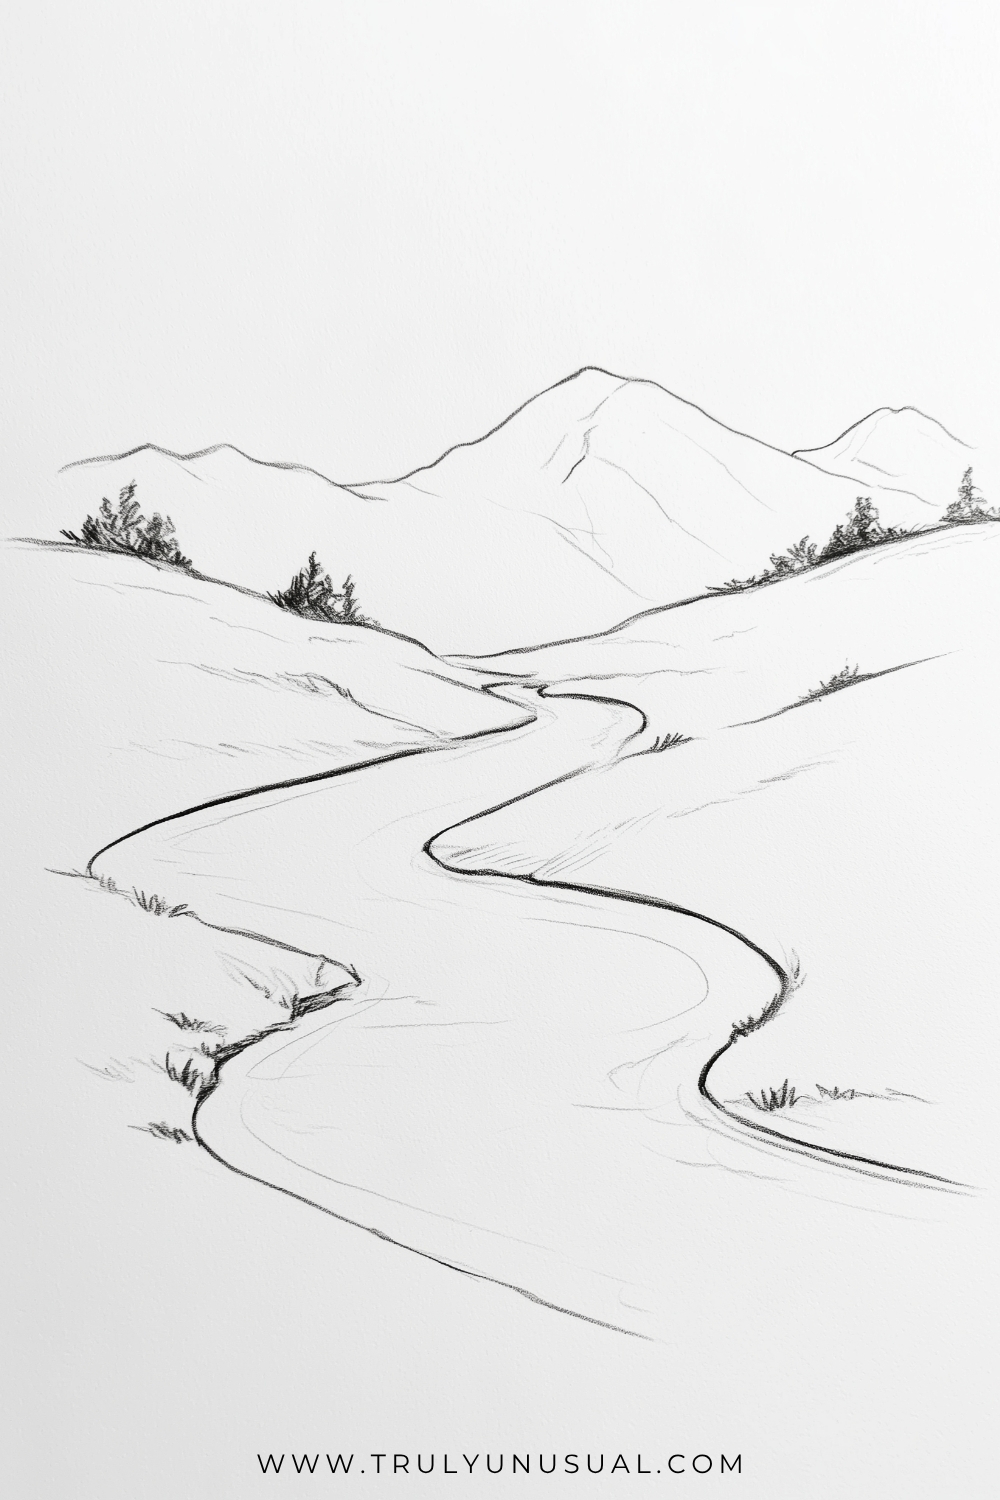
The river is wide at the bottom and almost disappears between the distant hills. Draw one long S-shaped bank first. Add the second bank beside it, leaving more space between the two lines as they approach the bottom of the page.
Set a row of mountains behind the point where the banks nearly meet. Keep the distant ridges pale and use a few darker strokes for the nearer grass and trees. A couple of faint ripples are enough to suggest moving water.
Monstera Leaf
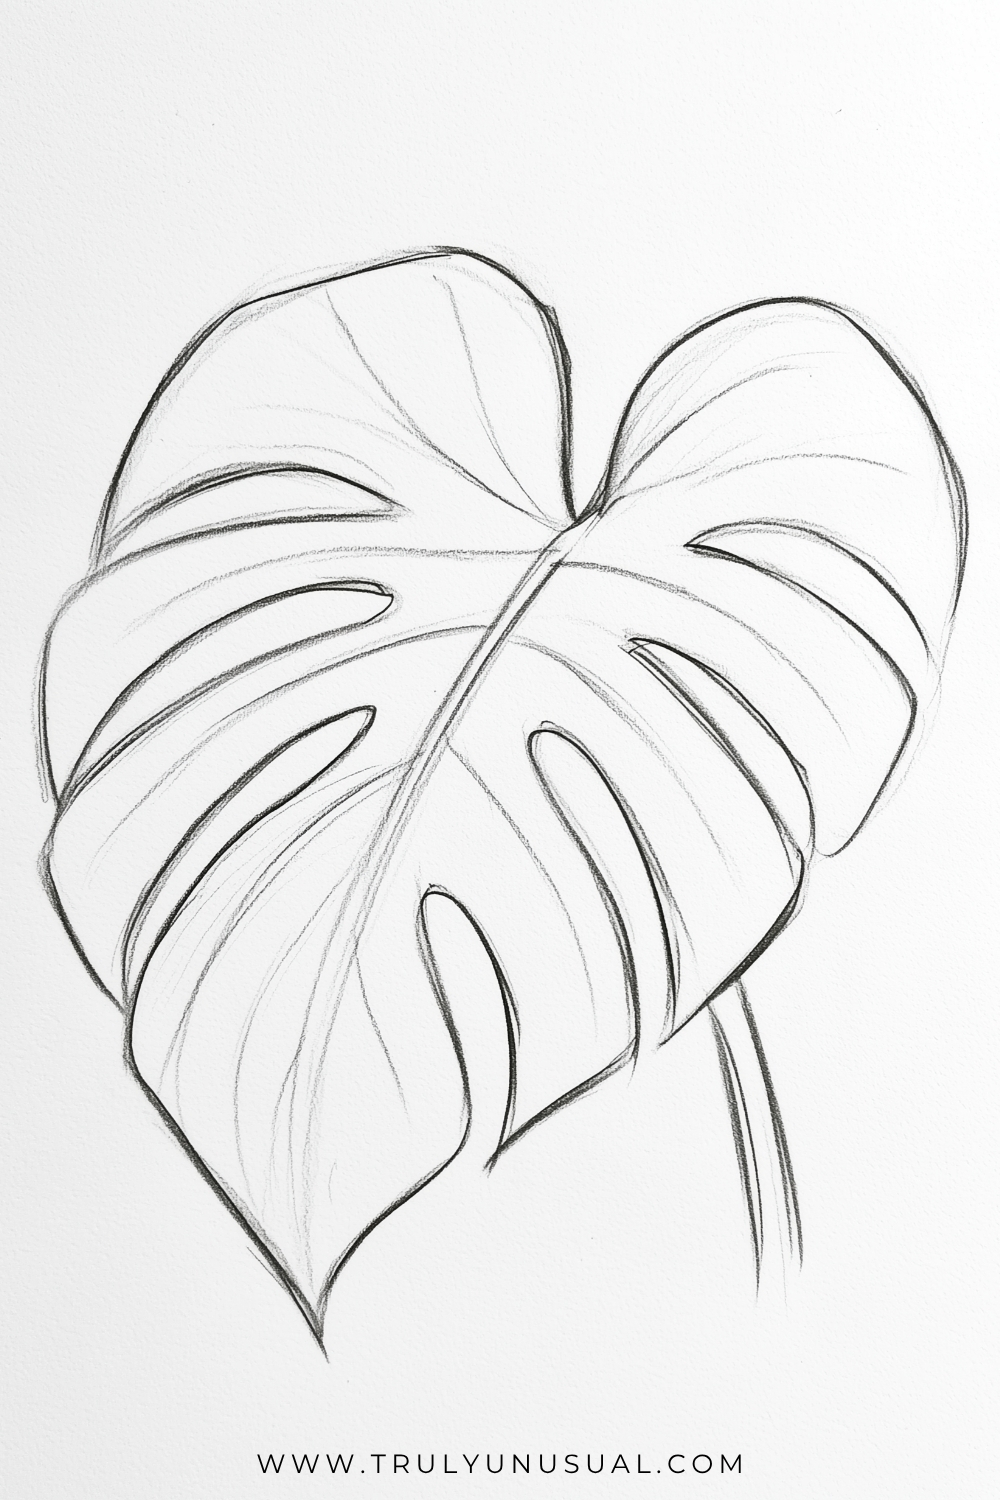
The deep cuts are what make this big heart-shaped leaf so recognizable. Sketch the outer silhouette and the curved center vein before worrying about the gaps. Then draw long, narrow cuts coming in from the edges, stopping short of the vein.
Let the cuts vary in length and angle so the leaf feels less uniform. Erase the original outline where each cut opens to the edge. Finish with a few faint side veins and a stem that curves out from behind the leaf.
Coral Reef With A Starfish And A Shell
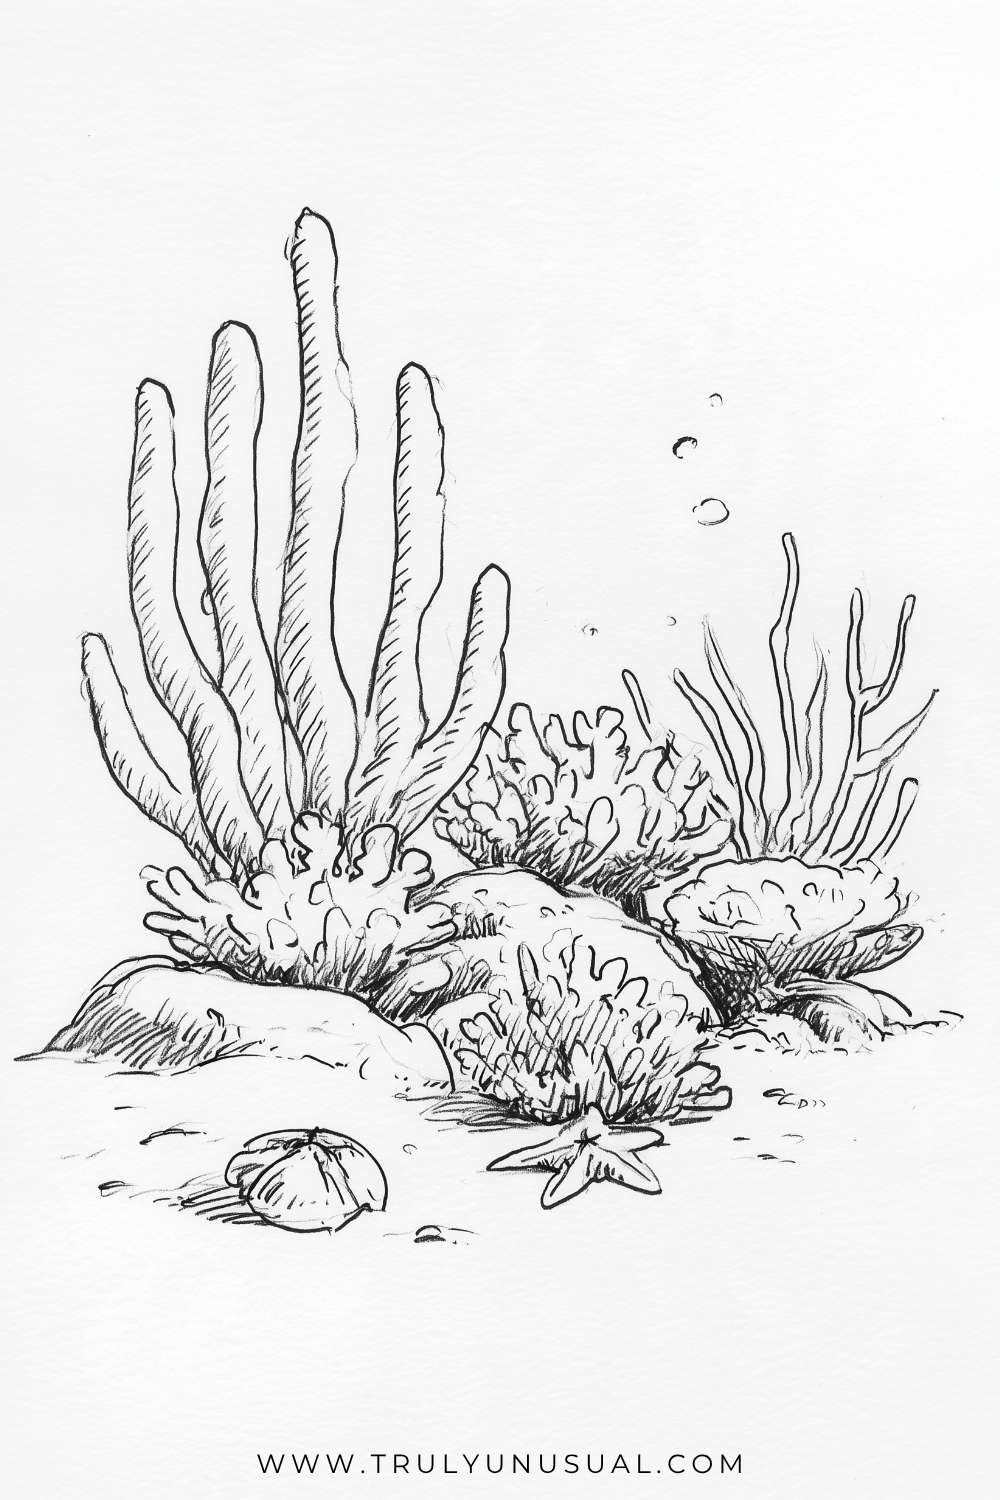
There are several shapes in this reef, but you can sketch them one group at a time. Put a few rounded rocks on the seabed and draw tall, finger-like coral rising behind them. Add smaller clusters with rounded lobes to fill the spaces around the rocks.
Place the starfish and shell in the foreground, with a few bubbles above the coral. Leave open sand around those little shapes so you can see them clearly. Put the darkest shading under the rocks and at the base of the coral to tie the scene together.
You don’t have to be a great artist to capture the essence of nature in a sketch. A few faint lines can make a forest look misty, and a handful of dark strokes can make a robin’s feathers look soft. Sometimes the best way to get new ideas is to revisit a subject you’ve already drawn. Look at a leaf from the side or sketch a tree from underneath its branches. A small change in angle can give you a unique perspective on something familiar.
Next time you’re looking for easy drawing ideas, think about the natural environments you spend time in. A garden, a park, or even the patch of grass by your front door might have something worth sketching. Pick whatever catches your eye and see what you can do with a few minutes and a pencil.
Check out my other easy step-by-step drawing tutorials for beginners: How to draw a pickup truck | How to draw sushi | How to draw a pleated skirt | How to draw a trash can | How to draw a beanie hat | How to draw a swan | How to draw a swordfish | How to draw a bench | How to draw a cute cat | How to draw a coyote.
And here are some easy drawing ideas: Cute and easy Halloween drawing ideas | Cute animal drawing ideas | Cute and easy Christmas drawing ideas | Easy love drawing ideas | Cute drawing ideas.
Happy Drawing!
Magdalena
If you enjoyed this post featuring easy nature drawing ideas, pin it on Pinterest to come back to it whenever you want and help it reach more readers!