• Home
  • DRAWING IDEAS
  • About
  • Privacy Policy And Disclaimer

trulyunusual.com

Lifestyle, Travel & Business Ideas That Stand Out

October 19, 2026

How To Draw A Pickup Truck: Easy Step-By-Step Tutorial For Beginners

Want to learn how to draw a pickup truck but aren’t sure where to start? This easy step-by-step tutorial takes you from a simple rectangle to a finished truck, with clear pictures to follow along the way. You’ll build the body, add the cab and wheels, then finish with smaller details and color.

I’ve kept the drawing simple so you can give it a go even if you’re a beginner. Grab a pencil and an eraser, leave yourself room to make a few adjustments, and let’s start drawing.

How To Draw A Pickup Truck: Easy Step-By-Step Tutorial For Beginners

Start with a pencil, an eraser, and a sheet of paper. Colored pencils, crayons, or markers will work for the final step. You can also use watercolor paint if you draw on paper thick enough to handle it.

This pickup truck starts with a few basic shapes, so you don’t need to get every detail right straight away. Use light lines at first so you can easily adjust the proportions and erase any guides later.
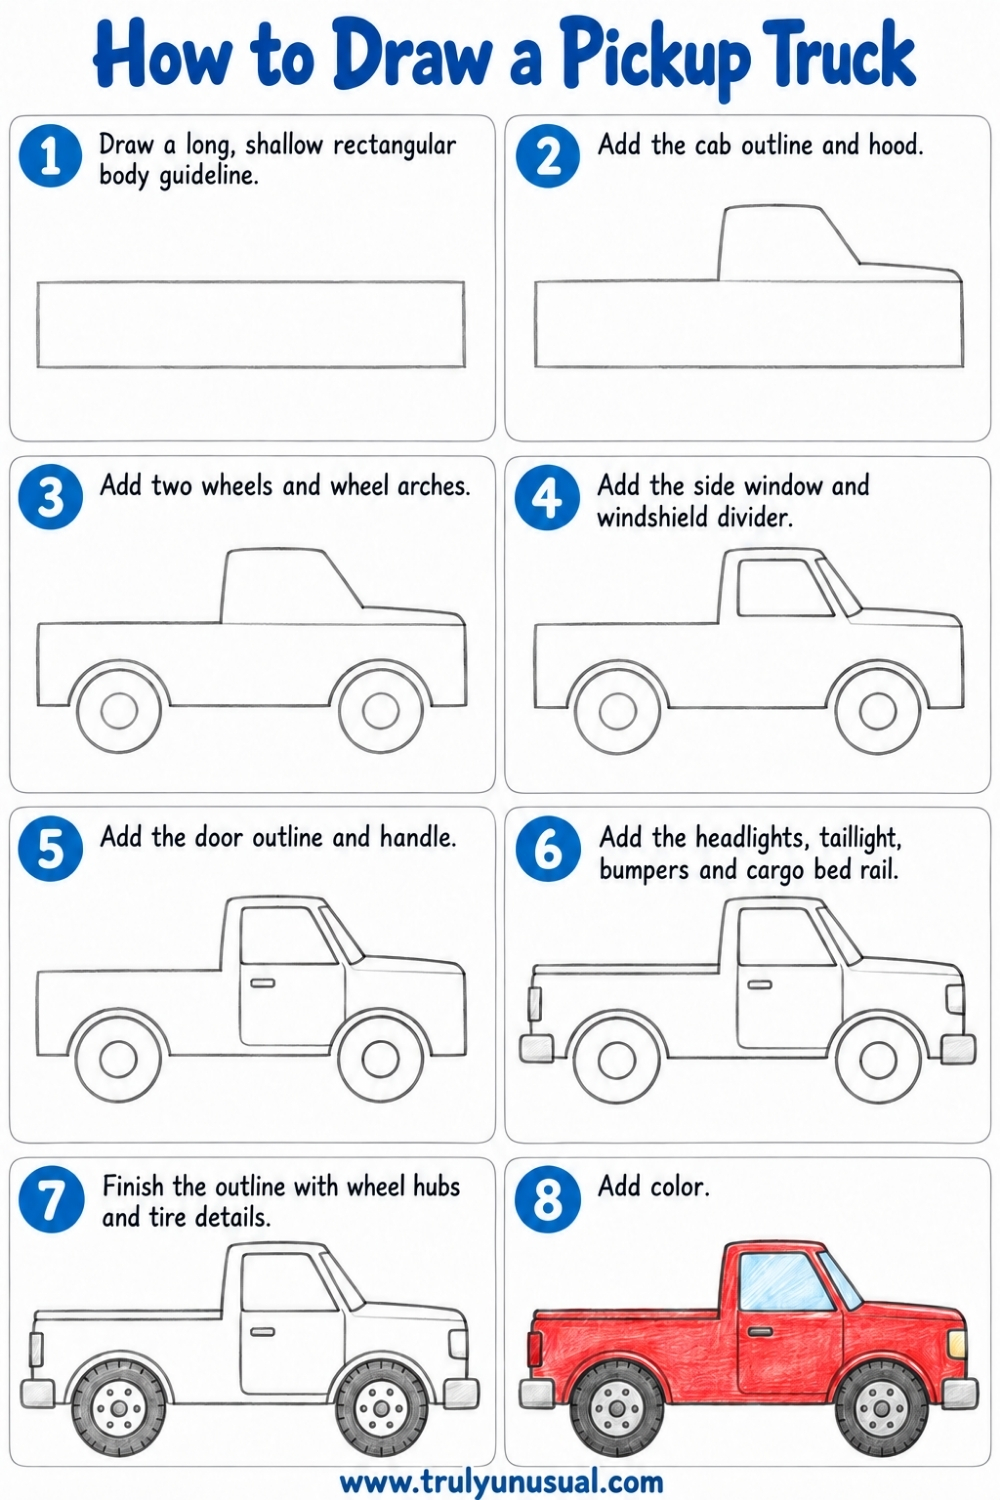
Eight-step pickup truck drawing tutorial showing how to build the body, cab, wheels, windows, and details, finishing with a red truck with blue windows.

Step 1: Draw a Long Rectangle

Draw a long horizontal line for the top of the truck’s body. Add another line underneath it, then join the ends with two short vertical lines to make a shallow rectangle.

Leave plenty of space above the rectangle for the cab and below it for the wheels. Keep your pencil pressure gentle, as part of this outline will become a construction line that you erase later. If drawing straight lines feels tricky, use a ruler or make several short strokes instead of one long stroke.

Step 2: Add the Cab and Hood

Above the middle-right section of the rectangle, draw a short line upward for the back of the cab. Continue across for the roof, then slope down toward the right to form the windshield. From there, draw the hood toward the front of the truck.

Keep the roof fairly flat and gently round the corners. The long section behind the cab will become the truck bed, so leave enough room on the left for an open cargo area. Erase the original horizontal guide where it crosses through the cab.

Step 3: Draw the Wheels and Wheel Arches

Add two circles along the lower edge of the body, with one near each end. The front tire sits below the hood on the right, while the rear tire sits beneath the bed on the left. Try to make both wheels the same size, with their bottoms level.

Draw a curved wheel arch just above each tire, leaving a small gap between the tire and the body. Erase the body lines that run through the wheels, then add a smaller circle inside each wheel for the hub. If the truck looks tilted, check that both wheel centers sit at roughly the same height.

Step 4: Add the Window Details

Inside the cab, draw a window that follows the shape of the roof and sloping front edge. Leave a narrow border around it to show the frame. The window should be wider at the bottom, with softly rounded corners.

Add a narrow angled section beside it, as shown in the image, to suggest the windshield. Keep this detail simple so it doesn’t crowd the cab. Rather than drawing tall ovals, aim for a broad window shape that fits comfortably inside the roof outline.

Step 5: Draw the Door and Handle

Extend a line down from the back of the window to create the rear edge of the door. Curve it around at the bottom, then bring the front edge up toward the windshield. Keep the bottom of the door slightly above the bottom of the truck’s body.

Add a small horizontal handle just below the window. Check that this part of the truck leaves enough space for the front wheel arch. If you’d like to include side mirrors, add one small rounded shape beside the front of the window; the mirror on the far side would usually be hidden from this angle.

Step 6: Add the Lights, Bumpers, and Bed Rail

Draw a small headlight at the front on the right and a narrow taillight at the back on the left. Add a rounded rectangular front bumper, then draw the rear bumper at the opposite end. Keep both bumpers simple and at a similar height.

Along the top of the truck bed, add a second line just below the existing edge. These parallel lines create a narrow rail and help define the bed. Because this drawing shows the truck from the side, you don’t need a bold grille across the front; a small hint at the nose is enough if you want that extra detail.

Step 7: Finish the Outline and Wheels

Check the overall shape before darkening your drawing. Make sure the wheels are similar in size, the cab connects neatly to the body, and the door doesn’t run into either wheel arch. Erase any leftover guides or overlapping marks.

Add small circles around each wheel hub to suggest the lug nuts. Draw short marks around the tires for a little tread detail, spacing them loosely rather than trying to make them perfect. Once you’re happy with the drawing, go over the main outlines with a darker pencil or a fine black pen.

Step 8: Add Color

Color the body red and the windows pale blue to match the finished truck in the image. Use dark gray for the tires, lighter gray for the wheel hubs and bumpers, and yellow for the front light. You can also choose a different body color to make the truck your own.

With colored pencils, build up the color in thin layers and let a little paper show through for that hand-drawn look. Add slightly darker shading beneath the bed rail, around the wheel arches, and along the lower body. Keep the window color light, leaving a few pale streaks to suggest reflections.

Make Your Pickup Truck Your Own

Now you know how to draw a pickup truck; try changing a few details to give your next drawing a different look. Choose a new paint color, add a stripe along the door, or fill the truck bed with pumpkins, Christmas trees, presents, or camping gear. You could even draw a simple road beneath the wheels.

Don’t worry if your first attempt looks a little uneven. Drawing the same truck again is a useful way to practice the shapes, and you may find the second one comes together more easily. Keep the version you’ve finished so you can see how your drawings change with practice.

Magdalena

Other drawing ideas and guides: Cute and easy Halloween drawing ideas | Cute animal drawing ideas | How to draw sushi.

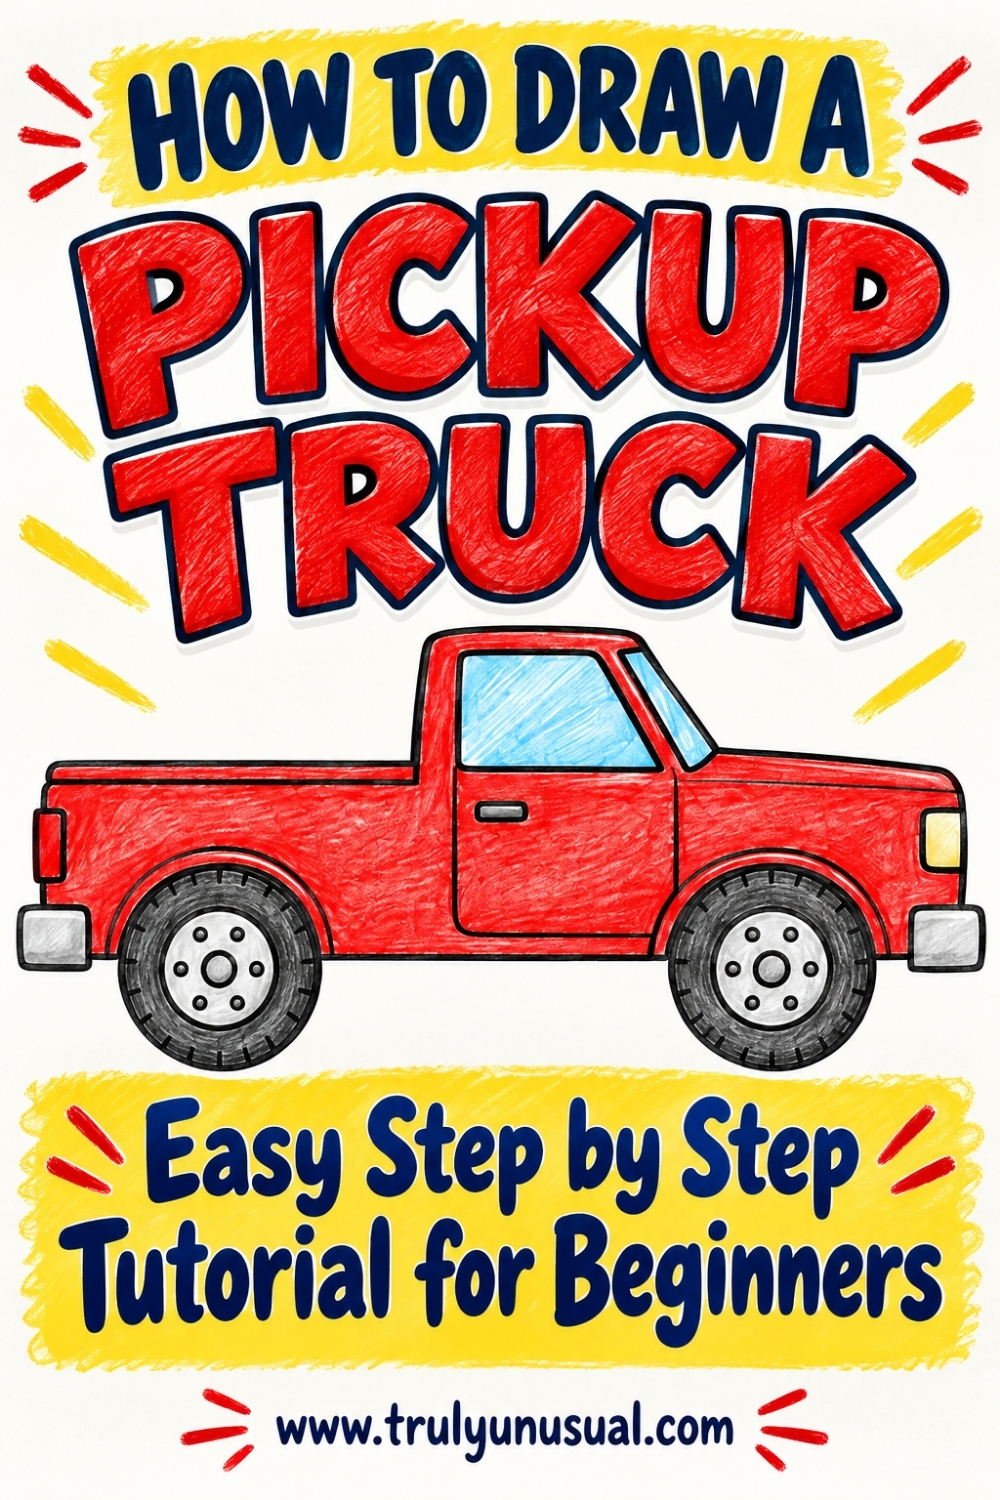
If you enjoyed this post featuring an easy pickup truck drawing tutorial for beginners, pin it on Pinterest to come back to it whenever you want and help it reach more readers!

Red pickup truck drawn in colored pencil beneath bold red and blue text reading “How to Draw a Pickup Truck,” with “Easy Step by Step Tutorial for Beginners” on a yellow background.

By: Magdalena · In: DRAWING IDEAS

LET’S BE FRIENDS!

You got this!

Copyright © 2026 trulyunusual.com · Theme by 17th Avenue