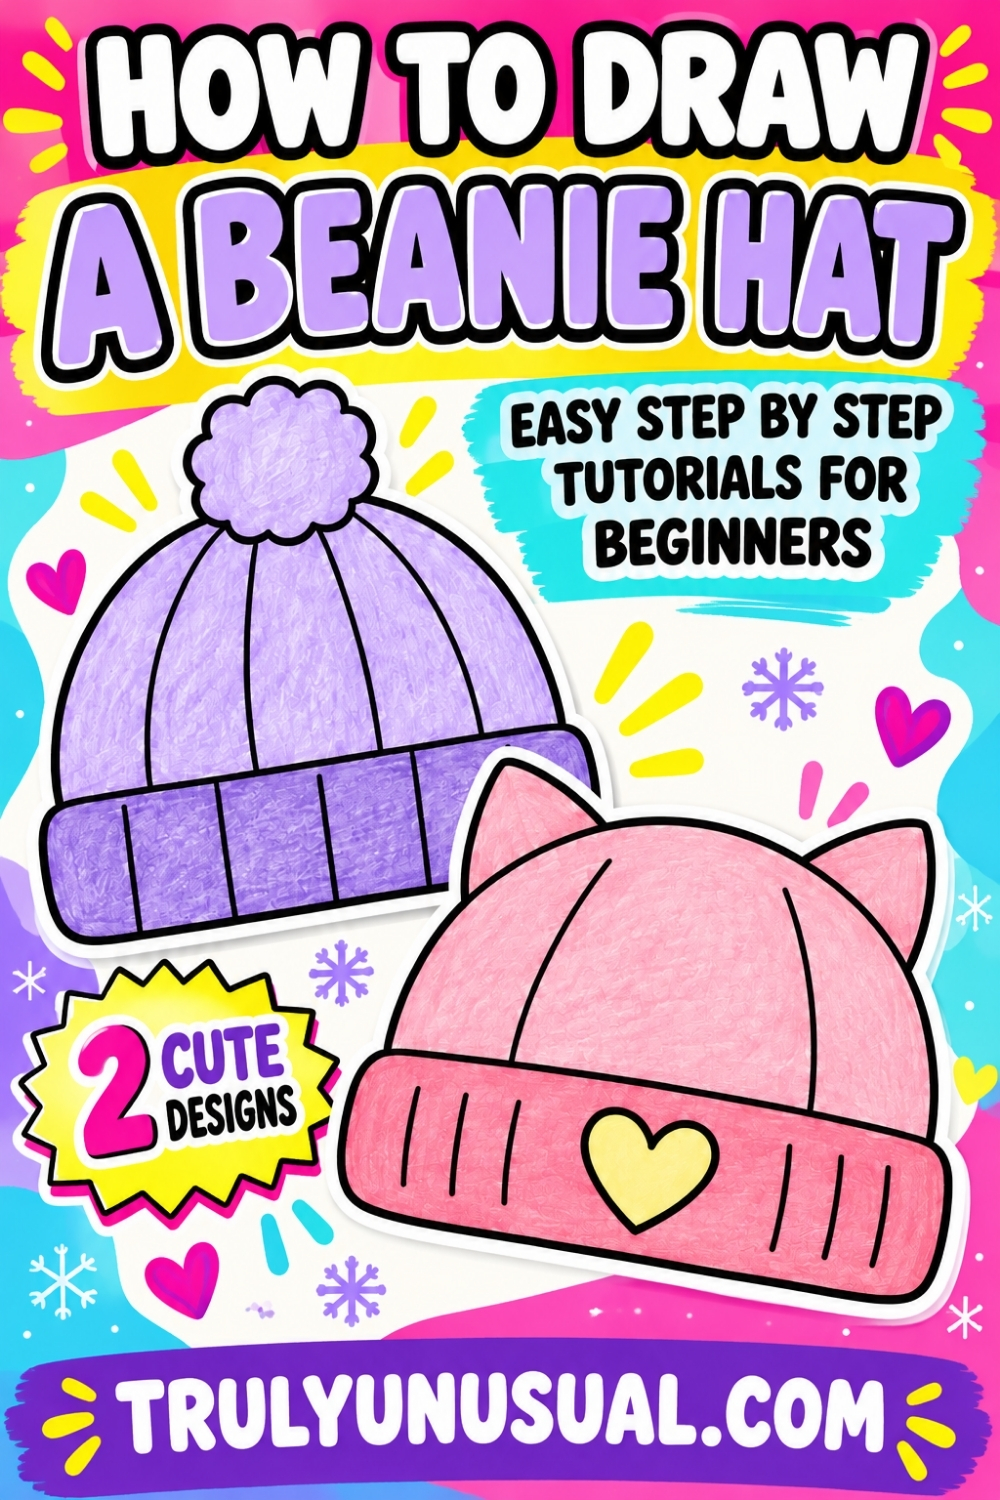
If you want to know how to draw a beanie hat, you’re in the right place!
A beanie is a cozy winter hat with a simple design that makes it fun to draw. Unlike a baseball cap, it has a soft, rounded shape, so you can practice smooth curves without worrying about sharp angles. Grab a pencil and a sheet of paper, and let’s turn a few light lines into a beanie sketch.
This step-by-step guide is suitable for all skill levels, whether you’re building your drawing skills or just looking for a relaxing activity. We’ll start with a horizontal line to help place the brim of the hat, then work our way up to the rounded top. You can use drawing paper or a sketchbook – whatever you have handy.
Let’s jump into these easy step-by-step tutorials that will teach you, in simple steps, how to draw two different hats!
How To Draw A Beanie Hat: Easy Step-By-Step Tutorial For Beginners
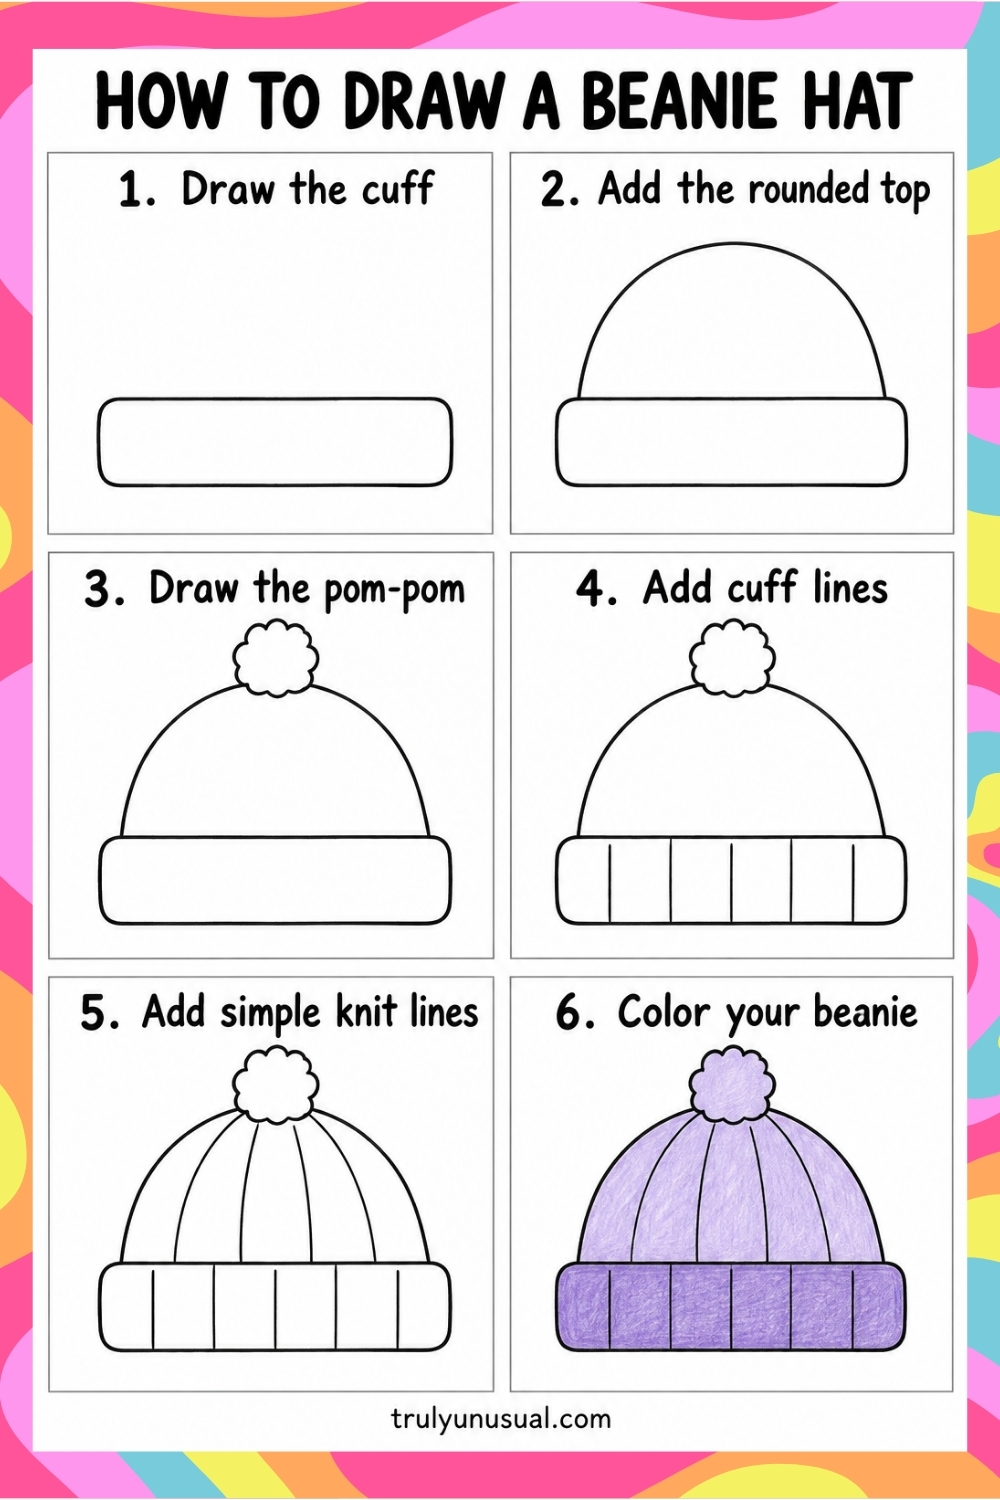
STEP 1: Draw the Cuff
Start with a wide rectangle near the bottom of your drawing space. Round off all four corners so the edges look soft. This is the folded cuff – the thick band that goes around the bottom of the beanie.
Keep the rectangle much wider than it is tall, and leave plenty of room above it for the hat and pom-pom. Draw lightly at first so you can adjust the shape if one side looks higher than the other. You can use a ruler to help with the long edges, but drawing them freehand is fine too.
STEP 2: Add the Rounded Top
Draw a large arch above the cuff. Start on the top edge of the band, a little way in from the left corner. Curve upward, over the middle, and back down to meet the band just inside the right corner.
Aim for a rounded dome, like an upside-down bowl. The cuff should stick out slightly on both sides. If you find the arch tricky, lightly mark its highest point above the center of the cuff, then draw each side toward that point. Keep the cuff’s top line in place; it shows where the fabric folds over.
STEP 3: Draw the Pom Pom
Add a small, fluffy pom-pom at the very top of the hat. Make its outline from a series of little rounded bumps, working your way around as though you’re drawing a tiny cloud.
Keep the overall shape roughly circular, but don’t worry about making every bump the same size. Place it over the center of the dome so it looks attached to the hat. Gently erase any part of the dome’s outline that shows through the pom-pom. There’s no need to draw individual strands of yarn – the bumpy edge gives it enough texture.
If you want to draw a beanie without the pom-pom, you could just skip this step and draw the rest of the beanie by following steps 4, 5 and 6.
STEP 4: Add Cuff Lines
Draw five short vertical lines across the folded cuff, spacing them fairly evenly. These lines suggest the raised ribs in the knitted fabric.
Start with the middle line, then add two on either side. This makes it easier to spread them out without squeezing the last few together. Keep every line inside the band, running down toward its lower edge. They don’t have to be perfectly straight or identical; a little variation suits a soft knitted hat.
STEP 5: Add Simple Knit Lines
Draw four longer lines on the main part of the beanie. Begin just beneath the pom-pom and bring them down to the top of the cuff.
The two middle lines should be almost straight, while the outer two curve outward slightly to follow the rounded sides of the hat. Spread them out as they approach the cuff, keeping a gap between the outer lines and the hat’s outline. Stop at the band rather than drawing through it. A few lines are enough to suggest knitting without having to draw lots of tiny stitches.
All that’s left in the next step is to add colors to your beanie.
STEP 6: Color Your Beanie
Check your outline and gently erase any stray pencil marks before adding color. In the example, the top and pom-pom are light purple, while the folded cuff is a darker purple.
Use light pressure with your colored pencils and build up the color gradually. Small, overlapping strokes will help you fill each section without leaving obvious gaps. Keep the black outlines and knit lines visible as you work.
You can copy the purple colors or choose your own combination. Try a blue hat with a navy cuff, or give the pom-pom a contrasting color. You don’t need any shading to finish this drawing – simple color is enough.
How To Draw A Beanie Hat: A Cute Cat Ear Design Easy Step-By Step Guide
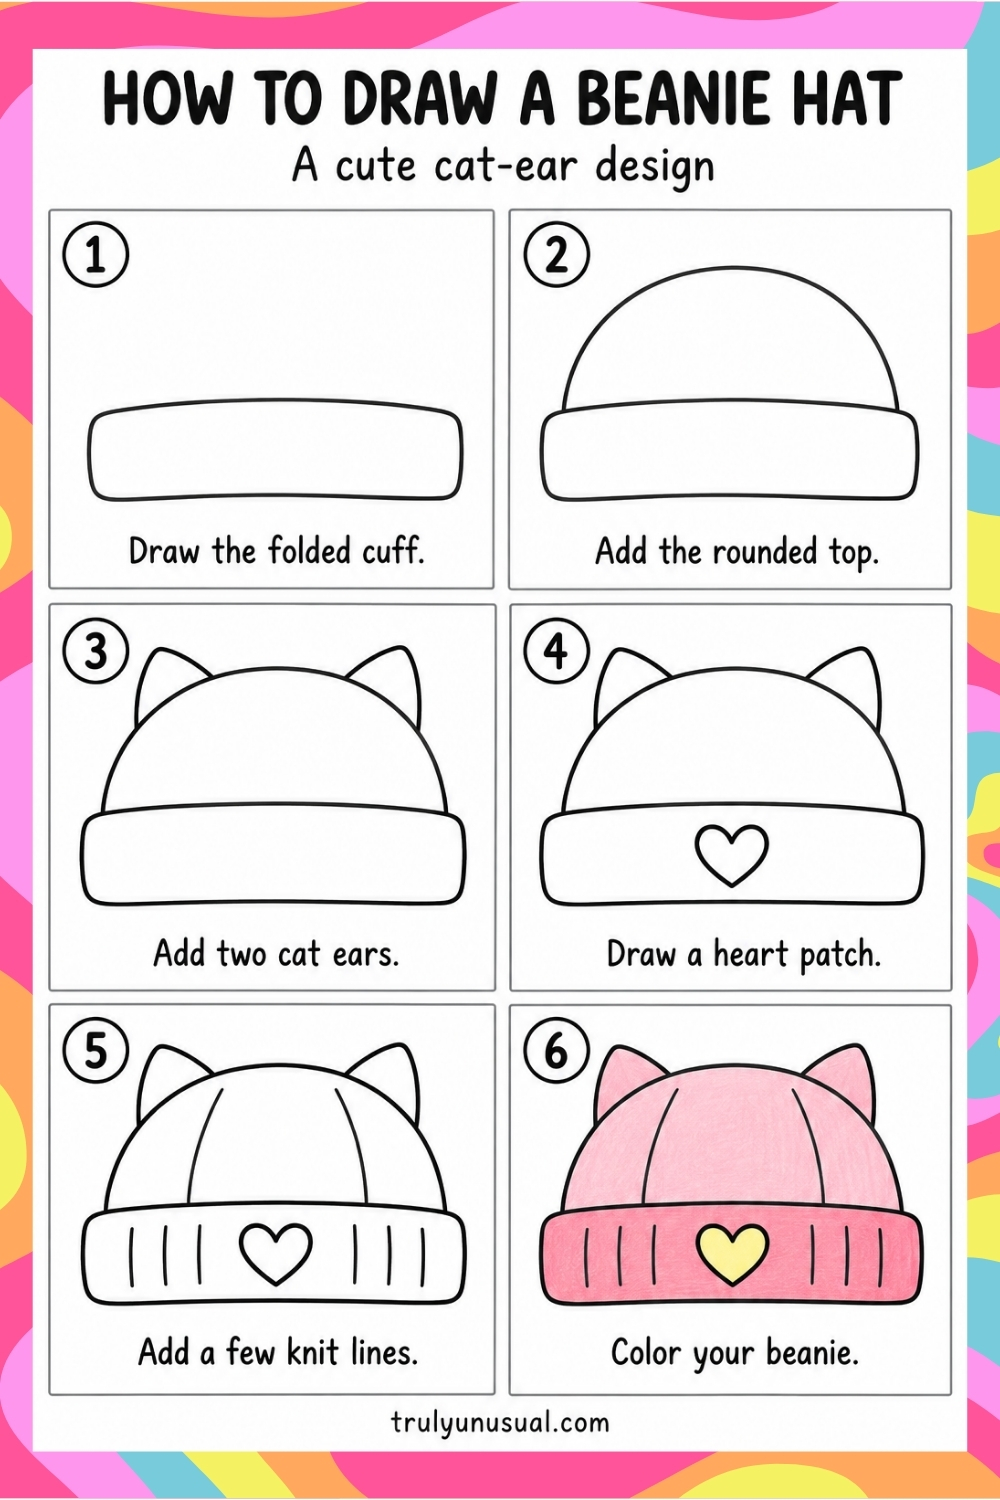
Step 1: Draw the Folded Cuff
Start near the bottom of your drawing space with a wide, narrow rectangle. Give it rounded corners and a slight curve along the top and bottom edges. This will be the folded cuff of your beanie.
Try to keep both ends about the same height so the band looks even. Draw lightly while you work out the shape, and leave enough space above it for the rounded top and cat ears. The cuff needs to be tall enough to fit a small heart in the middle later.
Step 2: Add the Rounded Top
Draw a large arch above the cuff, starting just inside its left edge and ending just inside its right edge. Think of an upside-down bowl resting on the band.
Keep the top rounded rather than pointed, with the highest part roughly above the center of the cuff. If drawing the whole arch in one go feels tricky, sketch a few light strokes first, then join them into a smooth curve. Leave the cuff’s top edge visible – it shows the fold across the front of the hat.
Step 3: Add Two Cat Ears
Draw a small triangular ear on each side of the rounded top. Let the tips lean outward slightly, and soften the points so the ears look like fabric rather than sharp corners.
Each ear should sit behind the dome, with its two sides meeting the existing curve. Keep that curved line in place across the bottom of each ear, just as it appears in the example. Aim for similar-sized ears, but don’t worry if they aren’t exact copies. It helps to lightly mark both tips before drawing the sides.
Step 4: Draw a Heart Patch
Add a small heart in the center of the folded cuff. Start with the little dip at the top, curve around one rounded side, and bring the line down to the bottom point. Repeat on the other side to close the shape.
Leave a little space above and below the heart so it fits comfortably inside the band. If it looks off-center, compare the empty space on either side before going over your lines. Keep the patch simple; the outline alone is enough for this drawing.
Step 5: Add a Few Knit Lines
Draw three short vertical lines on each side of the heart. Space them out across the cuff, leaving a small gap around the patch. These lines suggest the ribbed texture of knitted fabric.
Next, add two longer lines to the rounded top, one on the left and one on the right. Start below the ears and curve them gently outward as they come down to meet the cuff. Stop at the cuff’s top edge rather than continuing through it.
You don’t need lots of tiny stitches. These few lines give the hat some texture while keeping it easy to draw and color.
Step 6: Color Your Beanie
Gently erase any stray marks, then choose your colors. The example uses light pink for the top and ears, a stronger pink for the cuff, and pale yellow for the heart.
If you’re using colored pencils, start with light pressure and add another layer wherever you want a deeper color. Use short strokes near the heart and around the ear tips to help you stay inside the outlines. Keep the knit lines visible as you fill in each section.
You can also try different combinations, such as lavender with a pink heart or light blue with a yellow cuff. The little heart is a good place to use a contrasting color so it stands out.
Your beanie is ready for cold weather! Take a look at the entire hat and see whether you want to adjust its shape or add a few finishing touches. If any beanie hat step felt tricky, return to the previous step and give yourself another try.
Now you can make the beanie look more personal with stripes, a pom-pom, or your favorite amazing colors. Different types of hats serve different purposes, and changing the details is a fun way to give each drawing its own character. You could even share your drawing process on TikTok – make a short video showing how your hat took shape, from the first line to the final detail.
Check out my other easy step-by-step drawing tutorials for beginners: How to draw a pickup truck | How to draw sushi | How to draw a pleated skirt | How to draw a trash can | How to draw a swan | How to draw a swordfish | How to draw a bench | How to draw a cute cat | How to draw a coyote.
And here are some easy drawing ideas: Cute and easy Halloween drawing ideas | Cute animal drawing ideas | Cute and easy Christmas drawing ideas | Easy love drawing ideas | Cute drawing ideas | Nature drawing ideas.
Happy Drawing!
Magdalena
If you enjoyed this post featuring easy beanie drawing tutorials, pin it on Pinterest to come back to it whenever you want and help it reach more readers!