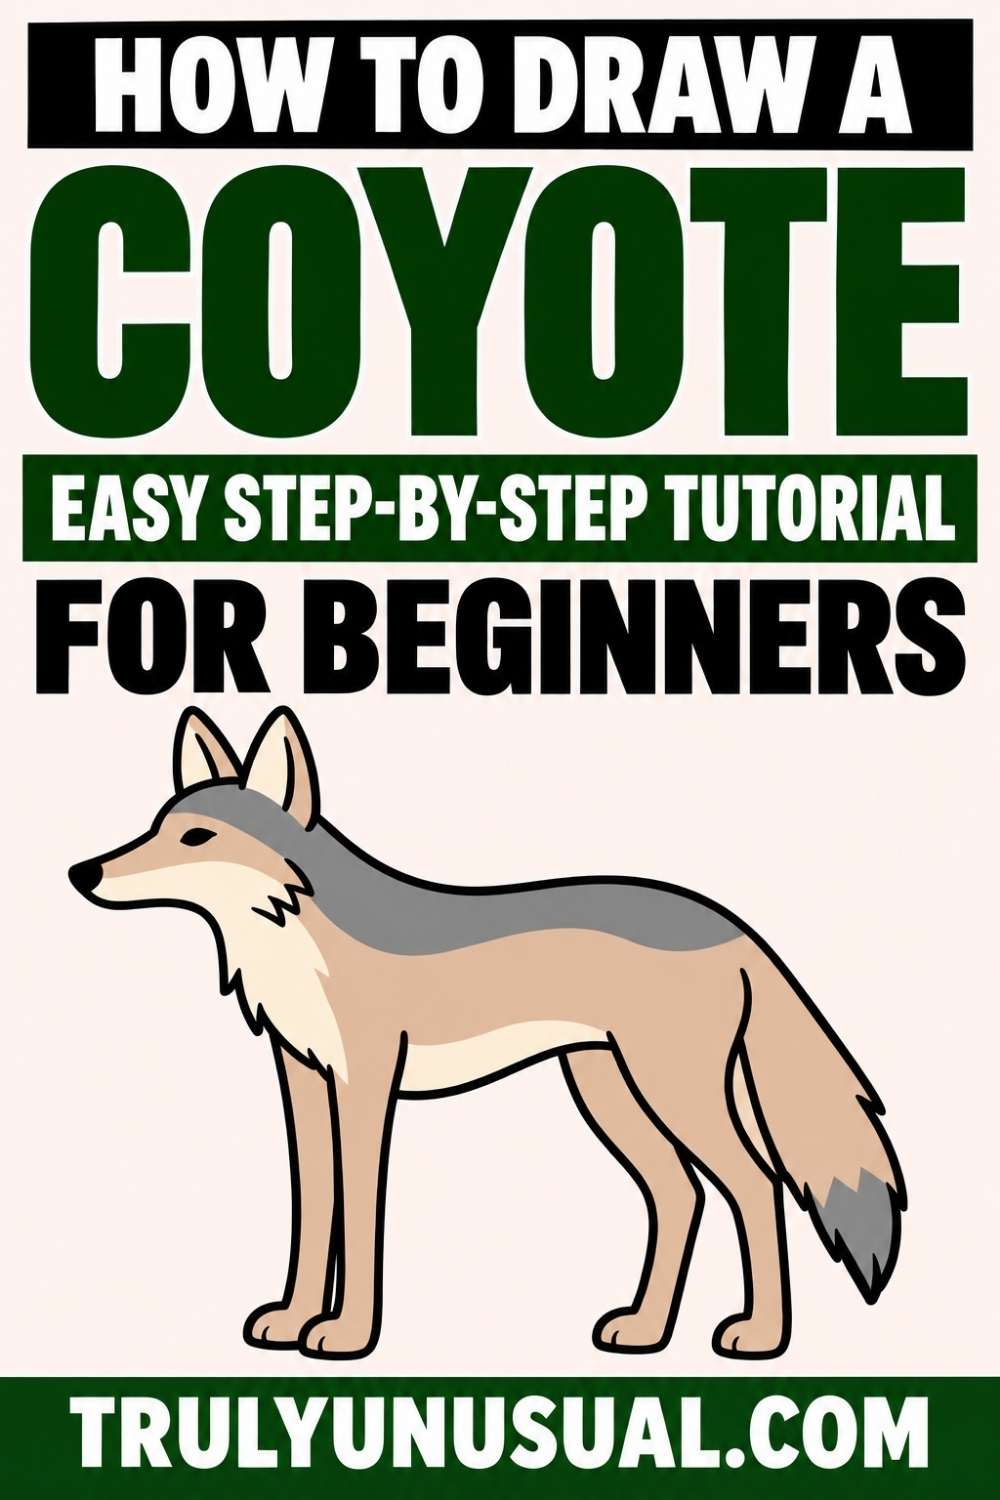
Want to draw a cute cartoon coyote? Start with three basic shapes. A smaller circle marks the head, and two ovals help you place the chest and hips. From there, you’ll join the shapes with a few light strokes and build the outline of the coyote in eight simple steps.
Coyotes live in many parts of North America, including Central America. Their pointy ears, slender legs, and low, bushy tails are the features I wanted to keep in this drawing. Use the finished coyote as a reference image if you’re unsure how long to make the legs or where the tail should end. The red marks in each panel show you which lines to add as you go.
How To Draw A Coyote: Easy Step-By-Step Guide
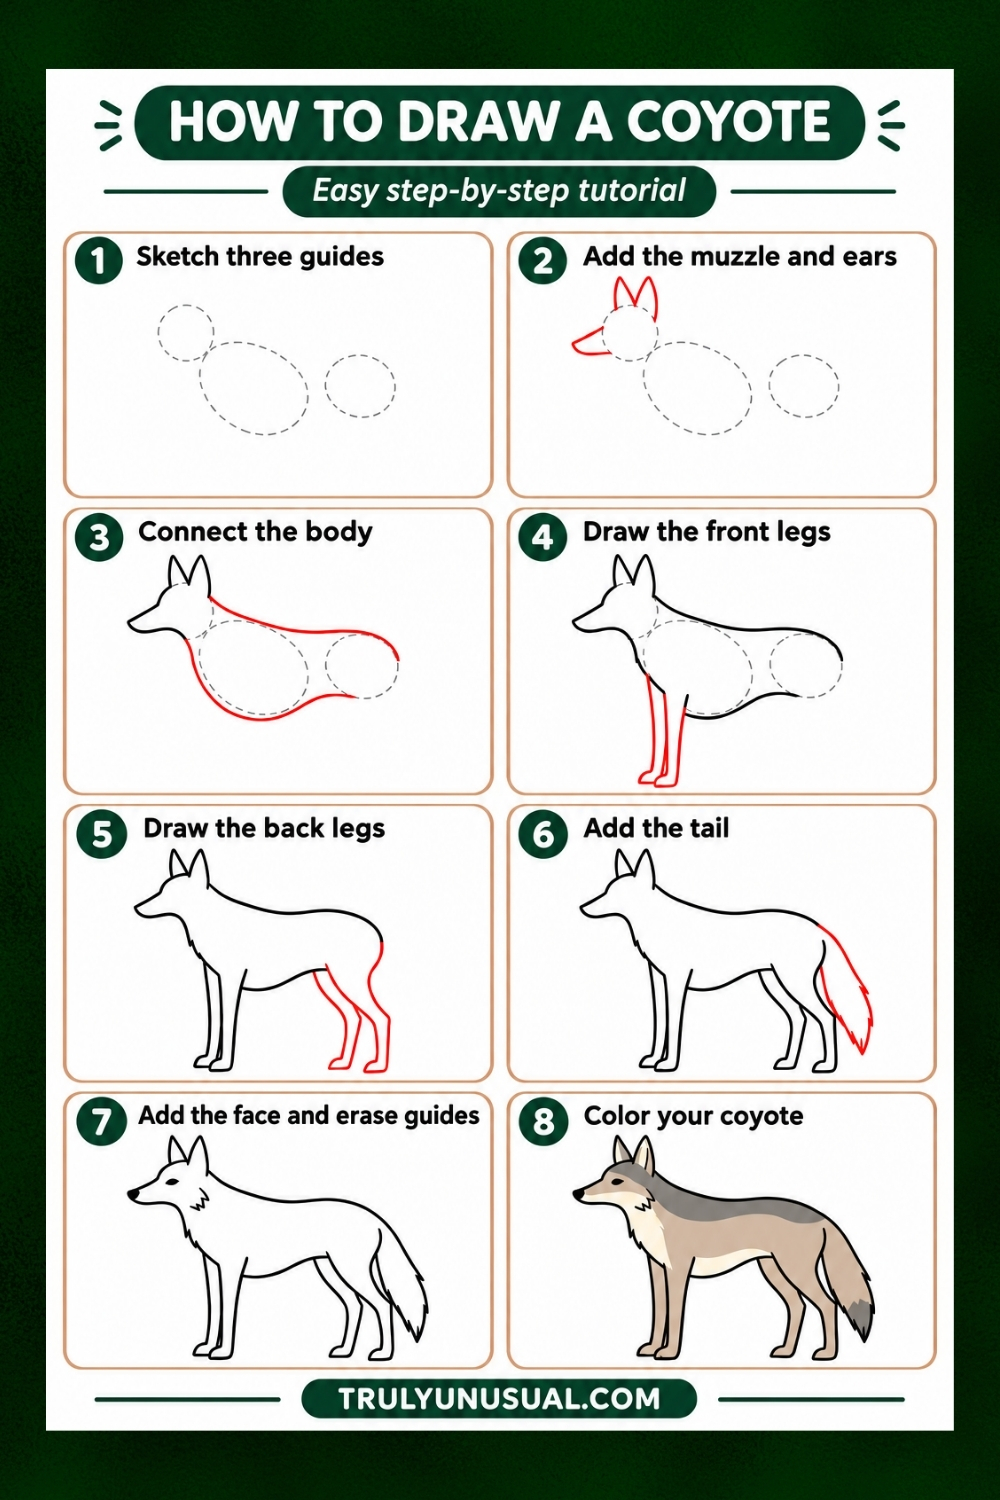
Step 1: Sketch three guides
Lightly draw a small circle toward the upper left of your page for the head. Just below it and a little to the right, draw a larger oval that tilts down to the right. This is the chest. Leave a small gap, then draw a smaller oval to the right for the hips. Keep the hip oval a little higher than the bottom of the chest oval so there’s room for the belly to curve upward later.
Use a light touch so the guides will be easy to erase. Leave plenty of space below them for the coyote’s long legs.
Step 2: Add the muzzle and ears
Starting about halfway down the left side of the head circle, draw a line that slopes out to the left. Round it gently at the tip, then bring a second line back toward the lower part of the circle to form the jaw. Keep the muzzle long and narrow, with the two lines closer together at the nose.
Add two tall, pointed ears on top of the circle. Draw the ear on the right with a slightly longer outer edge so it looks closer to you. Join the base of the left ear to the top of the muzzle with a short forehead curve.
Step 3: Connect the body
Start behind the right ear and draw a line that slopes down into the shoulders. Let it flatten out across the back, then round it gently over the hip oval. Use one smooth line so the neck and back flow into each other.
For the underside, start beneath the jaw and curve down to make the chest. Follow the lower edge of the large oval, then sweep the line upward toward the hips. That little rise gives the coyote its slim waist. Leave the underside of the rump open for the back legs.
Step 4: Draw the front legs
Draw the nearer front leg under the shoulder, where the chest meets the belly. Bring two long, almost straight lines down toward the ground, narrowing them slightly near the ankle. At the bottom, curve the front edge out to the left to make a small paw, then draw a short, flat line underneath it.
Add the second front leg just to the left, partly hidden behind the first. The paws should land at roughly the same height. If you’re having trouble lining them up, draw a faint horizontal line where you want the paws to touch the ground.
Step 5: Draw the back legs
Start the nearer back leg where the belly curves up toward the hips. Draw the upper part of the leg slanting down and to the right. Give it a clear bend, then bring the lower part down and slightly forward before adding a small paw that points left. The bend can be subtle and still make the leg look different from the straighter front legs.
Draw the other back leg a little to the left, showing only the parts you can see behind the nearer leg. Check that all four paws sit on the same ground line before you darken the outlines.
Step 6: Add the tail
Begin at the top of the rump and sweep a line down behind the back legs. Draw a second curve from the back of the thigh and bring the two lines together at a tapered tip. Let the tail hang low, with its tip ending a little above the paws.
Keep the tail wider through the middle and add two or three small points near the end to suggest tufts of fur. Where the tail passes behind a leg, stop the tail line at the leg’s outline and pick it up on the other side.
Step 7: Add the face and erase the guides
Fill in a small dark nose at the tip of the muzzle. Add a small almond-shaped eye a little below and in front of the ears. Keep it small so the muzzle still stands out. A couple of short zigzags at the cheek and chest are enough to suggest fur.
Go over the outline you want to keep, then erase any circles, ovals, or ground guides still showing. If you spot a gap where the muzzle joins the head or a leg joins the body, connect it with a short pencil stroke.
Step 8: Color your coyote
Use a light tan or sandy brown for the body and legs. Add a strip of gray from the top of the head down the back, following the curve of the shoulders and hips. Leave the lower muzzle, throat, chest, and belly cream or a very light beige.
Finish with a dark gray or charcoal tip on the tail. You can add a lighter shade inside the ears, too. If you’re sticking with pencil, leave the chest and belly mostly white, shade the body lightly, and press a little harder along the back and tail tip.
Once you’ve erased the guide lines, take one last look at your coyote sketch. A short curved line inside each ear can give it a little depth, and a few pencil marks on the cheek or chest can suggest fur texture. The facial features can stay simple. A small eye and a dark nose are enough to bring the face to life.
If you feel like drawing another one, try a coyote sitting down or looking back over its shoulder. Playing with different poses is a good way to see how the same shapes fit together from another angle. You can leave the page plain or add a few background elements, like tufts of grass, a rock, or a low hill in the distance.
Check out my other easy step-by-step tutorials for beginners: How to draw a pickup truck | How to draw sushi | How to draw a pleated skirt | How to draw a trash can | How to draw a beanie hat | How to draw a swan | How to draw a swordfish | How to draw a bench | How to draw a cute cat.
And here are some easy drawing ideas: Cute and easy Halloween drawing ideas | Cute animal drawing ideas | Cute and easy Christmas drawing ideas | Easy love drawing ideas | Cute drawing ideas | Nature drawing ideas.
Happy Drawing!
Magdalena
If you enjoyed this post featuring an easy coyote drawing tutorial, pin it on Pinterest to come back to it whenever you want and help it reach more readers!